Rough Country RC617 User Manual
Page 6
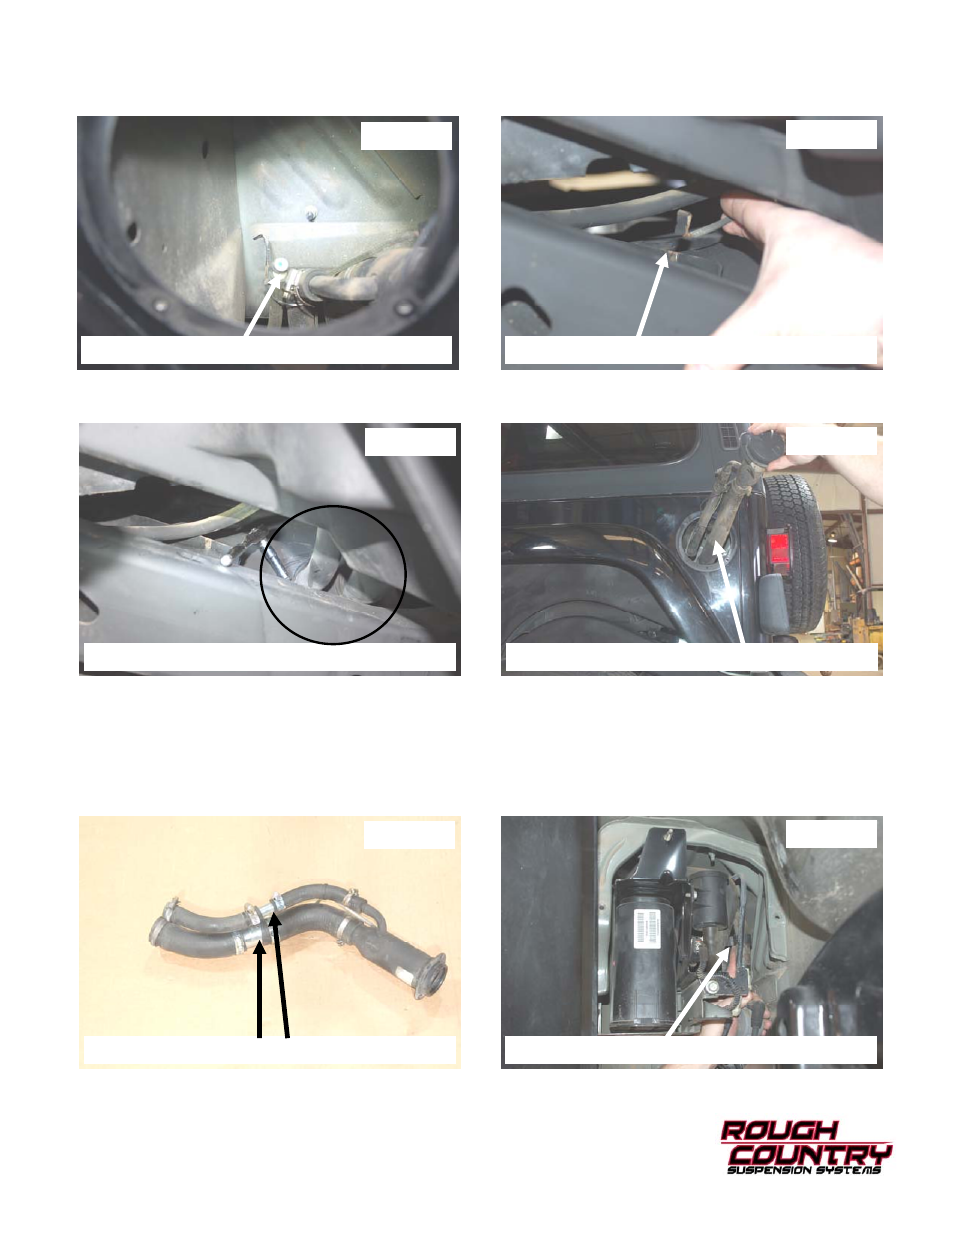
29. Remove zip tie from around axle vent tube and fuel filler vent hose. See Photo 25. Picture looking through the gas
filler housing.
30. In between body and frame on drivers side, near gas tank remove ground strap from frame. See Photo 26.
31. Using a 1/4 inch socket remove both clamps around fuel filler hoses at gas tank. See Photo 27.
32. Remove the filler hoses. See Photo 28.
33. With the fuel filler hoses out, cut the hoses in a straight spot and insert the 1-1/2” x 4” and 3/4” x 4” extensions into
filler hoses. Use the supplied clamps and tighten using a 8mm socket. See Photo 29.
34. Reinstall extended fuel filler hoses onto gas tank with the factory hardware. Tighten stock clamps with 1/4 socket.
35. Reinstall ground strap and zip tie axle vent tube back to fuel filler vent hose.
36. Reinstall fuel filler assembly to bezel and bezel back to the body.
37. On the EVAP canister, if located in the rear passenger side fender wheel, Slide the black clamp up to the hose
about 2 inches and reattach to body. Reinstall EVAP canister cover plate using 13mm. Install fender well if removed.
PHOTO 25
PHOTO 26
PHOTO 27
PHOTO 28
PHOTO 29
PHOTO 30
REMOVE THE ZIP TIE
REMOVE THE GROUND STRAP
REMOVE THE FUEL HOSES FROM FUEL TANK
REMOVE THE FUEL FILLER ASSEMBLY
CUT AND INSTALL EXTENSIONS AND CLAMP
PUSH COUPLER UP 2” AND REATTACH