Rough Country 234N2 User Manual
Page 7
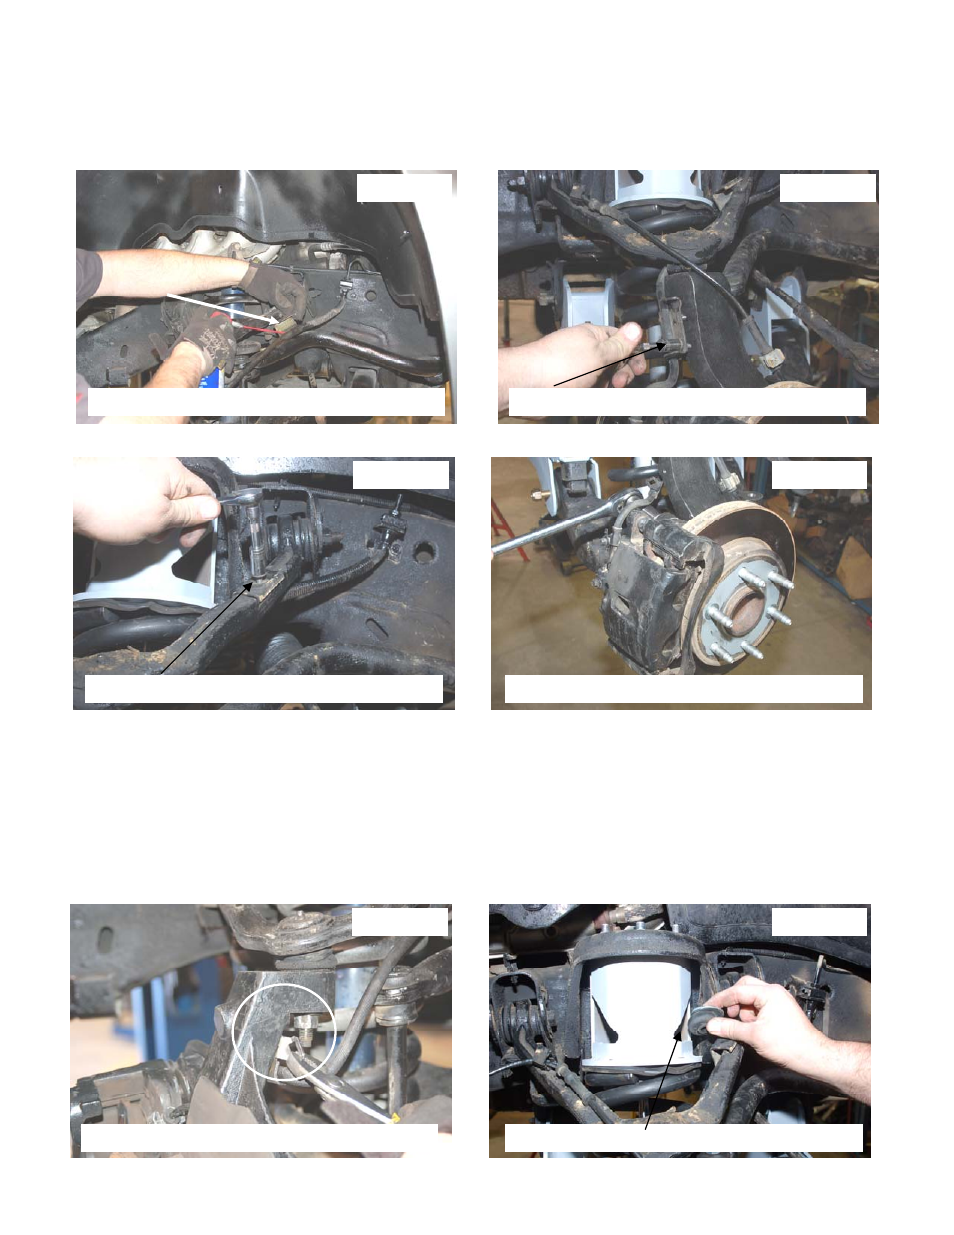
34. It may be necessary to reposition the brake line mounting bracket to allow the bracket to bolt up to the new mounting
hole on the knuckle. If needed spray the control arm bracket and knuckle bracket with WD40 and slide the brackets
to allow the brake line to install on the knuckle and upper control arm. Move the knuckle from full left turn and right
turn to make sure the brackets are positioned correctly and the brake line is not pulled. See Photo 31.
35. Move brackets as needed and install the brake line bracket bolt onto the hole on side of the new knuckle and on the
upper control arm with the stock hardware. See Photo 32 & 33. Tighten brake brackets using a 10mm wrench.
36. Reinstall the brake caliper and tighten using a 18mm socket to factory specs. See Photo 34.
37. Install the tie rod end on the new knuckle. Tighten using a 18mm wrench to factory specs and install the cotter pin.
38. Bend the brake line bracket as shown to install the ABS wire as shown in Photo 35. If needed spray the line with
WD40 and move the rubber mounts to install the wire on the arm and on the upper coil seat. Reinstall the ABS wire
in the clip on the upper coil seat. Be sure to check for adequate clearance and move as necessary.
39. Install the new shock absorbers with the factory hardware on the lower control arm and with the supplied bushings
on the upper stuff mount. See Photo 36.Tighten the upper stud until the bushings slightly bulge using a 9/16”
wrench.
40. Recheck all fasteners and install the wheels/tire. Repeat process for opposite side.
41. Install the tires and wheels and lower the vehicle to the ground.
42. Tighten the lower control arms and cross-member hardware using a 24mm socket and wrench.
PHOTO 35
BEND BRACKET TO REINSTALL ABS WIRE
PHOTO 34
PHOTO 31
SPRAY LINE
PHOTO 32
PHOTO 33
PHOTO 36
INSTALL THE BRACKET TO THE KNUCKLE
INSTALL THE LINE BRACKET TO ARM
INSTALL CALIPER AND TIGHTEN
INSTALL THE SHOCK HARDWARE