Rough Country 234N2 User Manual
Page 2
1. Set the emergency brake and chock rear tires to prevent rolling.
2. Jack up the front of the vehicle with a floor jack. Place jack stands on the frame rail directly behind the lower control
arm mounts. Lower the vehicle onto the jack stands.
3. Remove the tires\wheels.
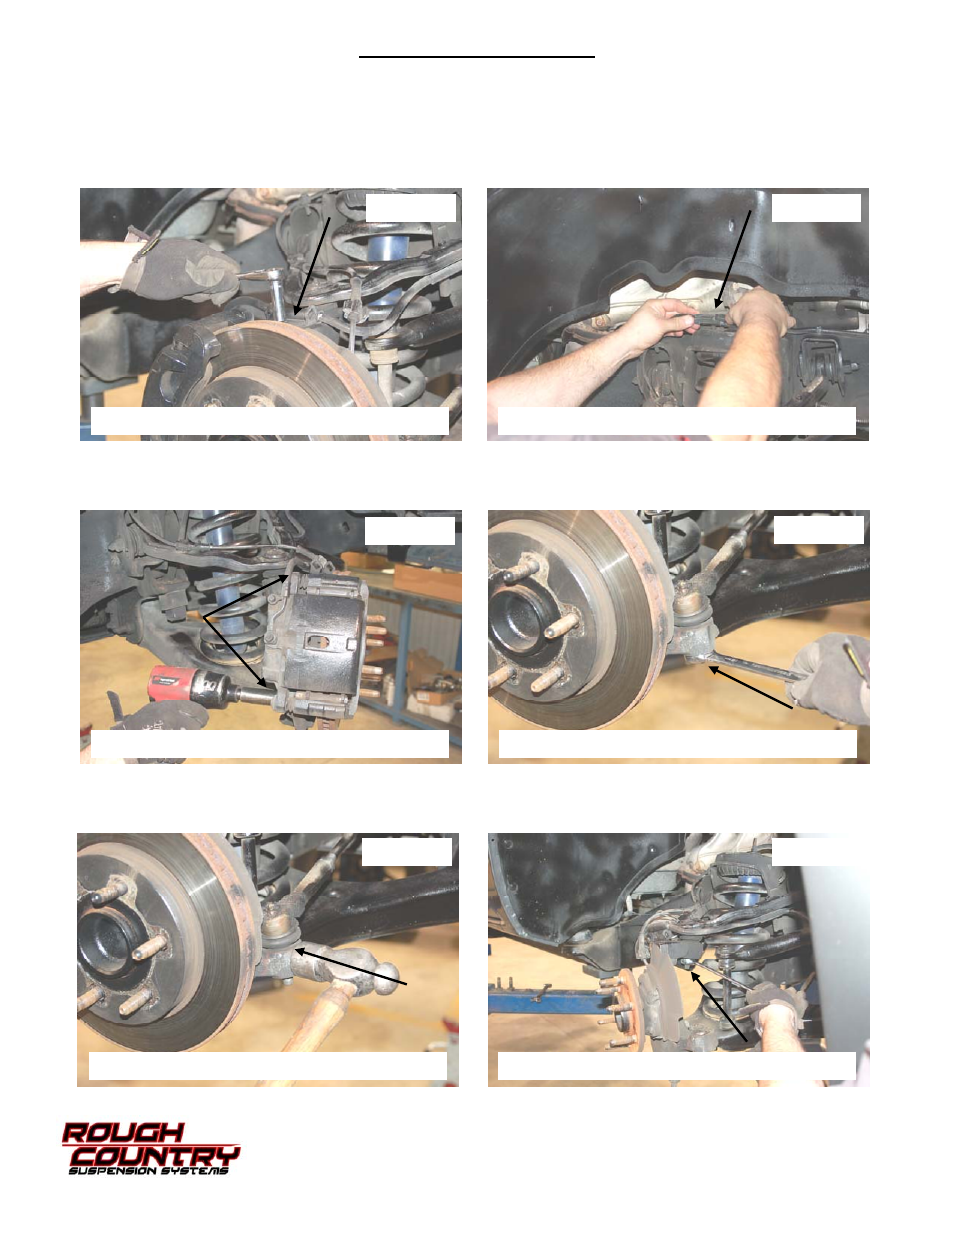
4. Remove the bolt on the top of the knuckle that secures the brake line to the knuckle using a 10mm wrench. See
Photo 1.
5. Remove the ABS wire from the mounts on the control arm and from the clip on the upper coil seat. See Photo 2.
6. Remove the brake caliper using a 18mm socket and secure out of the way. See Photo 3. Remove the brake rotor
and set aside.
7. Remove the tie rod end from the knuckle using a 18mm socket and secure out of the way. See Photo 4.
8. Loosen and remove the tie rod by striking the knuckle as shown to dislodge the tie rod. See Photo 5.
9. Place the floor jack directly underneath the lower control arm and loosen the upper ball-joint nut holding the upper
control arm onto the knuckle using a 18mm wrench. See Photo 6.
INSTALLATION INSTRUCTIONS
PHOTO 1
PHOTO 2
PHOTO 3
PHOTO 4
PHOTO 5
PHOTO 6
REMOVE BRAKE LINE FROM KNUCKLE
REMOVE ABS WIRE FROM FRAME
REMOVE THE BRAKE CALIPER
REMOVE THE TIE ROD FROM THE KNUCKLE
STRIKE TO DISLODGE TAPER
REMOVE THE UPPER BALL JOINT NUT