Rough Country 234N2 User Manual
Page 5
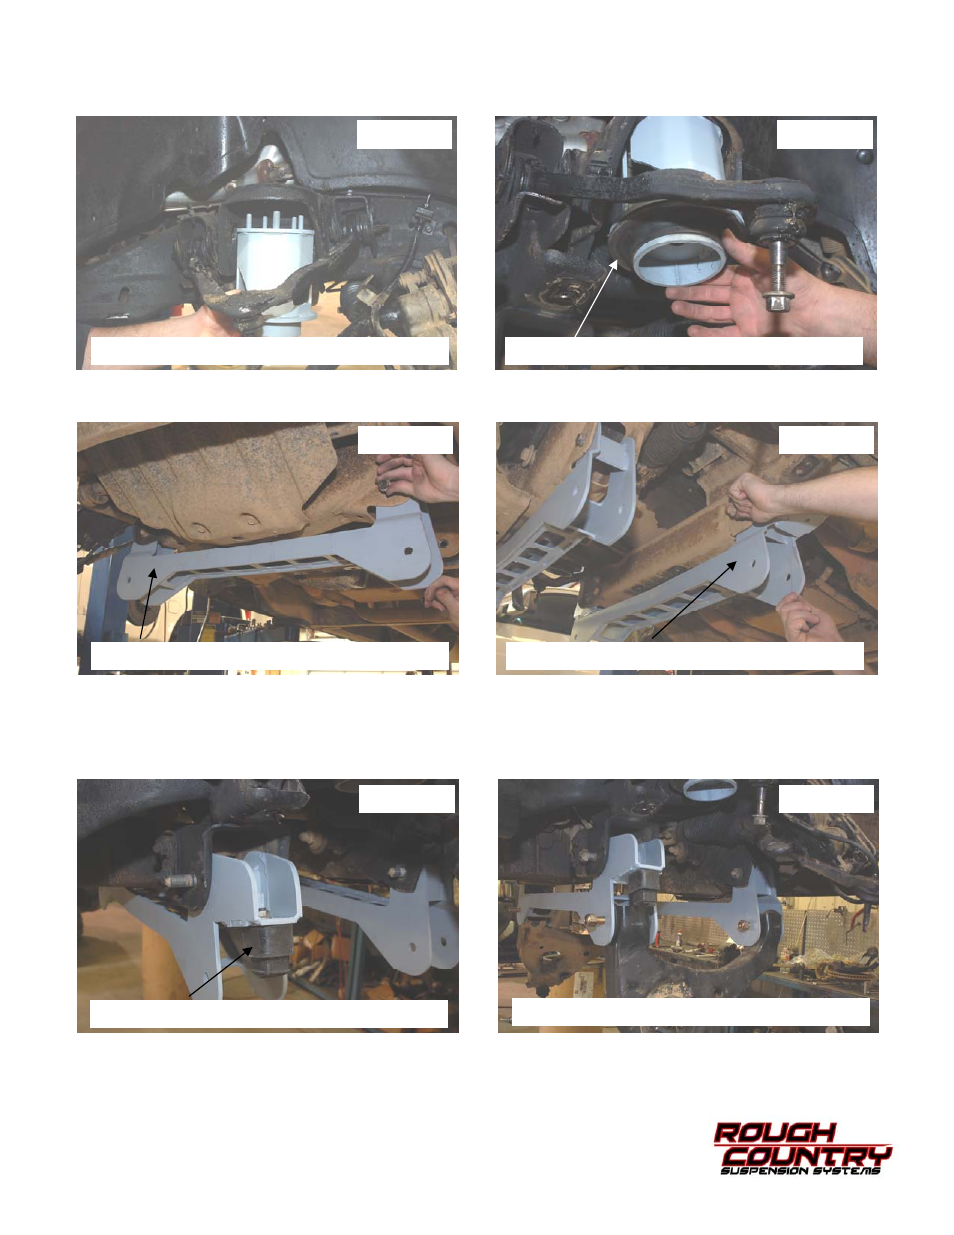
21. Remove the template and install the spring spacer using the supplied 3/8” lock nuts, 1/2” lock nuts and 1/2” flat
washer. See Photo 19.
22. Reinstall the stock coil isolator on the coil spacer. See Photo 20.
23. Install the front cross-member with the stock hardware. See Photo 21. Do not tighten at this time.
24. Install the rear cross-member using the stock hardware. See Photo 22. Do not tighten at this time.
25. Install the stock bump-stop that was removed from the frame on the rear cross-member. Tighten using a 15mm
wrench. See Photo 23.
26. Install the lower control arm on the new cross-members using the supplied 5/8” x 4 1/2” bolts & lock nuts for the front
cross-member and the supplied 5/8” x 5 1/2” Bolts & lock nuts for the rear cross-member. Do not tighten at this time.
See Photo 24.
PHOTO 19
PHOTO 20
PHOTO 21
PHOTO 22
PHOTO 23
PHOTO 24
INSTALL COIL SPACER
INSTALL STOCK ISOLATOR ON SPACER
INSTALL THE FRONT CROSS-MEMBER
INSTALL THE REAR CROSS-MEMBER
INSTALL THE STOCK BUMP-STOP
INSTALL THE LOWER CONTROL ARMS