Rough Country 234N2 User Manual
Page 3
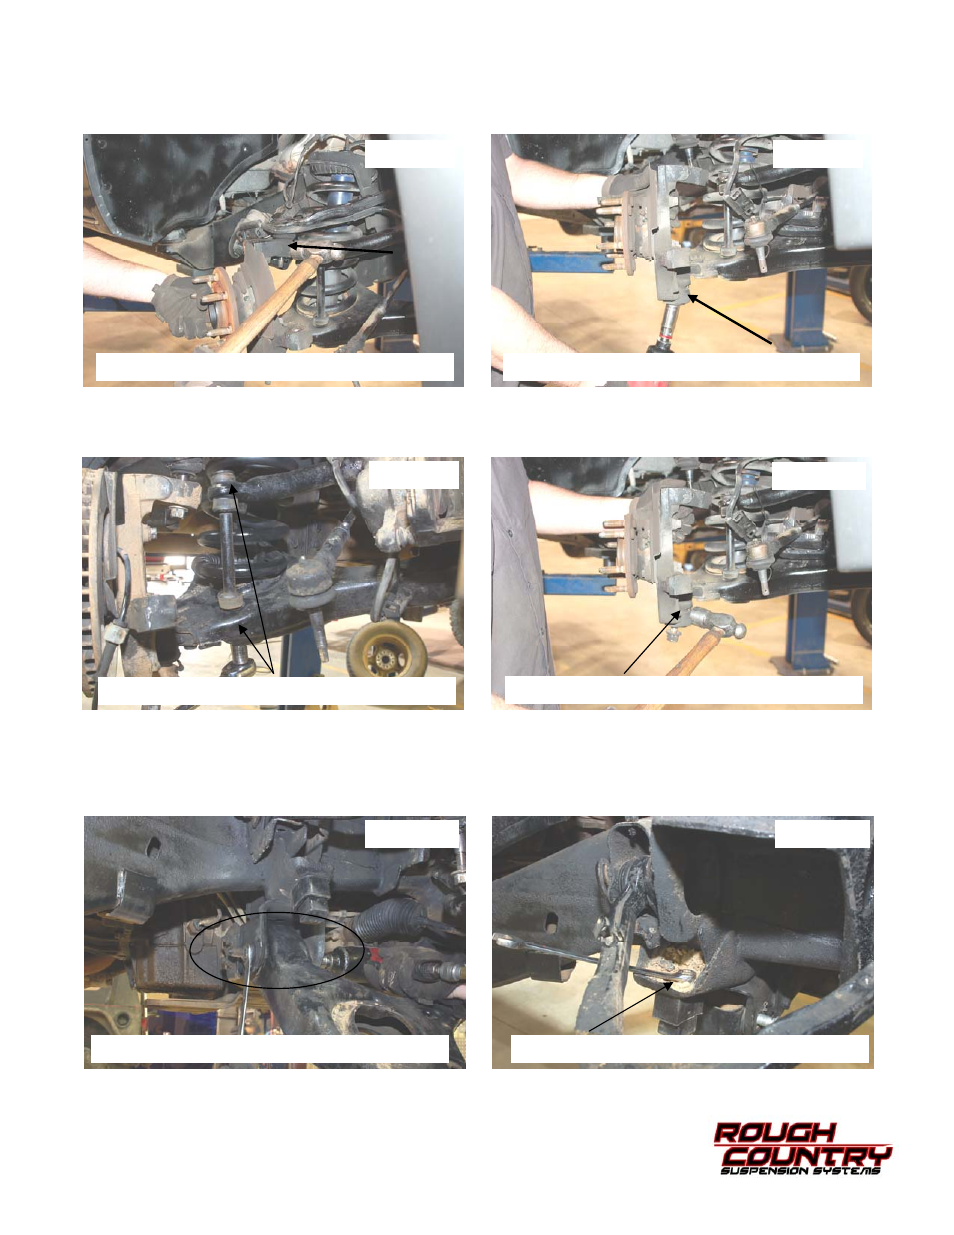
10. Remove the ball joint by either by using a ball joint separator tool or by striking on the upper portion of the knuckle
until the upper ball joint is free. See Photo 7.
11. Loosen the lower ball joint nut using a 18mm wrench. See Photo 8. Do not remove the lower ball joint nut at this
time.
12. Remove the sway bar using a 15mm wrench. See Photo 9.
13. Strike to dislodge the lower ball joint as shown in Photo 10 and remove the lower nut and remove the knuckle from
the vehicle.
14. Remove the coil spring
15. Loosen the lower arm hardware using a 18mm socket & 24mm wrench and remove the lower arm. See Photo 11.
Retain the hardware for reuse.
16. Remove the lower bump stop from the frame using a 15mm socket / wrench. See Photo 12. Retain the hardware for
reuse.
PHOTO 7
PHOTO 8
PHOTO 10
STRIKE TO DISLODGE TAPER
LOOSEN THE LOWER BALL JOINT NUT
STRIKE TO DISLODGE TAPER
PHOTO 9
REMOVE THE SWAY BAR LINK
PHOTO 11
PHOTO 12
LOOSEN THE LOWER ARM
REMOVE THE FACTORY BUMP-STOP