Rough Country 477.20 User Manual
Page 8
37. Install the factory cross member in the drop brackets as
shown with the factory hardware on the two outer bolts
and using the 10mm x 65mm bolt / washer & nuts in the
center. Do not tighten at this time. Slide the torsion bars
into the lower control arms.
38. Raise the torsion bar adjuster bracket into position in
the torsion bar cross member and install using factory
hardware.
39. Make sure that both sides of the drop bracket / torsion
bar cross member assembly are straight with the frame
tighten all hardware to 45 ft lbs.
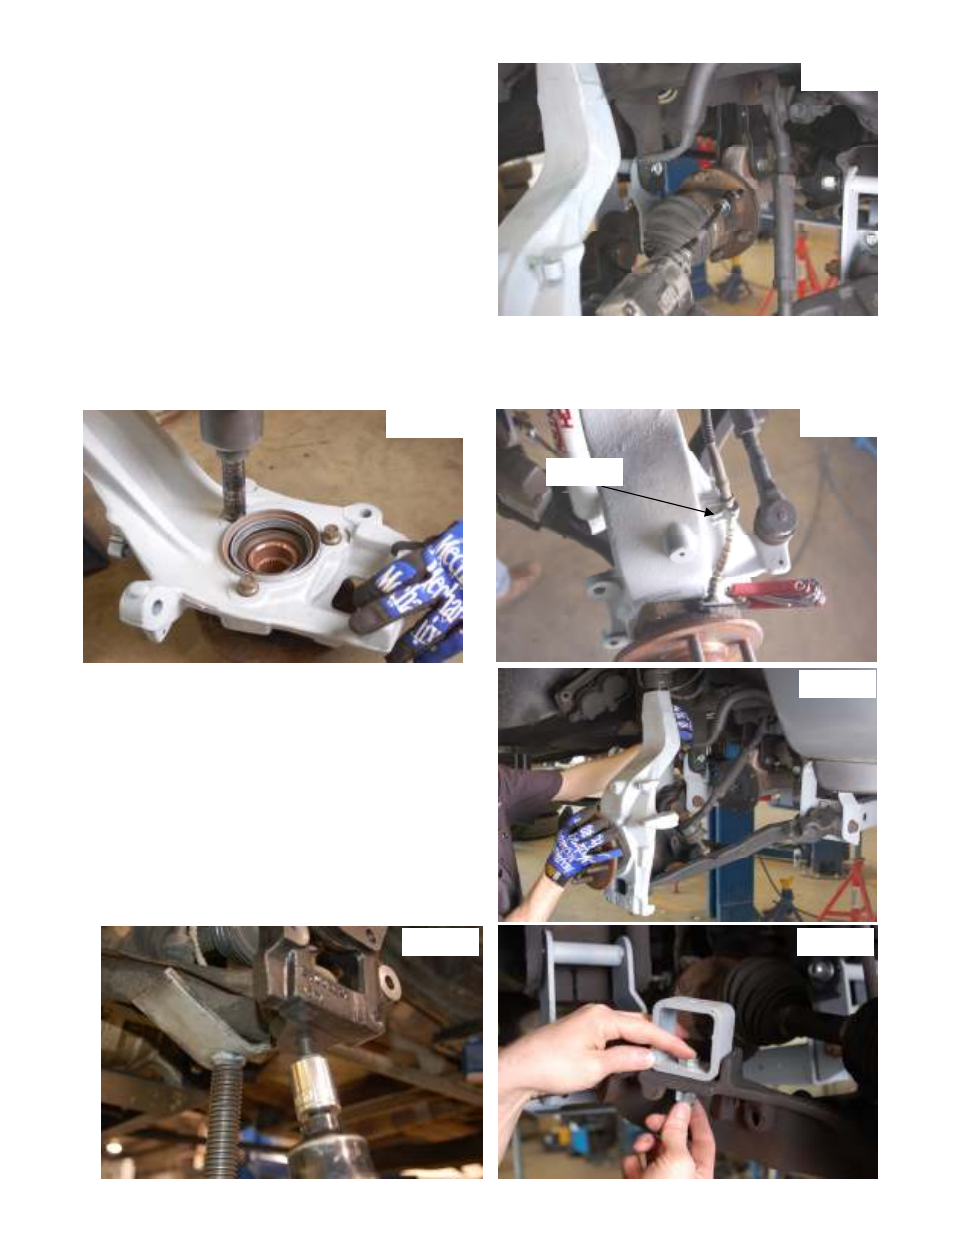
40. Using the factory CV bolts reinstall the CV shafts
on the
differential as shown in Photo 27 using a 12mm 12
point socket.
41. Locate the bearing assembly removed from the stock
knuckle. If the seal is in good condition, install the seal in the new knuckle. If necessary purchase new seals.
Install the bearing into the new knuckle
with the factory hardware using a 15mm wrench. See Photo 28.
42. Reinstall the ABS sensors & wire clip as shown in Photo 29 using a 3/16” allen head wrench and install wire clip
onto new knuckle using a 8mm wrench.
43. Install on the lower and upper ball joints as shown in
Photo 30 & 31 with stock hardware and supplied cotter
pin. Tighten using a 21mm wrench for the upper ball joint
and a 24mm on the lower ball joint.
44. Install the stock tie rod on the new knuckle with stock
hardware using a 21mm wrench. Install supplied cotter
pin.
45. Install the bump stop extension bracket as shown in
Photo 32 using the supplied 1/2” x 1 1/2” bolts/washers &
nuts. Install the factory bump stop on top of the bracket
using factory hardware.
Photo 30
Photo 32
Photo 28
Photo 29
Wire Clip
Photo 27
Photo 31