Rough Country 477.20 User Manual
Page 6
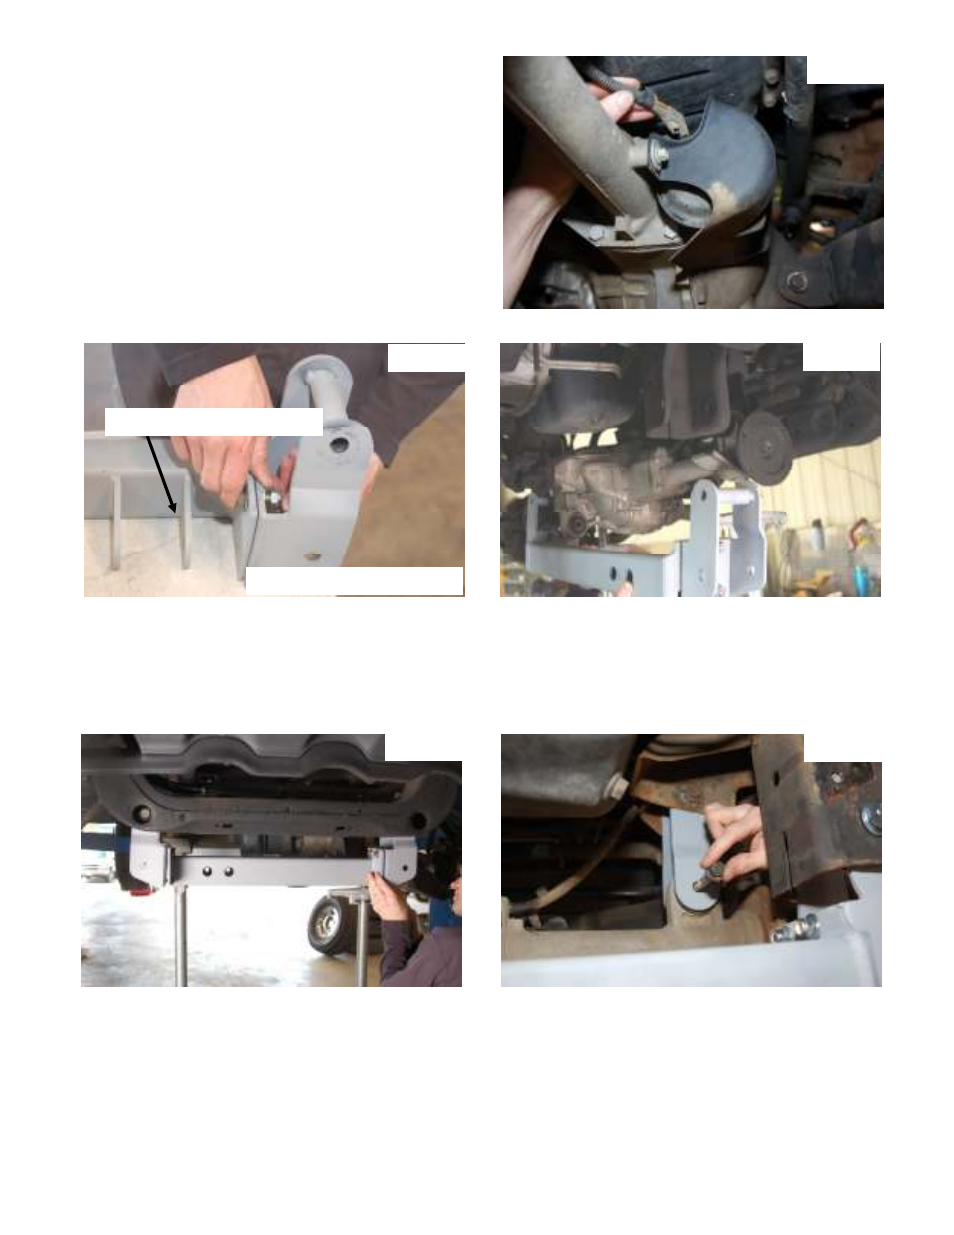
22. Unplug the Differential vacuum hoses. See Photo 16. Gen-
tly pull down on the hoses giving it 5 inches of slack. Using
a 12 point 12 mm socket remove the four bolts that secure
the drive shaft to the differential. Retain hardware for re-
use.
23. Locate the 4 cross member drop brackets and assemble
them using the 7/16” x 1 1/4” bolts, thick washers, and ny-
lock nuts with the cross members as shown in Photo 17.
Only three bolts per side will be used. Do not tighten
at this time.
24. With the differential still supported with jack stands or a
floor jack and using the 9/16 x 5 1/5 bolts, install the cross-
members into the lower control arm sockets as shown in
Photo 18. The bolts will be installed from the front to the
rear. Do not tighten at this time.
25. Assemble the front cross member the same as the rear with the supplied 7/16” x 1 1/4” bolts, washers/nuts. Only
three bolts per side will be used. DO not tighten at this time.
26. Install in the front factory location as shown in Photo 19 with the supplied 9/16” x 5 1/2” bolts. Do not tighten at this
time.
27. Install the diff drop bracket on the passenger side as shown in Photo 20 with the factory hardware on the frame and
the supplied 12mm x 100m bolts, washers /nuts on the differential. Do not tighten at this time.
Photo 16
Driver Side Rear Shown
Driver Rear Diff Mount
Photo 17
Photo 18
Photo 19
Photo 20