Rough Country 477.20 User Manual
Page 7
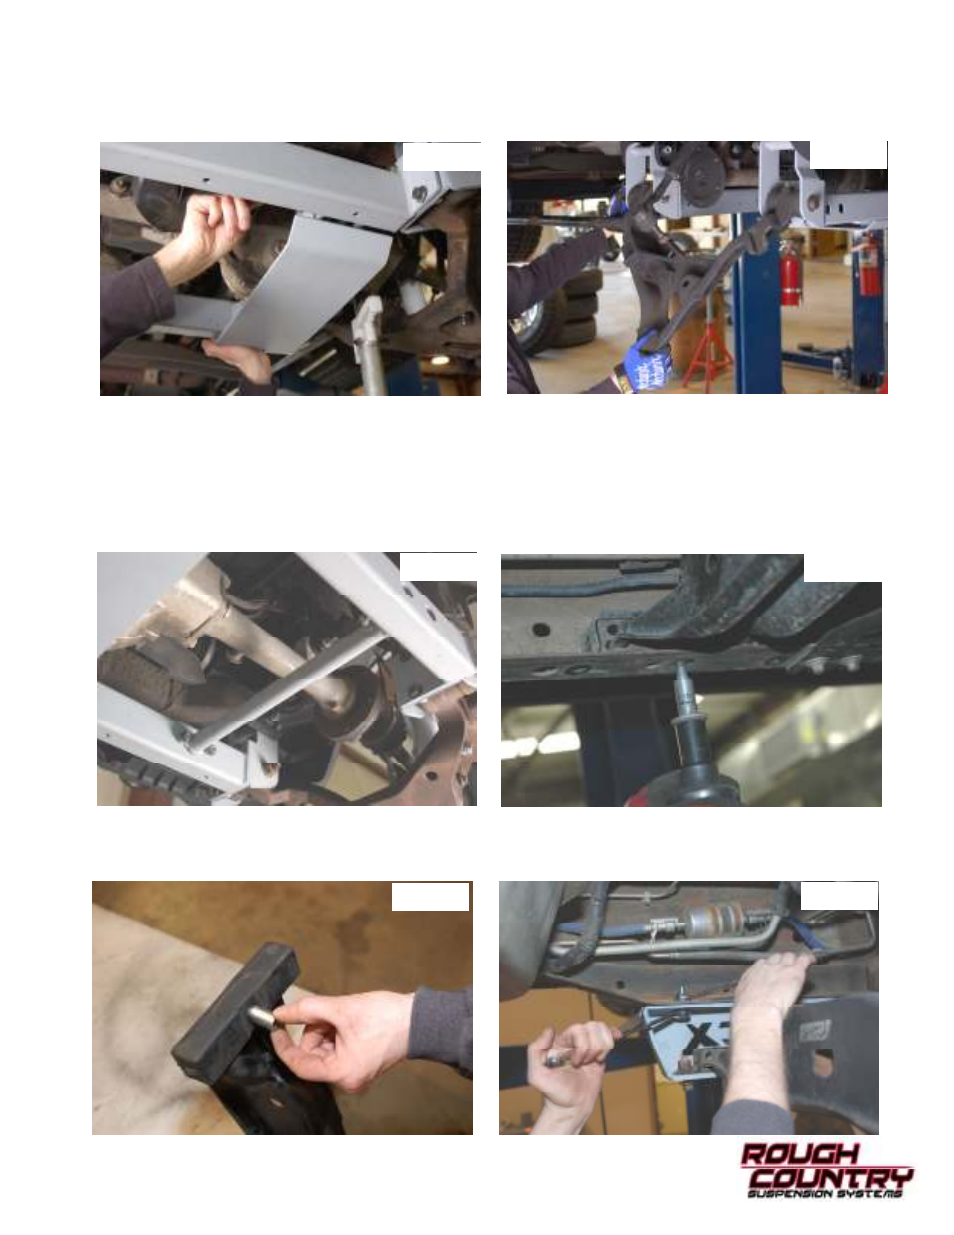
28. Install the skid plate on the drivers side as shown in Photo 21 on the differential tabs with the supplied 12mm x
100mm bolts, washers/nuts. Do not tighten at this time.
29. Remove the torsion bars from the lower control arms and install the lower control arms into the new brackets. With
the factory hardware. Slightly tighten the bolts. See Photo 22.
30. Tighten the 12 cross member bracket bolts to 45 ft lbs. Tighten the upper cross member bolts to 65 ft lbs.
31. Lightly pull the vacuum hose down and reinstall on the differential.
32. Locate the supplied spreader bars and install as shown in Photo 23 using the supplied 4-3/8” x 1” bolts/washers &
nuts. Tighten with a 9/16 wrench.
33. Using a 12 mm 12 point socket install the drive shaft with factory bolts.
34. Using a 15 mm socket and a 18 mm wrench remove the front and rear bolts from the Torsion bar adjuster bracket.
Using a 18 mm socket and 18 mm wrench remove the center bolt. See Photo 24. Retain the two factory outer
bolts for reuse.
35. Install the supplied 12mm x 1 1/4” crush sleeve as shown in Photo 25 on the stock torsion bar cross member.
36. Locate the torsion bar drop brackets and install as shown using the supplied 7/16” x 1 1/4”bolts/washers & nuts.
See Photo 26. Do not tighten at this time.
Photo 21
Photo 22
Photo 23
Photo 24
Photo 26
Photo 25