Rough Country 477.20 User Manual
Page 4
6. Using a 18 mm wrench and 18 mm socket remove the
upper shock nuts. Using a 13 mm wrench and 18 mm
socket remove the lower shock bolt. Retain the lower
hardware for reuse.
7. Using a 16 mm wrench and 15 mm socket remove the
stock sway bar links. See Photo 4.
8. Using a 13 mm wrench remove the brake caliper. Tie the
caliper up and out of the way. Do not let the caliper hang
from the brake line. Using a 18 mm socket remove the
brake caliper bracket.
9. Using a 8 mm socket remove the brake dust cover. This
will be reinstalled on the new knuckle.
10. Using a 8 mm socket remove the ABS hold down from the
knuckle. Using a 3/16 allen wrench remove bolt and
the sensor. Route this up to the frame rail. The allen bolt
will be reused
.
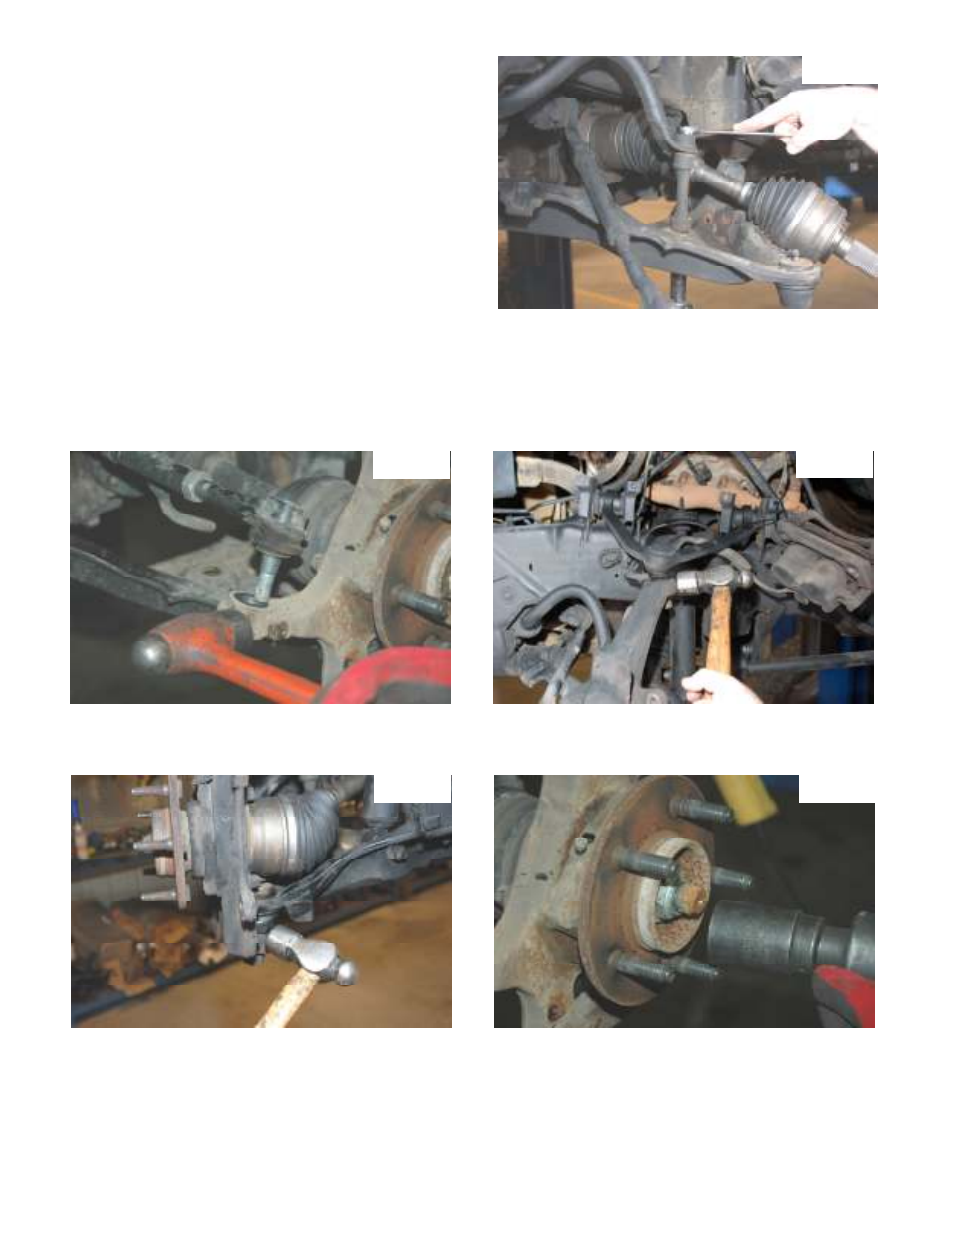
11. Using side cutters remove the cotter pin from the tie rod castle nut. Using a 21 mm socket remove the nut from the
tie rod. Using a hammer tap the knuckle as shown until the tie rod pops out. See Photo 5. Never hit the tie rod
itself.
12. Using side cutters remove the cotter key from upper ball joint. Using a 21 mm socket loosen the nut. Hit the knuckle
as shown until the ball joint pops loose. See Photo 6.
13. Using side cutters remove the cotter pin from the lower ball joint. Using a 24 mm socket remove the castle nut from
the ball joint. Using a hammer hit the knuckle as shown in Photo 7 until the ball joint pops free.
14. Using side cutters remove the cotter pin from CV shaft. Using a 36 mm socket remove the nut. See Photo 8.
15. Remove the nut from the upper ball joint and remove the knuckle from the truck. Using a 15 mm socket remove the
wheel bearing from the knuckle. Using a blunt punch and hammer remove the rear seal from the knuckle. Retain
hardware for reuse.
16. Using a 15 mm socket remove the six bolts that attaches each CV shaft to the front differential. Retain the bolts,
they will be reused.
Photo 5
Photo 6
Photo 7
Photo 8
Photo 4