Rough Country 291.20 User Manual
Page 5
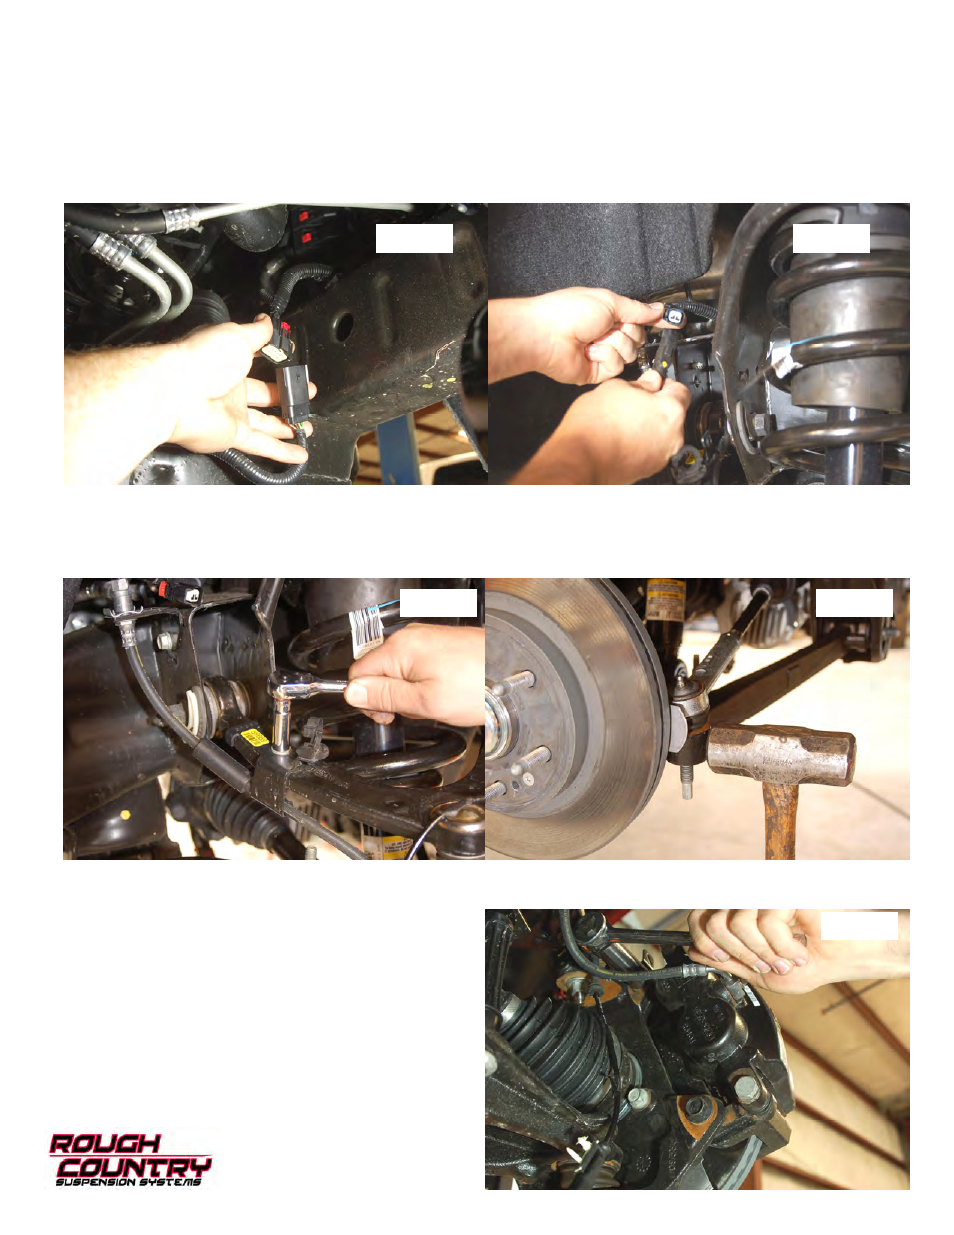
FRONT INSTALLATION
1. Park the vehicle on a level surface and chock the rear wheels. Raise the hood and disconnect the battery using a 10mm
socket. Lock the steering wheel in the straight position.
2. Jack up the front of the vehicle. Place jack stands under the frame rails and lower onto jack stands letting the front sus-
pension hang.
3. Remove the tires and wheels. Remove the 6 bolts holding the factory skid plate using a 15mm socket. Unplug the two
connectors going to the electric power steering wiring harness behind the front skid plate.
See Photo 1.
4. Remove and unplug the ABS sensor wire from the frame as shown in
Photo 2.
5. Remove the sensor wire from the plastic clip. Remove the brake line bracket from the control arm using a 10mm wrench.
See Photo 3. Next remove the bracket line bracket from the control arm pocket with a 13mm wrench.
6. Using a 21mm wrench, remove the tie-rod nut as shown in
Photo 2. Strike the front of the mount to dislodge the tie rod
end. Remove from the knuckle.
7. Remove the brake caliper using a 18mm socket. Hang the caliper out of the way and remove the rotor using a 30 torx
socket.
See Photo 5.
8. Use a 10mm socket to remove the brake line bracket from
the knuckle.
9. Remove the dust cap and then remove the axle nut using a
35mm socket.
Photo 5
Photo 2
Photo 1
Photo 3
Photo 4