Rough Country 291.20 User Manual
Page 11
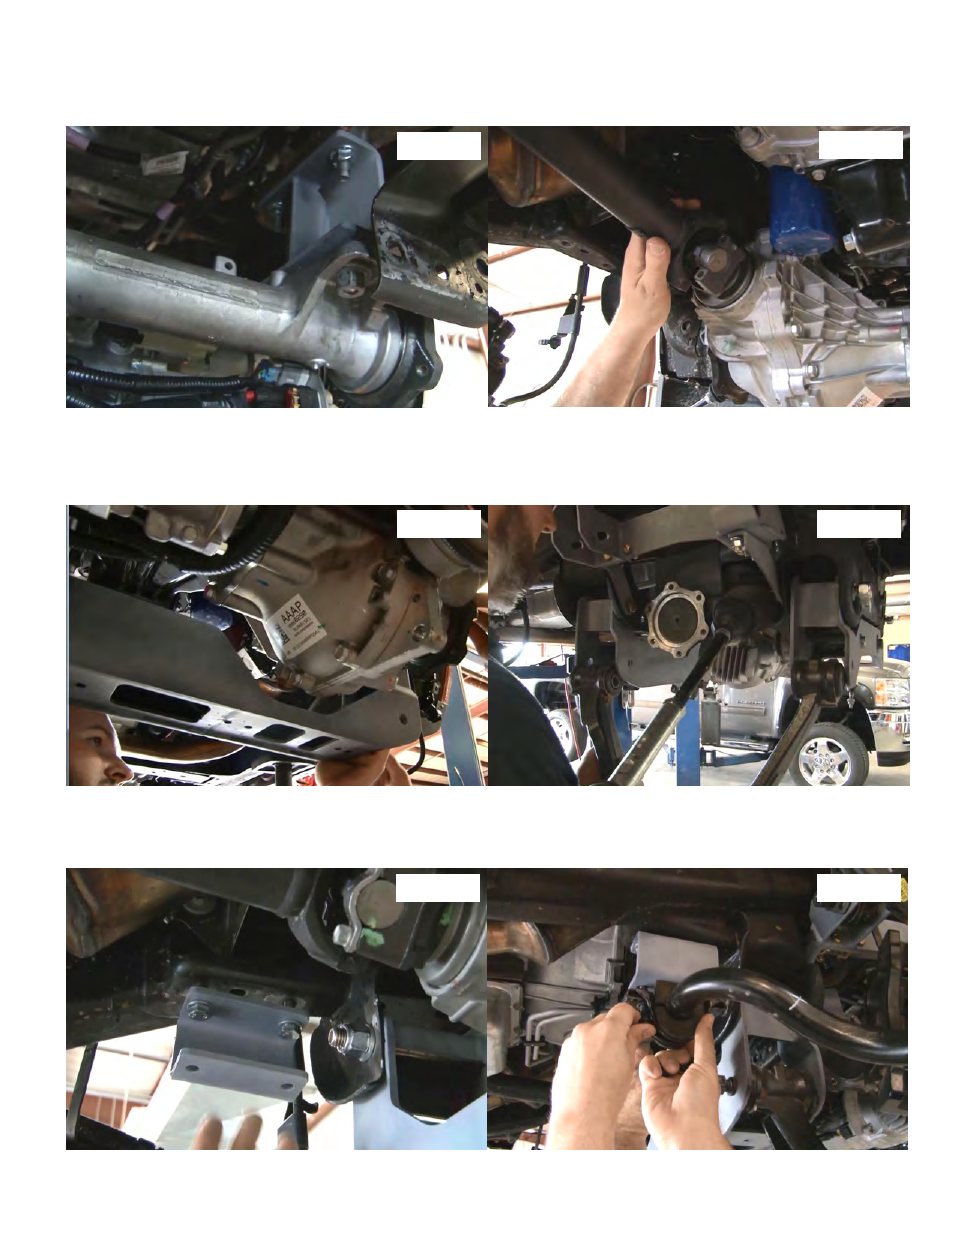
37. Install diff using new supplied 12mm x 45mm bolts and nuts. Be sure not to hit or push diff into rack and pinion. Use
new bolts and nut on driver side and use new bolts with old stock nut on passenger side. Use a 18mm and 19mm
socket and wrench for new bolts and a 21mm for the stock nuts. Plug in the 4x4 actuator and vent tube.
See Photo 36.
38. Install driveshaft using stock hardware and a 11mm wrench to tighten.
See Photo 37.
39. Install rear crossmember using new 5/8
” x 5.5” bolts, washer, and nuts. Install bolts front to back of truck.
See Photo 38
40. Install upper and lower control arms using stock bolts.
See Photo 39. Then tighten all cross-member and upper control
arm drop bolts. Use a 24mm wrench and socket on cross-member bolts. Use a 21mm and a 22mm wrench and socket
on upper drops. Then use a 14mm wrench and socket to tighten all 3/8 bolts on upper control arm drop brackets.
41. Install sway-bar drop bracket using 10mm x 35 mm bolts and washers. Tighten using 17mm wrench.
See Photo 40.
Install sway-bar using stock bolt with new 10mm nuts.
See Photo 41. Use a 10mm socket and 17mm wrench to tighten.
Install stock sway-bar link using a 15mm to tighten.
Photo 36
Photo 37
Photo 38
Photo 39
Photo 41
Photo 40