Rough Country 243.20 User Manual
Page 12
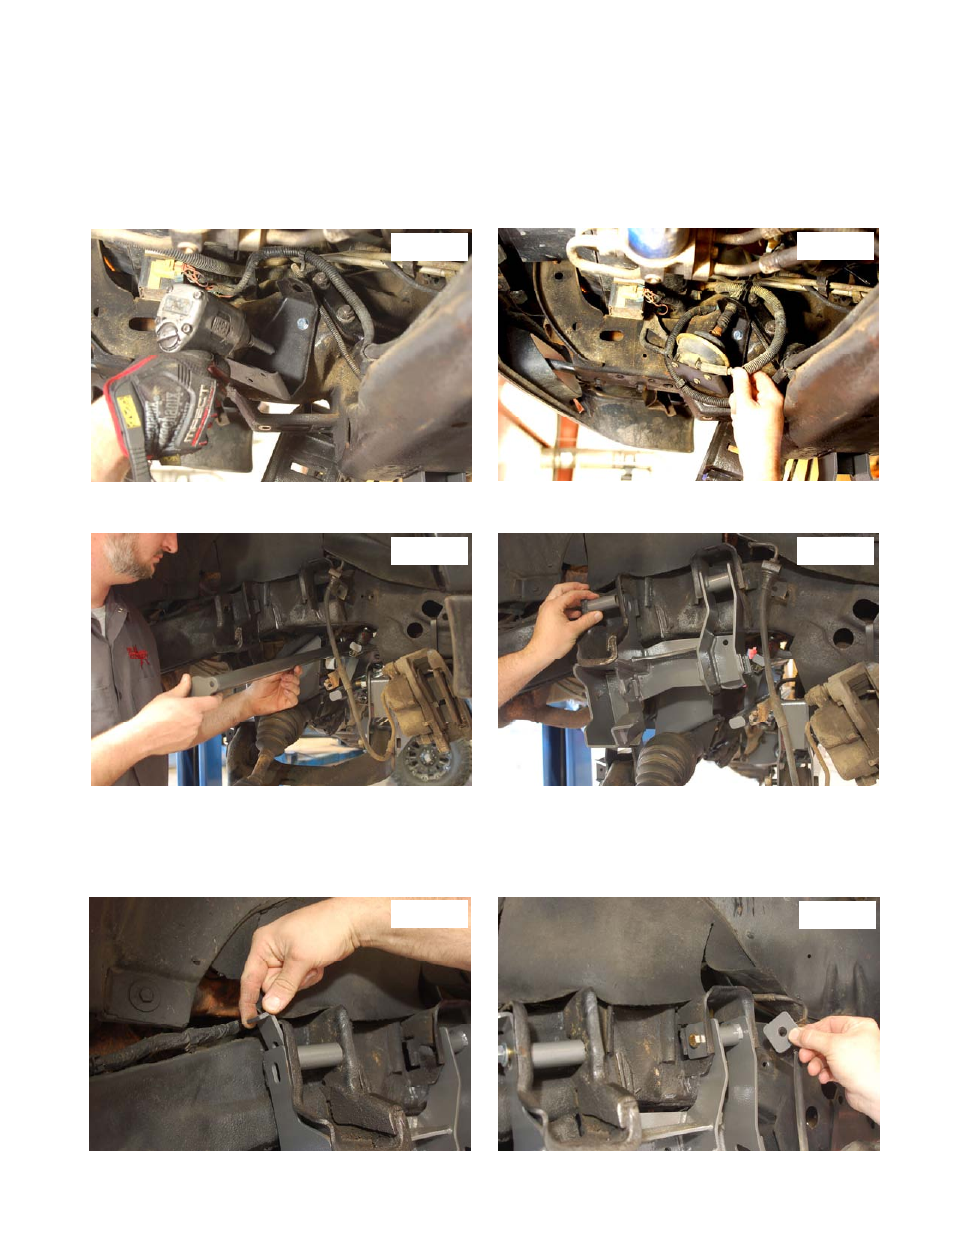
43. Route the 4x4 cable around the back side of diff up an over the stabilizer and over the lower radiator hose. Make
sure cable is not in harms way. Route the vacuum hose that went to the 4x4 actuator over to the 4x4 cable. Using a
7mm socket remove the 4x4 actuator from the bracket it is mounted to. Remove the clip holding the ABS wire from
the frame using some needle nose pliers. Adjust hard brake line out of the way. Drill the hole out on the 4x4 actuator
bracket to 11/32. Take the bracket and place it on the frame as flat as possible with the small end pointing toward
the 4x4 cable and mark holes. See pic. Drill the marked hole using a 1/4 drill bit. Using the supplied 5/16” self tap-
ping bolts and install bracket to frame. Use a 13mm socket to tighten. See Photo 43. Reinstall the actuator to the
bracket using stock hardware and a 7mm socket to tighten. Reinstall 4x4 cable into actuator and vacuum line. Ad-
just hard brake line away from moving parts on idler arm. See Photo 44.
44. Install control arm drop support bar above the stabilizer at this time. Make sure all wires, hoses and cable are above
this bar. See Photo 45.
45. Install upper control arm drops using the supplied 7/16” X 4” bolts, washer, and nut with the painted square washers
on the front side and use the flag washer and sleeve on the back side. See Photo 46,47,48. Install the supplied 3/8”
x 1.25” bolts, washers, and nut into the upper control arm drop and attach the support bar. NOTE SHIM maybe
needed if bar is to short. Install two of the 3/8 bolts into the upper control arm drop bracket to rear cross-member on
both sides. Tighten all 3/8” bolt using 14mm socket and wrench. Tighten all 7/16” bolts using 5/8 socket and wrench.
Photo 43
Photo 44
Photo 45
Photo 46
Photo 47
Photo 48