Rough Country 576.20 User Manual
Page 10
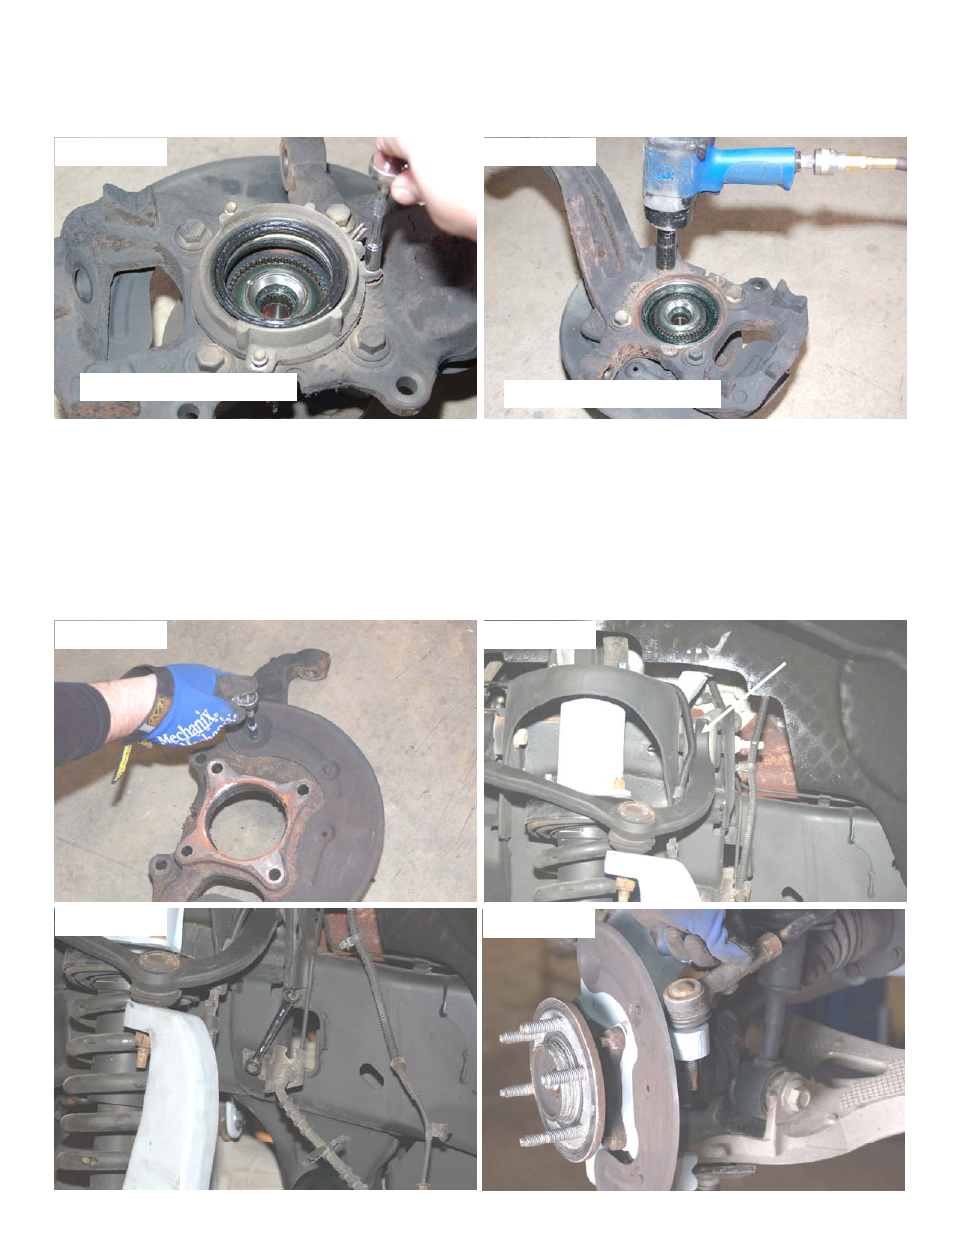
46. Remove the inner bearing assembly using 8mm wrench and remove the outer bearing assembly using a 15 mm
wrench. See Photo 37 & 38. Remove the dust shield using a 8mm wrench as shown in Photo 39 and install to new
knuckle. Install bearing assembly into new knuckle. Install the new Rough Country knuckle in the stock location with
factory hardware. Using a 21mm wrench tighten the upper ball joint and a 24mm wrench tighten the lower ball joint.
47. Slide the CV axle shaft in the knuckle and tighten with stock nut and using a 13mm wrench. Reinstall the CV shafts
on the differential with the factory hardware and using a 12mm 12 point socket. Install the outer dust cap.
48. Install ABS wire back into bearing using a 5mm allen wrench then install rotor and brake caliper with factory hard-
ware using a 18mm wrench to tighten bolts . Reroute line as shown in Photo 40 and install vacuum hose. Using a
10mm wrench remove the brake line bracket from the frame as shown in Photo 41. Replace the front brake lines
with the new supplied brake lines/crush washers using 14mm,16mm and a 11mm wrench. Bleed the brakes and
check brake fluid level. Reinstall brake line brackets with the factory hardware in the stock location.
49. Flip the tie-rod end and install into the knuckle using a 21mm wrench to tighten. See Photo 42.
50. If optional kicker bars were purchased with this kit, install at this time per the instructions included with that kit.
51. Install tires and wheels and lower to the ground. Tighten the lower control arm bolts.
PHOTO 37
PHOTO 38
PHOTO 39
PHOTO 40
PHOTO 41
PHOTO 42
Inner bearing assembly bolts
Outer bearing assembly bolts