Installation guide, Dimensions, Operation – Veris Industries HED SERIES Install User Manual
Page 2: Installation, Hed series, Mounting holes
Z205848-0C
PAGE 2
©2012 Veris Industries USA 800.354.8556 or +1.503.598.4564 / [email protected]
07122
Alta Labs, Enercept, Enspector, Hawkeye, Trustat, Veris, and the Veris ‘V’ logo are trademarks or registered trademarks of Veris Industries, L.L.C. in the USA and/or other countries.
TM
HED SEriES
inStallation GUiDE
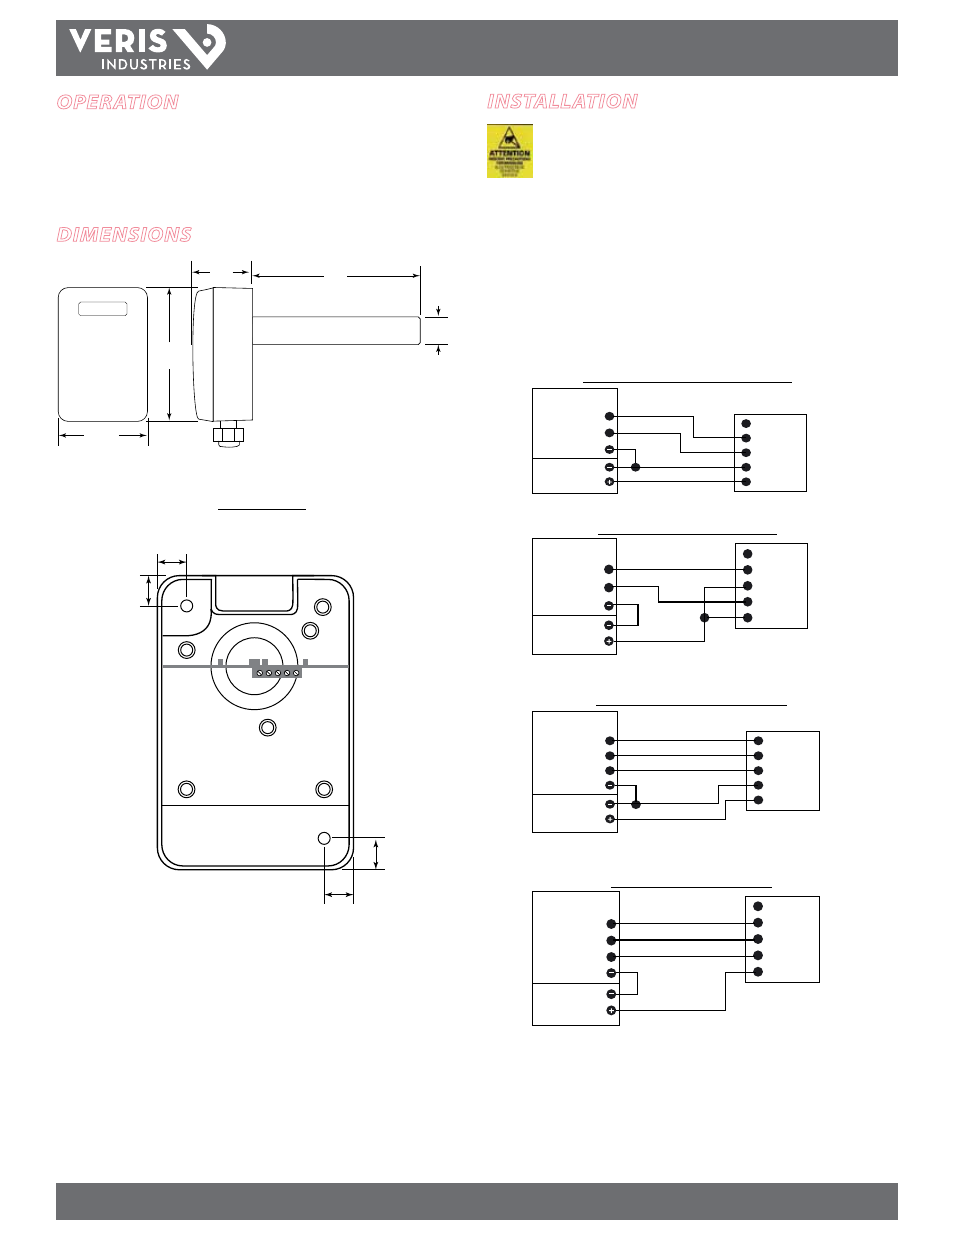
dImensIons
3.2"
(82 mm)
4.9"
(123 mm)
2.1"
(53 mm)
6.1"
(155 mm)
1.0"
(25 mm)
Mounting Holes
0.6”
(15 mm)
+
0.6”
(15 mm)
+
0.6”
(15 mm)
0.6”
(15 mm)
oPeratIon
The HED series economy duct mount humidity sensors measure the levels of RH
and temperature (if equipped) in the air inside a duct. HEDs are warranted to meet
accuracy specifications for 1 year. To maintain accurate functionality, keep all pickup
vents clear and free of dust, debris, etc.
4-20mA Versions, Thermistor
0–5V/0–10V Versions, Thermistor
0–5V/0–10V Versions, No Thermistor
4-20mA Versions, No Thermistor
Power Source
AC/DC
Digital Control
RH In
Temp In
RTD
Temp/RTD
RH
GND
PWR
RTD
Temp/RTD
RH
GND
PWR
Power Source
AC/DC
Digital Control
RH In
Thermistor In
Thermistor In
T-
T+
RH-
RH+
Power Source
DC
Digital Control
RH Return
Temp Return
T-
T+
RH-
RH+
Power Source
DC
Digital Control
RH Return
Thermistor
Thermistor
InstallatIon
Observe precautions for handling static sensitive
devices to avoid damage to the circuitry that
is not covered under the factory warranty.
1. Choose a location to mount the sensor.
2. Drill a 1” (25 mm) diameter hole in the duct.
3. Insert probe into hole. Mount HED housing to duct using self-tapping screws
(included). Make sure that the gasket on the back of the housing is compressed
between the housing and the duct for a secure fit.
4. Remove faceplate. Wire unit.
5. Replace faceplate.