Install differential carrier – Spicer Single Drive Axles Service Manual: Single Reduction & Single Reduction with Differential Lock User Manual
Page 13
10
Differential Carrier
Ser
vice Procedure
Install Differential Carrier
Before installing carrier assembly, inspect and thoroughly
clean interior of axle housing using an appropriate solvent
and clean rag.
Procedure -
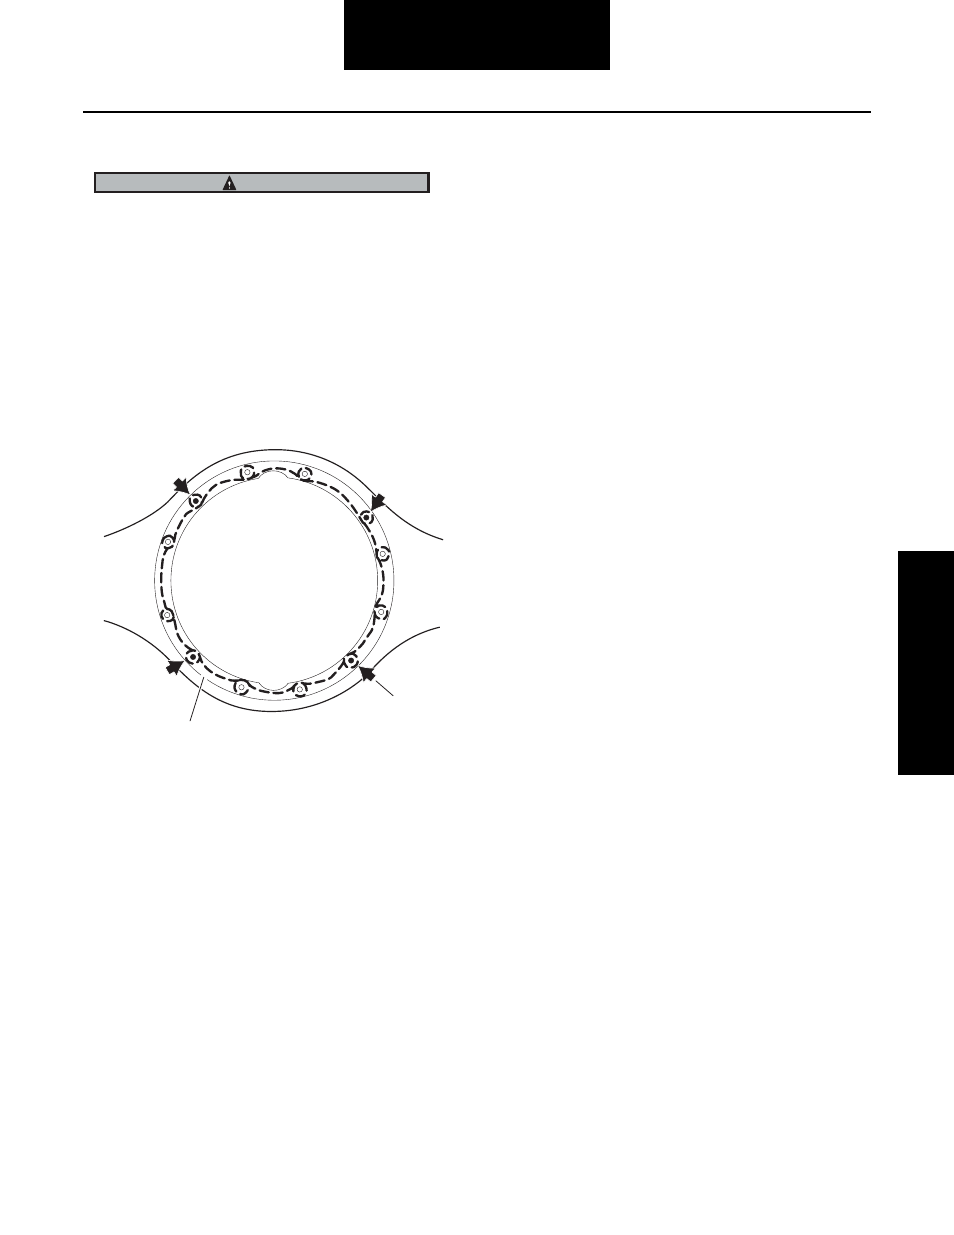
1. Apply Spicer approved RTV compound on axle hous-
ing mating surface as shown in the illustration. Com-
pletely remove all old gasket material prior to
applying new material. Compound will set in 20 min-
utes. Install carrier before compound sets or reap-
ply.
1— Apply silicone gasket in this pattern
2— Common stud locations
TIP: To assist in installing complete differential carrier
use two pieces of threaded rod threaded into carrier cap
screw holes. Rod should be approximately 6" long. Use
these to pilot the carrier into the housing.
2. Install carrier to housing, washers, cap screws and
nuts. Torque to proper specifications. See torque
chart of page 66.
3. Install axle shafts and axle stud nuts (if used, also
install lock washers and tapered dowels).
4. Add axle lubricant. Fill to bottom of filler hole.
5. Rear Only: Connect inter-axle driveline, making sure
all yokes are in phase. Lubricate U-joints.
IMPORTANT
1
2