EVS GX Version 1.00 - February 2011 User’s Manual User Manual
Page 37
GX server – Version 1.0 – User’s Manual
EVS Broadcast Equipment – February 2011
Issue 1.0.C
31
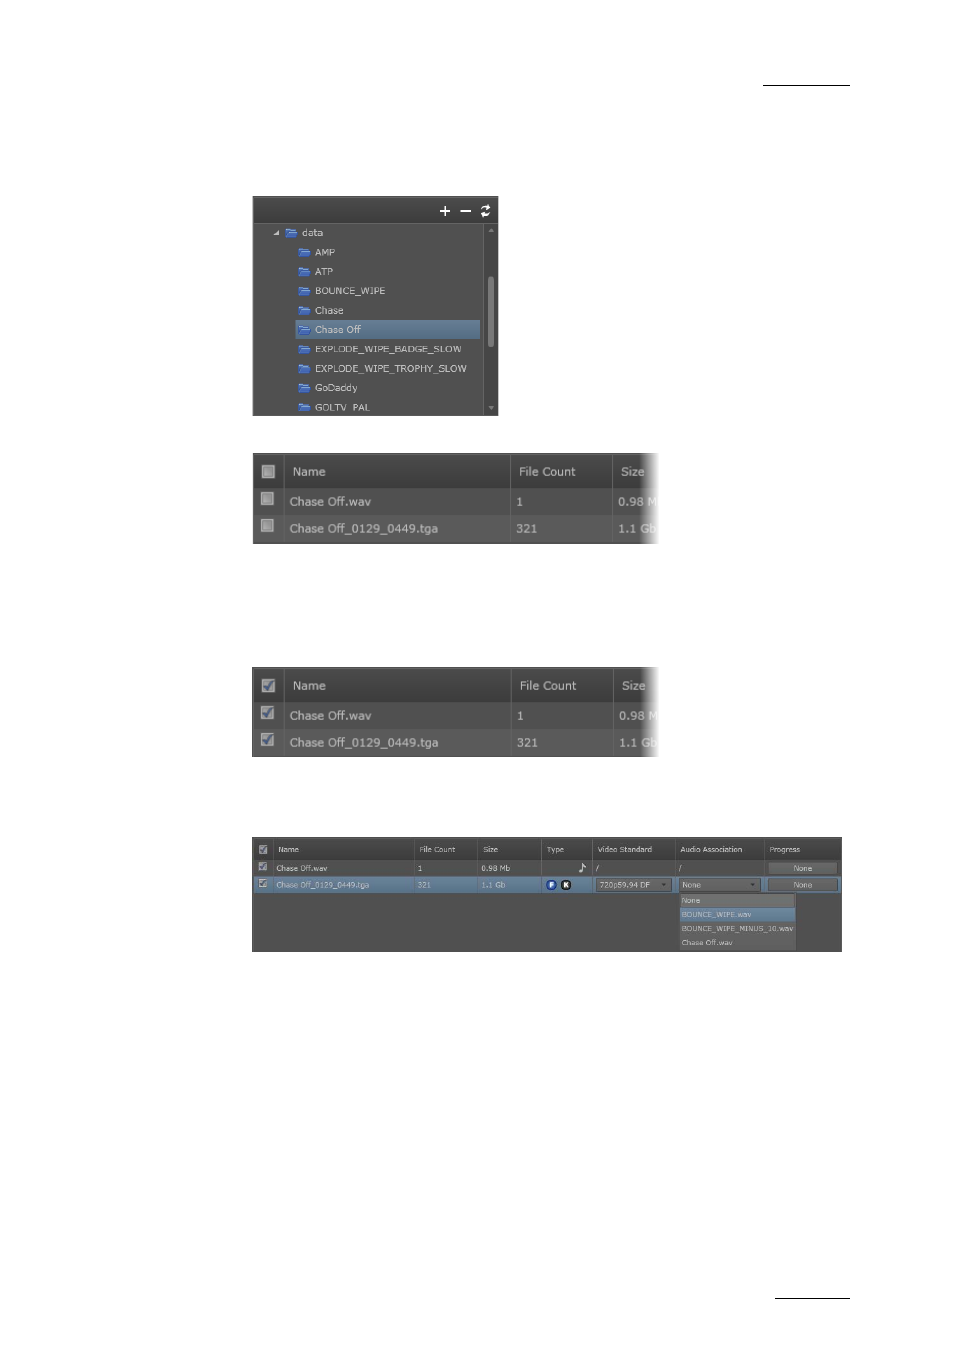
To import files onto the GX server, proceed as follows:
1.
In the drive tree structure, select the drive and folder that contains the
source files to import.
The source files are displayed in the source file list.
2.
Select the files to import in one of the following ways:
•
To select all displayed files, tick the top check box in the list.
•
To select individual files, tick the check box in front of each file you want
to import
3.
If you want to associate an audio file to a video file, c lick the down arrow in
the Audio Association column in the row corresponding to the video file, and
select the requested audio file.
The audio file you want to associate must have been imported or selected
for import to appear in the list of available audio files.
4.
Import the selected files in one of the following ways:
•
Click the Import button to import the file(s) solely to the Raw Materials
drive.
•
Click the Direct Online button to import the file(s) to the Raw Materials
drive and to the GX Clips drive (with predefined settings detailed in the
section ‘Import Results’).
During the import process, a progress bar displays in real time the progress of the
copy process to the Raw Materials drive.