Acroprint timeQplus Biometric (V2) TQ100 Terminal User Manual
Page 9
timeQplus BIOMETRIC™ Terminal User Manual
9
36
timeQplus BIOMETRIC™ Terminal User Manual
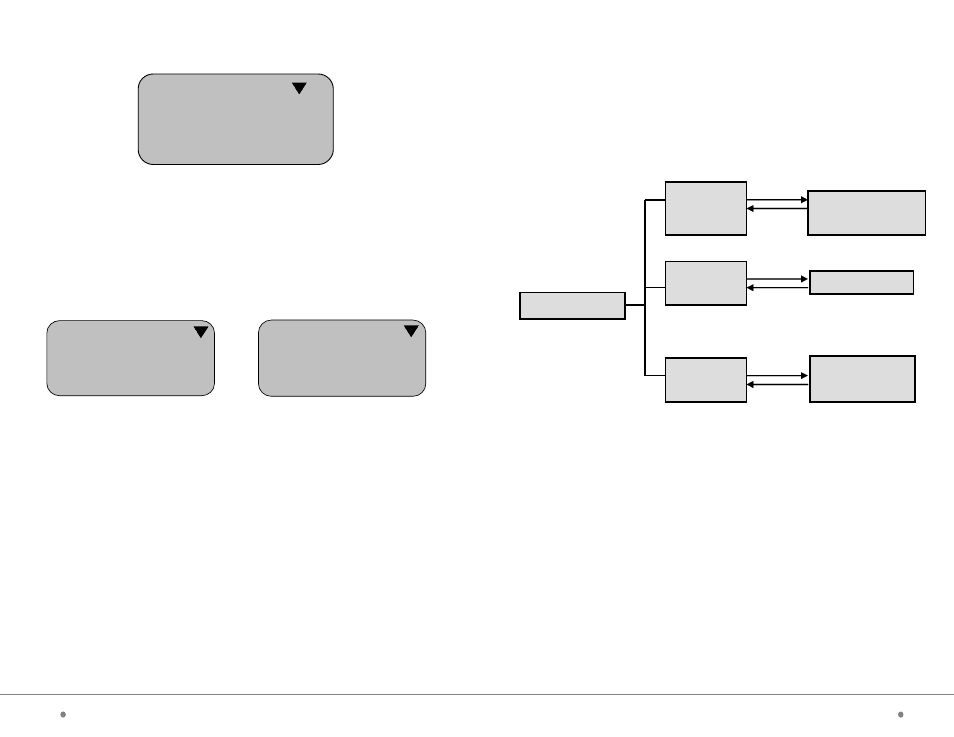
3.3 System Info
With System Information highlighted, press OK to access System
Information level-2 menus. You will see three menu items displayed.
Press OK in each menu to display the corresponding item as follows:
Level-1 Menu
Level-2 Menu
Level-2 Menu
System Info
Total
(# Punches)
Fingerprint
Registration
User
(# of users)
Administrator
(# of Administrators)
Password
Admin Recs
(# Admin Recs)
Press OK
Press OK
Press OK
Note: When User is selected, pressing OK switches between User and
Admin. The other items work in a similar way.
Select Setup menu and press OK to display the following:
Select Display Adjust and press OK. A “click” sound will be produced
indicating that the brightness auto match function of the sampling
instrument in the machine is complete. The software will search for the
optimal brightness value for the display.
Setup
System
Record
Communication
Display Adjust
7.3 System Info
Select System Information menu and press OK to access the level-3
menu as follows:
There are 6 level-3 menus in System Information, namely User
registration, Administrator registration, Fingerprint registration, Password
registration, total Punches and Administrator Records. These items can be
alternated using the OK button.
1) User Registration: to view the total number of users registered.
2) Administrator Registration: to view the total number of
administrators registered.
3) Fingerprint Registration: to view the total number of
fingerprints registered.
4) Password Registration: to view the total number of
passwords registered.
5) Total Punches: to view the total number of punches recorded.
6) Administrator records: to view the total number of admin records.
System Info
User
Finger
Punches
5
5
10
System Info
Admin
Password
Admin Recs
1
0
7
7.2.4 Display Adjustment Setting