Acroprint timeQplus Biometric (V2) TQ100 Terminal User Manual
Page 39
timeQplus BIOMETRIC™ Terminal User Manual
39
6
timeQplus BIOMETRIC™ Terminal User Manual
Chapter Three:
TQ100 Biometric Terminal Menu Structure
The terminal uses function and number keys to navigate through the
menu options and to access system settings. Level-1 menus include:
Data management, Settings and System Information. Each menu consists
of subordinate level-2 menus such as User Registration and View Punches.
Level-3 menu include enrollment method selection, sensitivity settings, etc.
Menu structure contains:
a. Data Management: to setup, change or delete data (e.g. enroll fingerprints,
passwords, administrators, delete records, track attendance); to perform audits
for system changes and set up sensitivity levels for the fingerprint reader.
b. Setup: to set up the TQ100 to communicate with the PC software application.
c. System Information: to examine the information recorded in the terminal
and view statistical data.
The structural diagram of the menu is illustrated as follows:
Level 1
Data Management
Setup
System Information
Menu
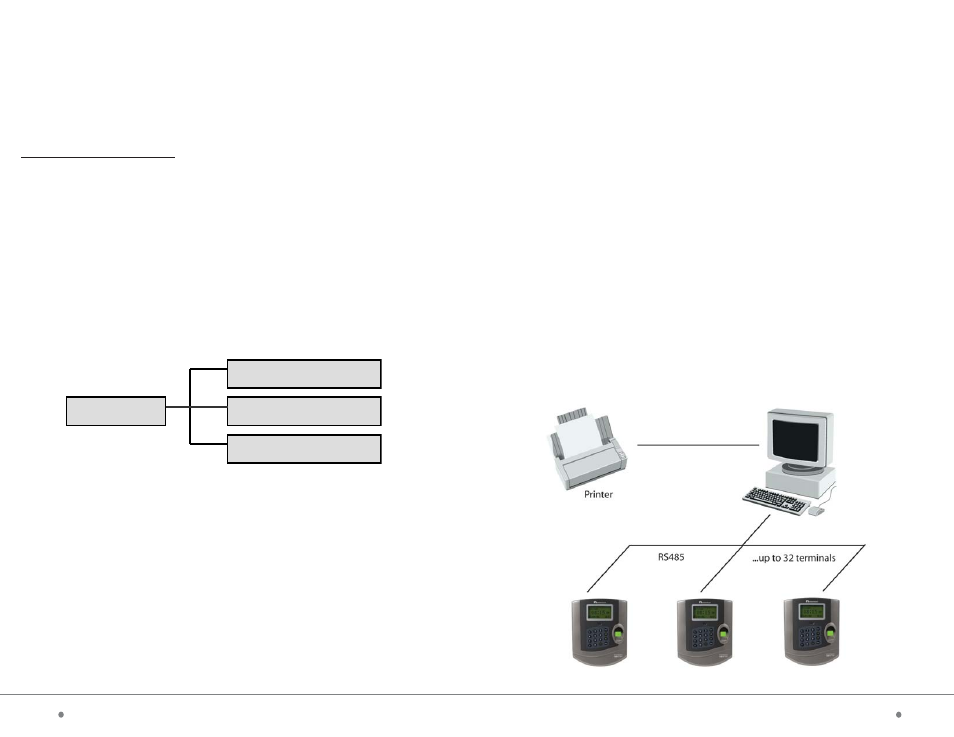
RS485 Connection
For the RS485 communication, TQ100 only uses two wires in the cable,
the Brown (8) and the Brown/White (7).
The RS485 communication setup requires the following steps:
1.
Take the CAT5 Ethernet cable supplied in the box and cut one end,
exposing the wires.
2.
Attach an RJ11 connector to the bare end of the cable; looking at the RJ11
connector (see the RS485 wiring diagram below) the Brown wire goes to
the leftmost pin. The Brown/White wire goes to the rightmost pin of the
RJ11 connector.
3.
Connect the cable above one end at the RJ45 Interface of terminal and the
RJ11 connector to a Junction Box; the Black wire in the Junction Box should
go to the Brown (8) wire in the CAT5 cable, and the Yellow wire in the
Junction Box should go to the Brown/White (7) wire.
4.
Connect the last Junction Box to a RS485/RS232 converter using a standard
phone cable.
5.
Connect the RS232 interface to the PC.
RS485 Communication Design