7 managing xsan storage, 1 expanding the capacity of xsan volume, Managing xsan storage -21 – Accusys ExaSAN SW-08 User Manual
Page 72: Expanding the capacity of xsan volume -21
6. Xsan
User Guide
Page 6-21
At this point, you have created an Xsan volume and mounted it properly. All host systems may now
access it as if it were a local disk.
6.7 Managing Xsan Storage
This section shows how you can expand an existing Xsan volume to provide more free space. It also
contains information about advanced volume and storage pool setting, and shows how to optimize and
verify the performance of Xsan volume.
6.7.1 Expanding the Capacity of Xsan Volume
Currently, ExaSAN can configure up to 3 RAID systems. If you started with one RAID system and like to
expand the capacity, you may:
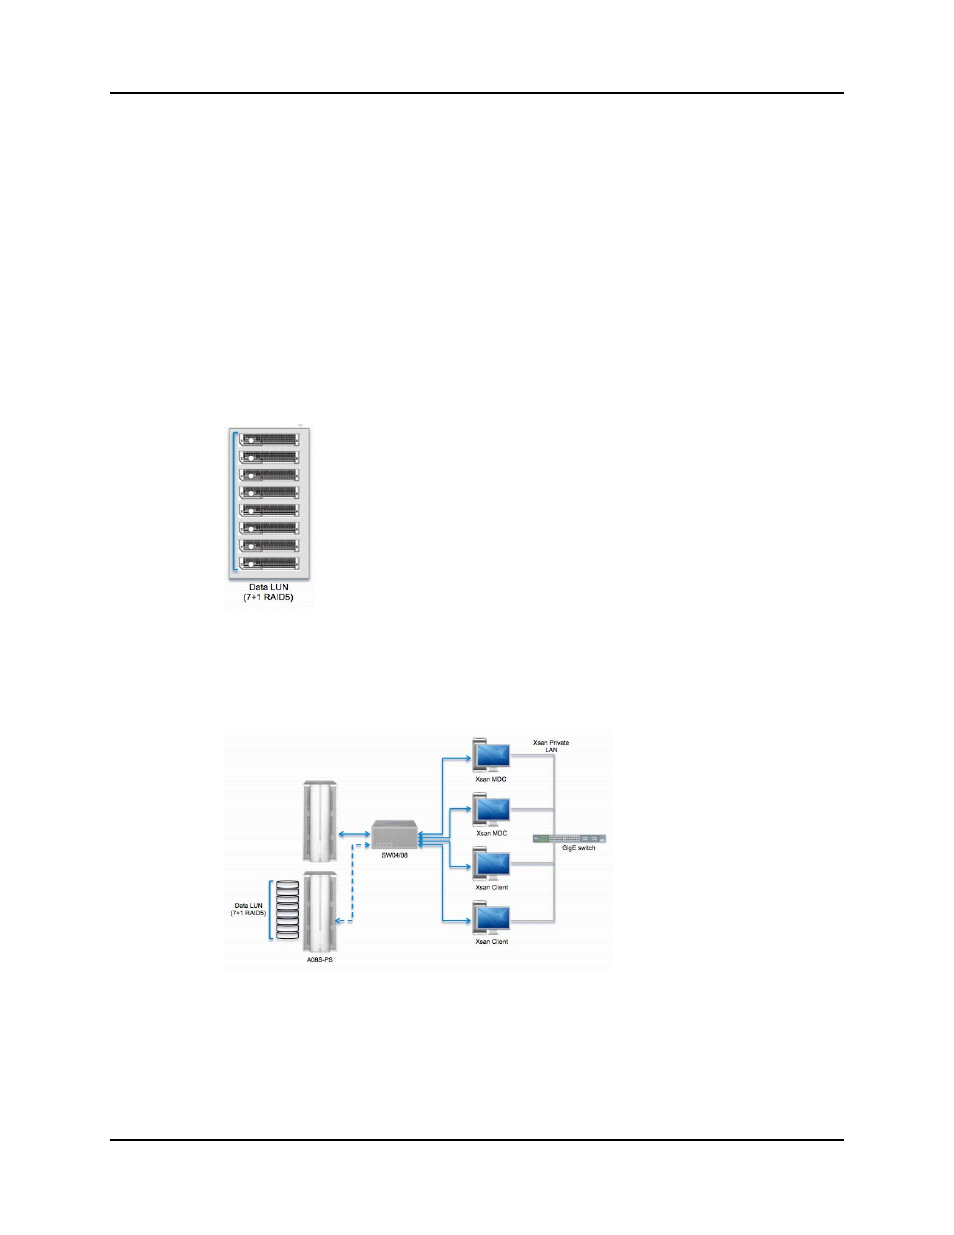
1. Create a LUN from your new ExaSAN RAID system: Use the RAIDGuard X GUI to create a single
RAID 5 LUN on the new ExaSAN RAID storage as illustrated below. Refer to the appropriate user
documentation of your RAID system(s) for more information about RAIDGuard X.
2. Add the new RAID to your ExaSAN network: Connect the new RAID to ExaSAN switch as
illustrated below. Follow the procedures outlined in Section 3, “Installing ExaSAN Compact,” to
power off the system, connect the new RAID and power every component back on.
Note that once you’ve properly added the LUN, you may verify it by checking if the new LUN can be
discovered on all the hosts in “System Profiler > SCSI Parallel.”
3. Add new LUN into the Xsan volume: Follow the steps below to add a storage pool:
a. In Xsan Admin, select “Volumes” in the “SAN Assets” list.
b. Select the volume in the list and choose “Expand Volume” from the “Action” (gear) pop-up
menu.
c. In the “Label LUNs” pane of the assistant, click “Edit LUN Label” and enter a new label.
d. In the “Configure Volume Storage” pane, click “New Pool” to add a storage pool, and then drag
the new LUN to the new pool.