6 the setup tcp/ip screen, Figure 18 web configurator: tcp/ip, Table 13 web configurator: tcp/ip – ZyXEL Communications NPS-520 User Manual
Page 40: 40 3.6 the setup tcp/ip screen
Chapter 3 Web Configurator
NPS-520 User’s Guide
40
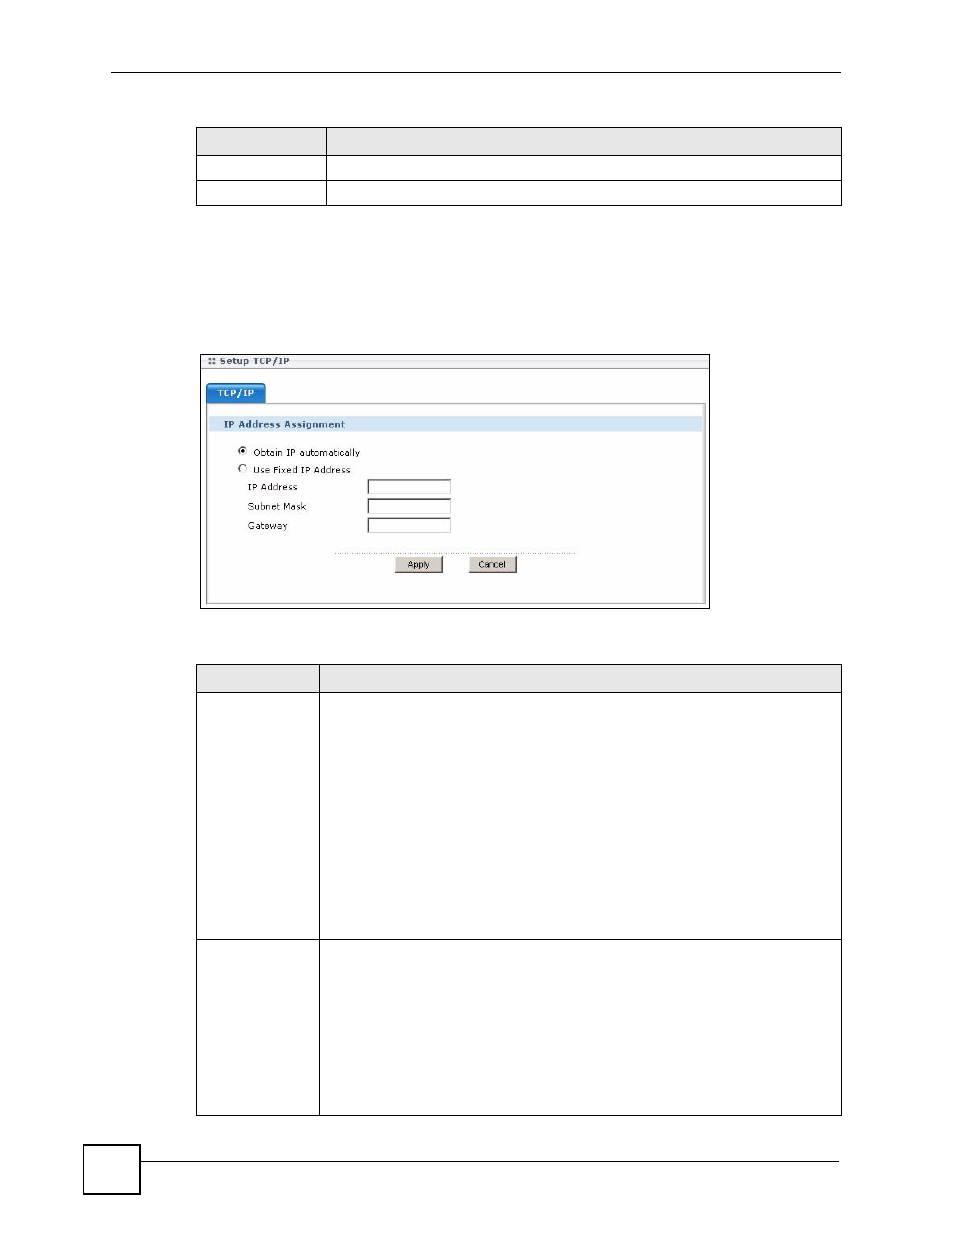
3.6 The Setup TCP/IP screen
Use this screen to configure the NPS-520’s IP address and other TCP/IP settings.
Figure 18 Web Configurator: TCP/IP
The following table describes the labels in this screen.
Apply
Click Apply to save your changes back to the NPS-520.
Cancel
Click Cancel to exit this screen without saving and go to the Status screen.
Table 12 Web Configurator: System (continued)
LABEL
DESCRIPTION
Table 13 Web Configurator: TCP/IP
LABEL
DESCRIPTION
IP Address
Assignment
Use this section to configure the NPS-520’s IP address.
Note: If you changed the NPS-520’s IP address, use the new IP
address to access the web configurator again.
If you set the NPS-520’s to get an IP address from a DHCP
server, check the DHCP server for the NPS-520’s new IP
address.
Note: After you changed the NPS-520’s IP address and click Apply,
make sure you click the Logout icon in the upper right corner
before you use the new IP address to access the web
configurator again.
Obtain IP
automatically
Select this option to have the DHCP server assign the NPS-520 an IP address
automatically when there is a DHCP server in the network to which the NPS-520 is
connected.
Note: We recommend you give the NPS-520 a static IP address or
configure your DHCP server to always give it the same IP
address (static DHCP). If the NPS-520's IP address changes,
you need to uninstall and reinstall the ZyXEL utility on each
computer that uses it.