Getting connected cont – VocoPro DTX-9909K User Manual
Page 18
18
Connecting a DVD Player Video using the Compo-
nent Video Input(s)
There are Component Video (Y, Pb/Cb, Pr/Cr) inputs
mponent Video (Y
mponent Video (Y
on 3
of the DTX-9909K’s input channels: DVD, AUX1 and AUX2.
NOTE: When connecting a player to the Component Video
inputs, make sure that the player’s audio outputs are con-
nected to the same input channel. i.e. If the player is con-
nected to the Y, Pb/Cb, Pr/Cr
Y
Y
inputs on the AUX2 channel,
make sure that the player’s audio is connected to AUX2
audio inputs as well.
What you will need
• Player with Component Video outputs
• Set of component video cables
1. Connect one end of each of the component video cables
to the Component Video (Y, Pb/Cb, Pr/Cr) outputs on the
player
2. Connect the other ends of the component video cables
to one of the Y, Pb/Cb, Pr/Cr Inputs on the DTX-9909K
rear panel
3. Select the proper input channel on the DTX-9909K
NOTE: 3 of the A/V input channels have Com-
ponent video inputs, DVD, AUX1 and AUX2, so
make sure the correct one is selected.
Selecting the correct input channel:
Front panel: Press the INPUT button on the DTX-9909K
front panel until the correct input channel is displayed on
the screen
Remote Control: Press the corresponding input button on
the remote control to access the correct input channel.
i.e. AUX1 for the AUX1 input channel, DVD/OPT1 for the
DVD input channel, etc.
�������������������
��������������������
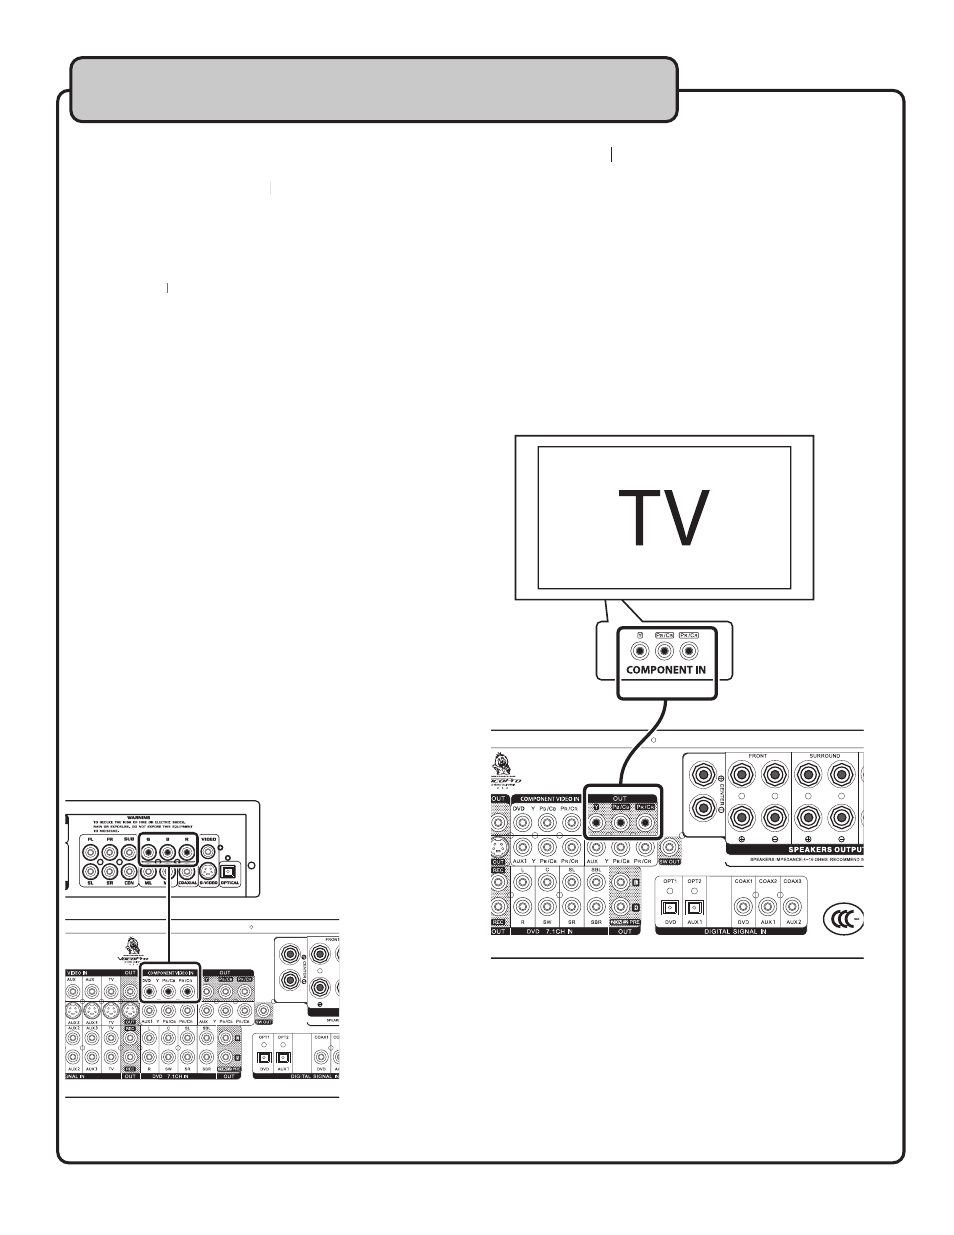
Connecting to a TV / Video Monitor using the Com-
ponent Video (Y, Pb/Cb, Pr/Cr) Outputs
ponent Video (Y
ponent Video (Y
What you will need
• TV/ video monitor with Component Video inputs
• Component video cable
1. Connect one end of each of the Component video cables
to each of the Component Video Output jacks on the DTX-
9909K rear panel
2. Connect the other ends of the Component video cables to
the Component Video inputs on the TV/Video monitor
3. Make sure the TV/Video monitor is set to the correct
video input. Consult the TV/Video monitor’s user manual
for the necessary instructions
��������������������
Getting Connected cont.