Uniden TRAX436 User Manual
Page 62
Page 62
How Do I Use It?
If you insert a via point in a route that is already a multi-point route, you will
automatically be taken to the Edit Route screen where you can determine
the position of the intermediate route point. When you enter the screen,
the new via point is placed as the last via point before the final destination.
The new point is the selected point in the list.
You have the following options:
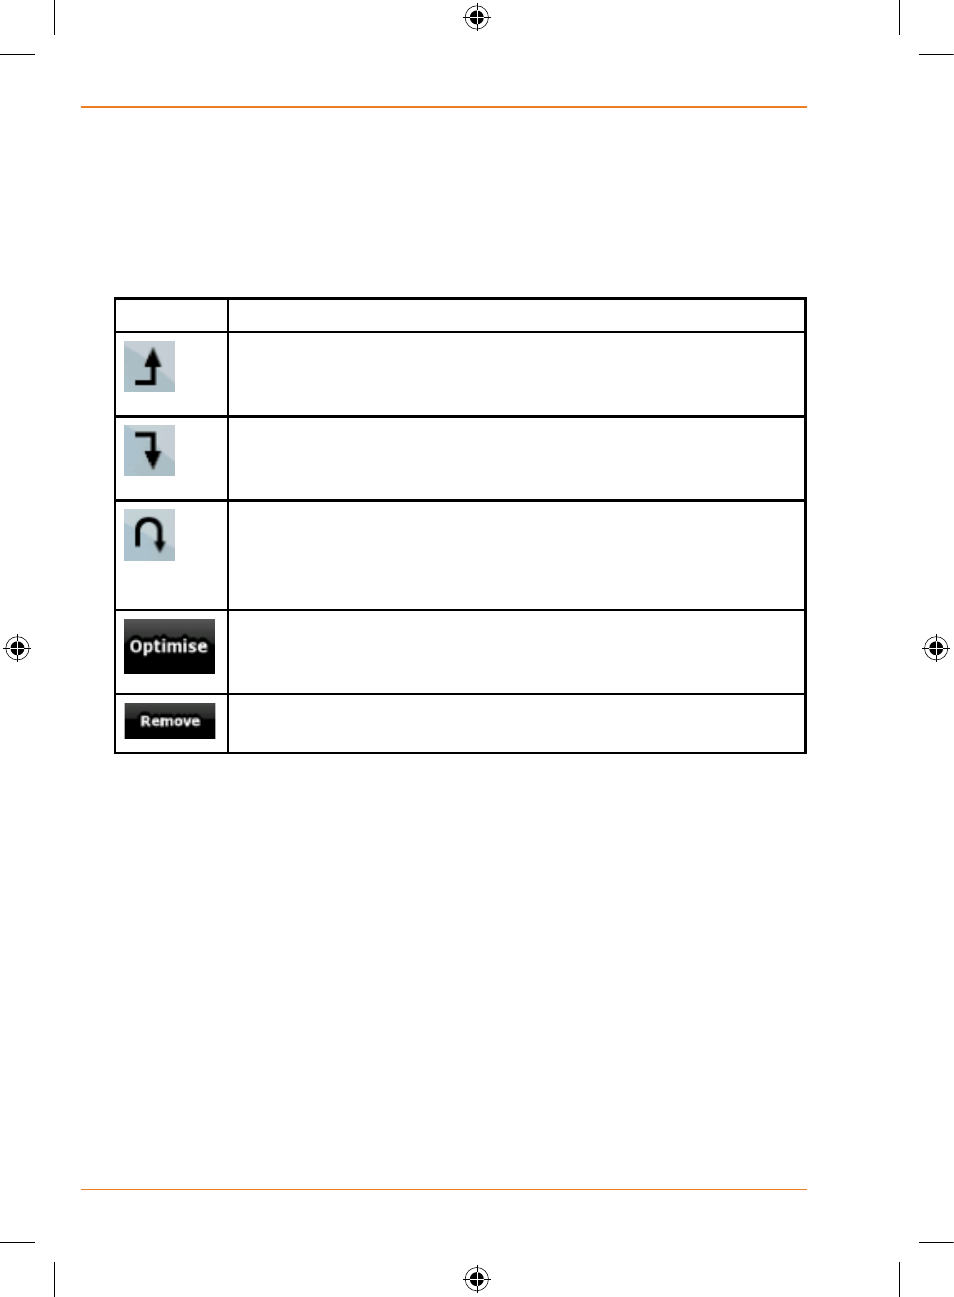
Button
Action
The selected point moves up in the list (becomes a via point
to be reached earlier). Tap this button repeatedly, and the
point becomes the start point of the route.
The selected point moves down in the list (becomes a via
point to be reached later). Tap this button repeatedly, and
the point becomes the final destination of the route.
The route is reversed. The start point becomes the
destination, the destination becomes the start point, and
all via points are to be reached in the opposite order than
before.
The route is optimised. The start point and the destination
remain at their position, but the via points are reordered to
make the shortest possible route.
The selected point is removed from the route. The route
remains as it was before adding the new point.
Every time a new point is added, the route is recalculated automatically,
and you can start navigating right away.
Creating a multi-point route (appending a new
destination)
Multi-point routes are created from simple routes, so a route must be
active first. One of the ways of expanding the route is to add a new
destination. The previous destination becomes the last via point of the
route.
This feature is available in Advanced mode only.
1. Select a new location as you did in the previous sections. This
will be the additional destination in the route.
2. The map appears with the selected point in the middle, and the
Cursor menu opens automatically.