Updating the firmware – TurboChef Technologies 2020 User Manual
Page 32
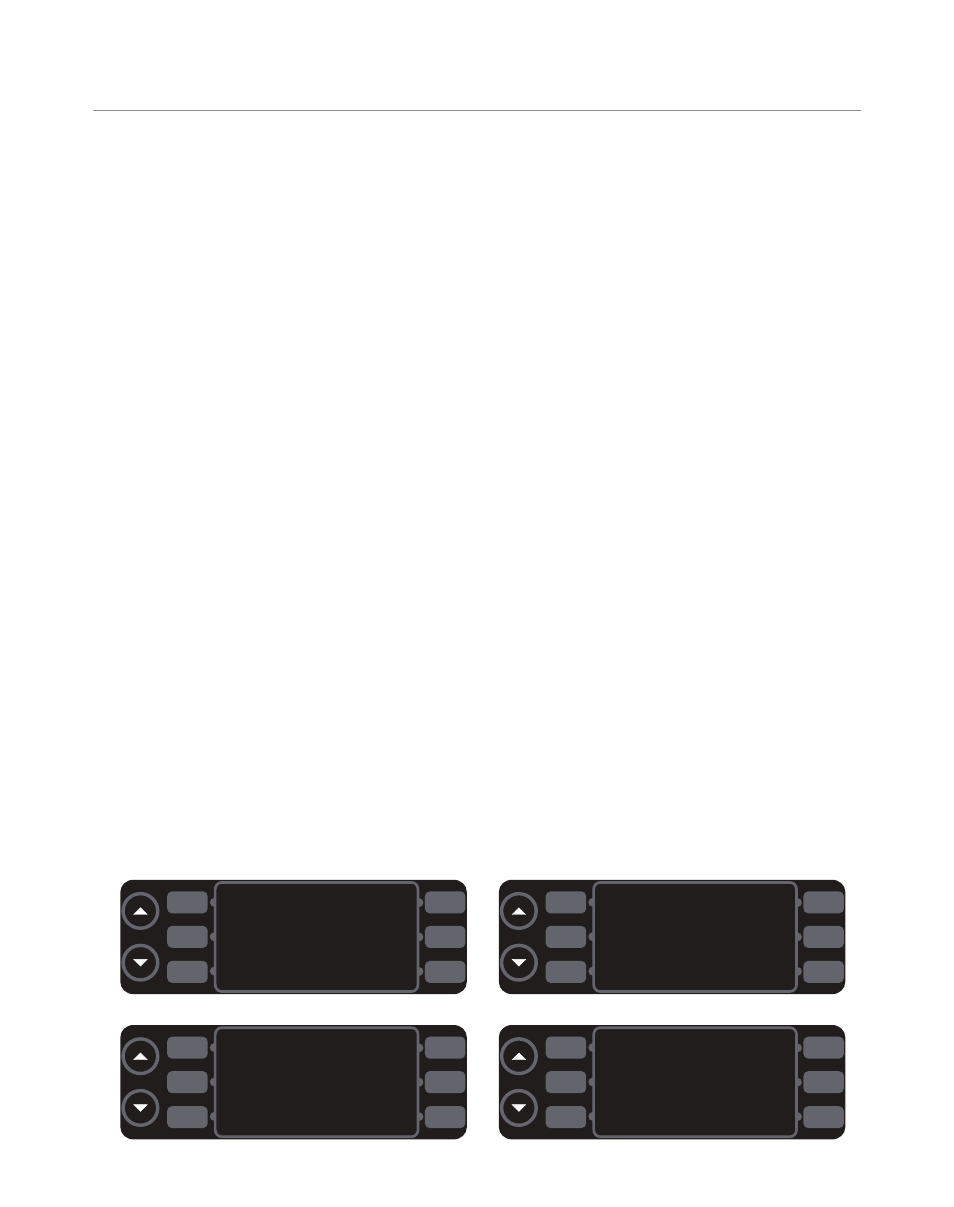
1 6
DEGS F
EDIT/RIGID/FLEX
ENGLISH
SETUP MENU
INFO
Figure 17: Setup Mode
Changing the Display Temperature
The oven can display the temperature in either
Celsius or Fahrenheit units. To change the display
temperature, press L1 in
SETUP MODE
(Figure 17).
Edit Modes Select Screen
The edit modes select screen (Figure 19) allows the
user to switch between full edit, rigid, and flex for
profile name, belt speed, temperature, and % air.
For more information on the different edit options,
see
Editing a Cooking Profile on page 11.
To access the edit modes select screen,
1. Press L3 (Figure 17) to access the password
screen (Figure 18).
2. Input the password
6 6 3 3
by pressing the
soft keys adjacent to the numbers.
To change the edit option (Figure 19),
- Press L1 to select full edit or rigid for the profile
name.
- Press L3 to select full edit, rigid, or flex for the
belt speed.
- Press R1 to select full edit, rigid, or flex for the
profile cook temperature setting.
- Press R3 to select full edit, rigid, or flex for the
% air setting.
Changing the Display Language
NOTE: Feature is not available on all oven models.
From the setup menu screen (Figure 17), press R1
to set the language to English, French, German, or
Spanish.
Info Screen
The info screen (Figure 20) is used to display the
following information in an easy to access place:
- Serial number
- Electrical compartment temperature
- Voltage
- Total time the oven has been on
- Total time the oven has been idle
- Firmware version
To access the info screen, press R3 within the
SETUP
MODE
(Figure 17).
Updating the Firmware
From the oven off screen,
1. Insert the gray smart card (see Figure 14, page
15) with the gold chip facing the front of the
oven. If multiple smart cards are required, they
will be labeled in sequence - ensure the correct
sequence is followed.
2. From the
COOLING DOWN
or
OVEN OFF MODE
,
press and hold the idle key until the oven resets
(approximately 5 seconds). The display will go
blank until the upload is complete.
3. When the oven beeps one long high tone, the
load was successful. If a second card was
provided, insert it.
4. When the oven restarts and the display turns
on, the update is complete. Remove the smart
card from the oven.
F1: 0
F2: 0
F3: 0
F4: 0
F5: 0
F6: 0
F7: 0
F8: 0
F9: 0
F10: 0
FAULT COUNTS
Figure 16: Fault Counts Screen
1
2
3
4
5
<6633>
6
ENTER PASSWORD
Figure 18: Password Screen
NAME: FULL
BELT: RIGID
EDIT MODES
SELECT
TEMP: FLEX
AIR: FLEX
Figure 19: Edit Option Screen
L1
L2
L3
R1
R2
R3
L1
L2
L3
R1
R2
R3
L1
L2
L3
R1
R2
R3
L1
L2
L3
R1
R2
R3
O V E N M O D E S