Installation site preparations, Rack mounting (optional) – TANDBERG D13187-03 User Manual
Page 13
TANDBERG Gateway
13
Installation
Installation site preparations
• Make sure that the gateway is accessible and that all cables can be easily connected.
• For ventilation: Leave a space of at least 10cm (4 inches) behind the gateway’s rear panel and 10cm (4 inches)
in front of the front panel.
• The room in which you install the gateway should have an ambient temperature between 0
o
C and 35
o
C (32
o
F
and 95
o
F) and between 10% and 90% non-condensing relative humidity.
• Do not place heavy objects directly on top of the gateway.
• Do not place hot objects directly on top, or directly beneath the gateway.
• Use a grounded AC power outlet for the gateway.
• You will need a CSU (Channel Service Unit) between your system and the PRI line from your network provider.
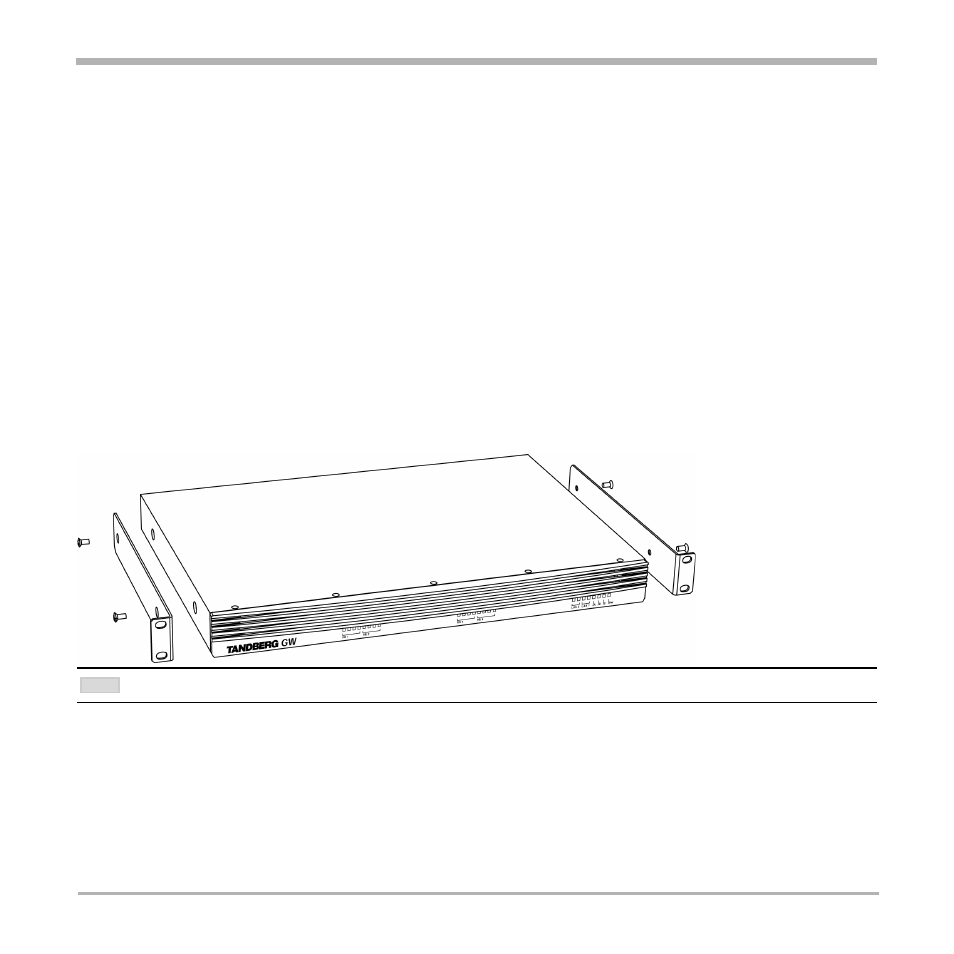
Rack Mounting (optional)
The gateway comes with brackets for mounting in standard 19” racks.
1. Disconnect the AC power cable.
2. Make sure that the mounting space is according to the ‘Installation site preparations’ (see above).
3. Attach the brackets to the gateway on both sides of the unit.
4. Insert the gateway into a 19” rack, and secure with screws in the front (four screws).
B
EFORE
STARTING
THE
RACK
MOUNTING
,
PLEASE
MAKE
SURE
THE
TANDBERG GW
IS
PLACED
SECURELY
ON
A
HARD
,
FLAT
SURFACE
.
NOTE