Olympus SZX16 User Manual
Page 24
20
Fig. 19
Fig. 20
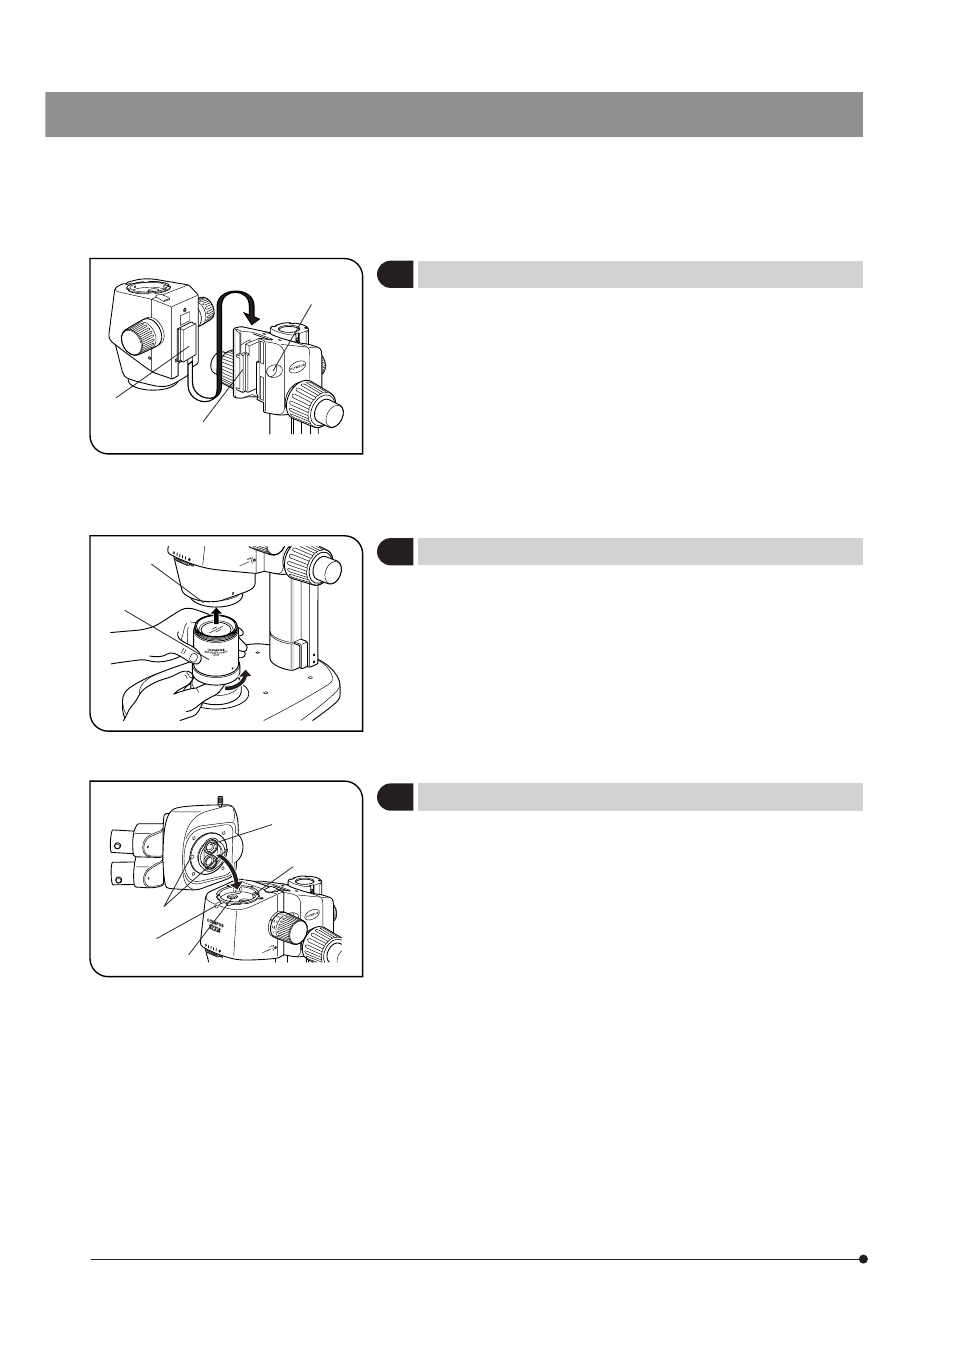
Fig. 21
3
Mounting the Microscope Body
(Fig. 19)
1. Remove the cap @ on the focusing assembly by inserting a thin object
into the notch.
2. Using the provided Allen wrench, loosen the dovetail mount clamping
screw inside the cap on the focusing assembly by rotating it by 2 or 3
turns (counterclockwise).
3. Gently insert the dovetail mount ³ on the rear of the microscope body
into the dovetail mounting port ² on the focusing assembly.
# Do not insert the mount at an angle or with excessive force, for this
may cause malfunctions.
4. When the microscope body has been inserted until it stops, tighten the
clamping screw using the Allen wrench.
5. Place the cap @ in the original position.
4
Mounting the Objective
(Fig. 20)
# Since the objective is heavy, take the following measures to prepare
for an accident in case it is dropped.
· Attach the cap to the objective tip.
· Place the cap of the objective mount thread or a notebook, etc. on the
stand to absorb the shock even when the objective drops.
While holding the tip of the objective ², mount it on the objective mount
thread @ by rotating the objective in the direction of the arrow.
5
Mounting the Observation Tube
(Fig. 21)
1. Using the Allen screwdriver, loosen the observation tube clamping screw
@ completely.
2. Aligning the positioning pin ³ of the microscope body to the positioning
groove ² on the observation tube, insert the dovetail mount | at the
bottom of the observation tube into the mounting port ƒ on the
microscope body.
3. Using the Allen screwdriver, tighten the observation tube clamping screw
@.
#The observation tube can be mounted 180° from the above position,
but this positioning makes observation difficult and is not
recommended.
When the auxiliary pillar is used, this positioning is impossible
because the eyepiece gets in the way.
@
²
³
@
²
@
²
³
|
ƒ