Connecting zone 3, Setting the multi zone, Connecting zone 3 setting the multi zone – Onkyo PR-SC5508 User Manual
Page 76: E “setting the multi zone
76
En
Zone 3 speakers must be connected to an amp in Zone 3.
Connecting Your Zone 3 Speakers
You can enjoy 2-channel stereo playback in Zone 3 and a
different source to those selected for your main room and
Zone 2.
Note
• With the default settings, the Zone 3 volume must be set on the
Zone 3 amp. If your Zone 3 amp has no volume control, set the
“Zone 3 Out” setting to “Variable” so that you can set the
Zone 3 volume on the AV controller (
➔
76).
Note
• This procedure can also be performed on the AV controller by
using SETUP, arrows, and ENTER.
■
Zone 2 Out, Zone 3 Out
`
Fixed:
The Zone 2/3 volume must be set on the amp in that
zone.
`
Variable:
The Zone 2/3 volume can be set on the AV control-
ler.
If you’ve connected your Zone 2/3 speakers to an amp
with no volume control, set the “Zone 2 Out” and
“Zone 3 Out” setting, respectively, to “Variable” so that
you can set the volume, balance, and tone of Zone 2/3 on
the AV controller.
■
Zone 2 Maximum Volume,
Zone 3 Maximum Volume
`
Off, 50 to 99 (Absolute display)
`
Off, –32dB to +17dB (Relative display)
With this setting, you can limit the maximum volume for
Zone 2/3.
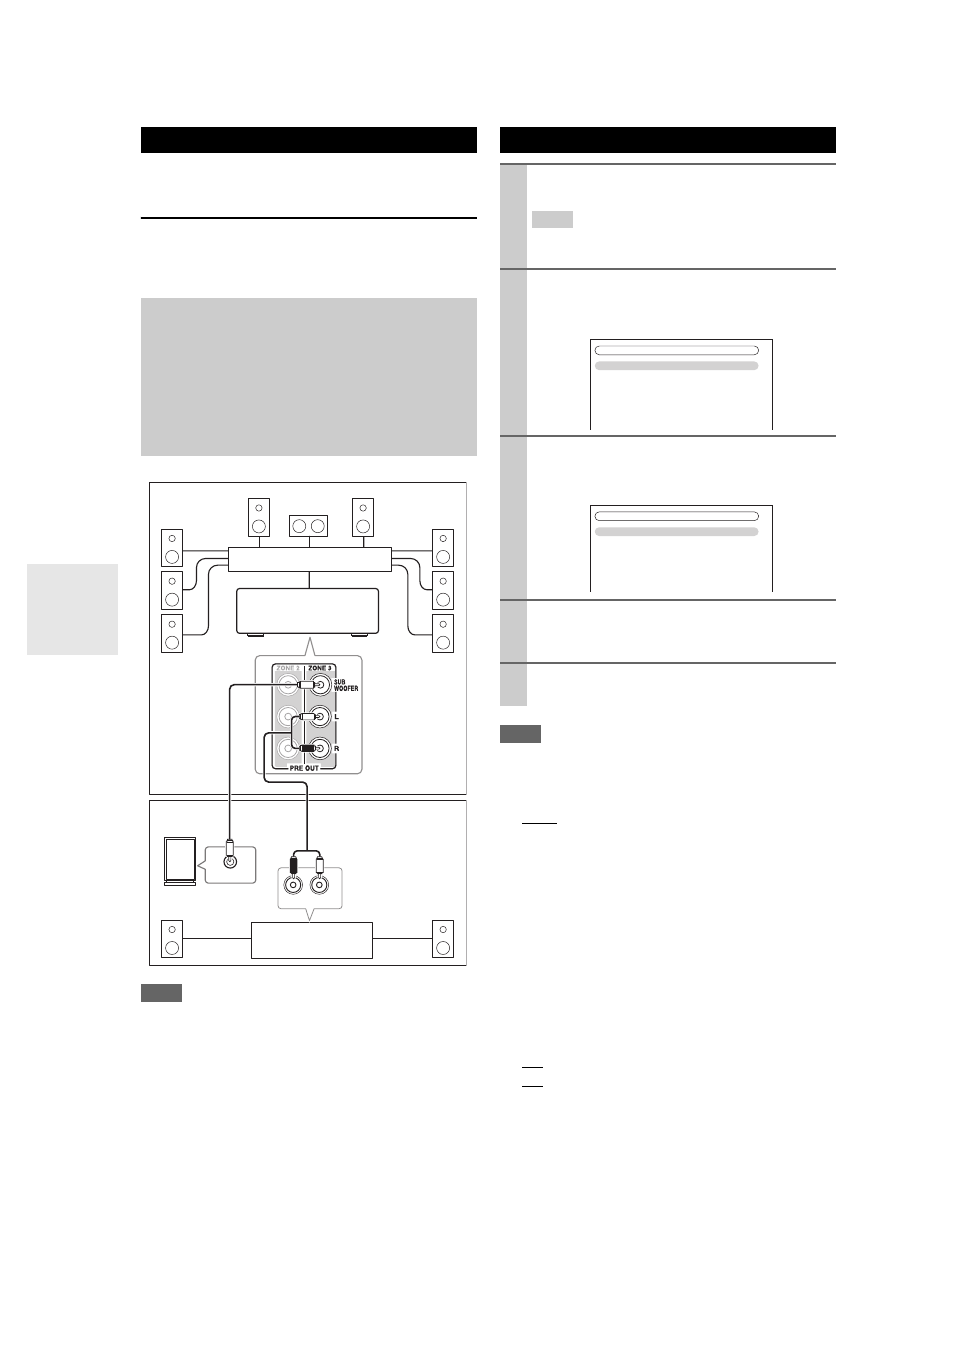
Connecting Zone 3
Hookup
• Use an RCA audio cable to connect the AV controller’s PRE
OUT ZONE 3 L/R jacks to an analog audio input on your
Zone 3 amp.
• Use an RCA audio cable to connect the AV controller’s PRE
OUT ZONE 3 SUBWOOFER jack to the line input on a
powered subwoofer in Zone 3.
• Connect your Zone 3 speakers to the speaker terminals on
your Zone 3 amp.
R
L
IN
LINE INPUT
Main room
Zone 3
AV controller
Powered subwoofer
Receiver/
integrated amp
Multichannel power amp
Setting the Multi Zone
1
Press
RECEIVER followed by SETUP.
The main menu appears onscreen.
Tip
• If the main menu doesn’t appear, make sure the appropri-
ate external input is selected on your TV.
2
Use / to select “Hardware Setup”, and then
press
ENTER.
The “Hardware Setup” menu appears.
3
Use / to select “Multi Zone”, and then press
ENTER.
The “Multi Zone” menu appears.
4
Use / to select an item, and use
/
to change
it.
The items are explained below.
5
Press
SETUP.
The setup menu closes.
7. Hardware
Setup
1. Remote
ID
2. Multi
Zone
3. Tuner
4. HDMI
5. Auto
Power
Down
6. Network
7. Firmware
Update
7-2. Multi Zone
Zone 2 Out
Zone 2 Maximum Volume
Zone 2 Power On Volume
Zone 2 Component Out
Zone 3 Out
Zone 3 Maximum Volume
Zone 3 Power On Volume
Fixed
Off
Last
Use
Fixed
Off
Last