Alignment – RIDGID SP6263 User Manual
Page 33
33
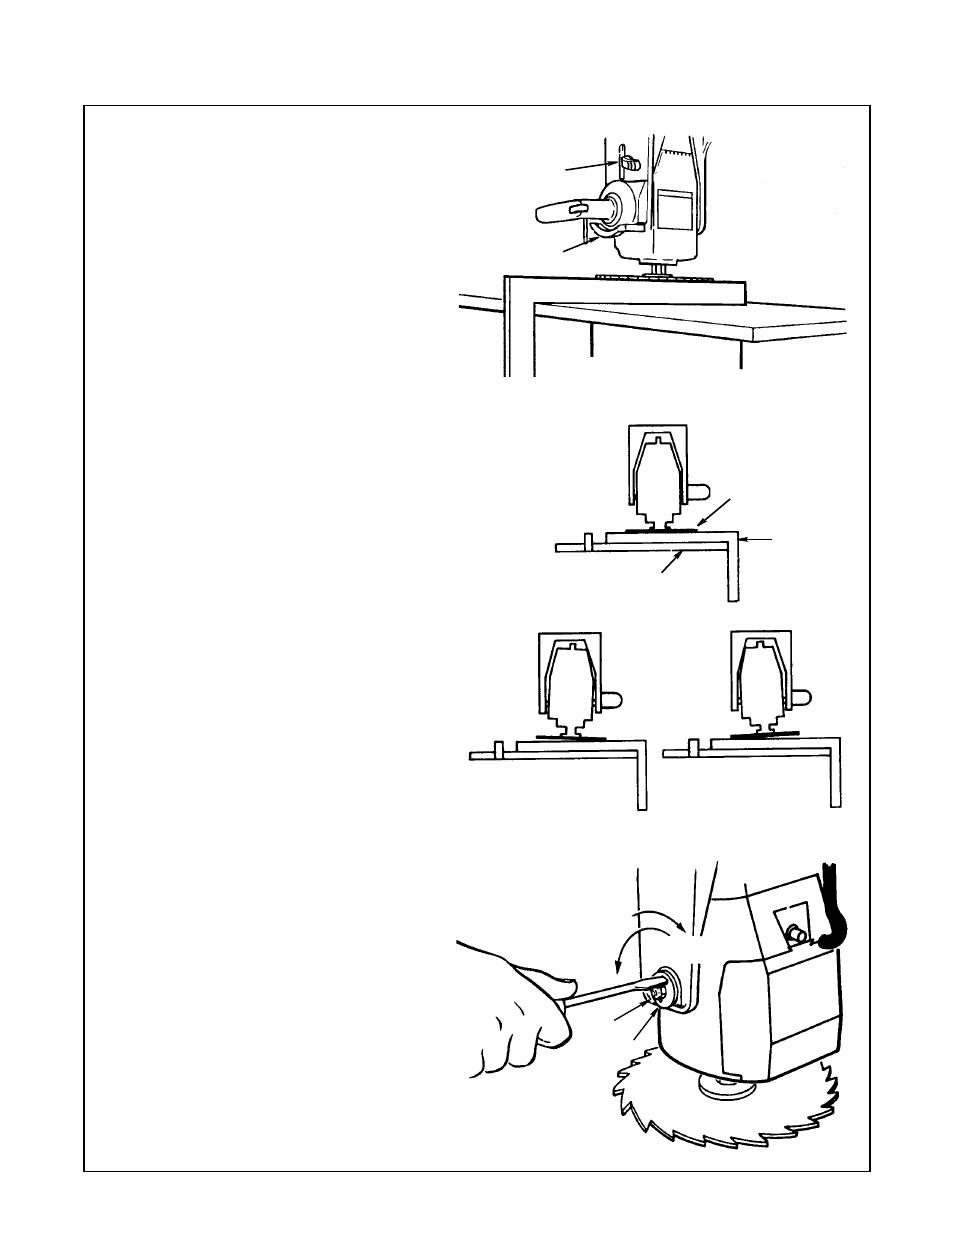
Make Blade Parallel to Table
The goal of this adjustment is to keep the
workpiece from being thrown or damaged.
This adjustment will also reduce splintering
of the workpiece and burning of the kerf dur-
ing ripping and crosscutting.
1. Lock arm in 0°miter crosscut position.
2. Pull blade forward and tighten carriage
lock knob.
3. Raise blade at least 2" above table.
Release bevel lock lever and release bevel
index lever and rotate motor 90°.
4. Lock motor at 90° bevel (blade horizontal)
with bevel lock lever.
5. Place square with long side on table
under right side of blade, and short side
hanging down vertically at front of saw.
6. Lower radial arm until blade surface, not a
tooth, just rests on square.
7. There should be no gap between blade
and square. Note:
Not all blades are perfectly flat.
Check different points along blade surface by making
quarter turns and looking for gap each time. Consider
overall fit of blade.
If there is no gap, no adjust-
ment is needed.
8. If there is a visible gap between saw
blade and square, a bevel heel condition
exists and adjustment is required.
a. To correct, unlock bevel lock lever.
Loosen the rear motor mount nut until you
can rotate Cam. Rotate Cam as shown
until gap between saw blade and square
is eliminated.
b. Tighten nut.
c. Tighten bevel lock lever and recheck
blade to square.
d. Reposition motor to crosscut position
with blade at rear of arm.
Bevel Index
Lever
Bevel Lock
Lever
Wrong
Wrong
Table
Blade
Motor
Correct
Square
Clockwise
Counter
Clockwise
Nut
Cam
Alignment