Alignment – RIDGID SP6263 User Manual
Page 28
28
The saw and blade must be aligned correctly
for two reasons:
1) To prevent binding of the blade and work-
piece, which can cause jams, kickbacks, or
thrown workpieces;
2) To make accurate cuts.
Alignment and Adjustment Steps
The following alignments and adjustments
must be made in order. If you miss an
adjustment, you must go back, make the
missed adjustment, and repeat all steps
from that point on.
These adjustments are like fine tuning a
piece of equipment. Often, a series of steps
must be repeated more than once in order to
get the adjustment right. There are many
adjustments to make. Because some adjust-
ments may be awkward, you may want to
ask someone to help you.
Before you start, make sure the framing
square is true.
Square Crosscut Travel
The goal of this adjustment is to make accu-
rate crosscuts. To do so, the radial arm must
be square to the fence, otherwise, there will
be a slight miter angle in all crosscuts.
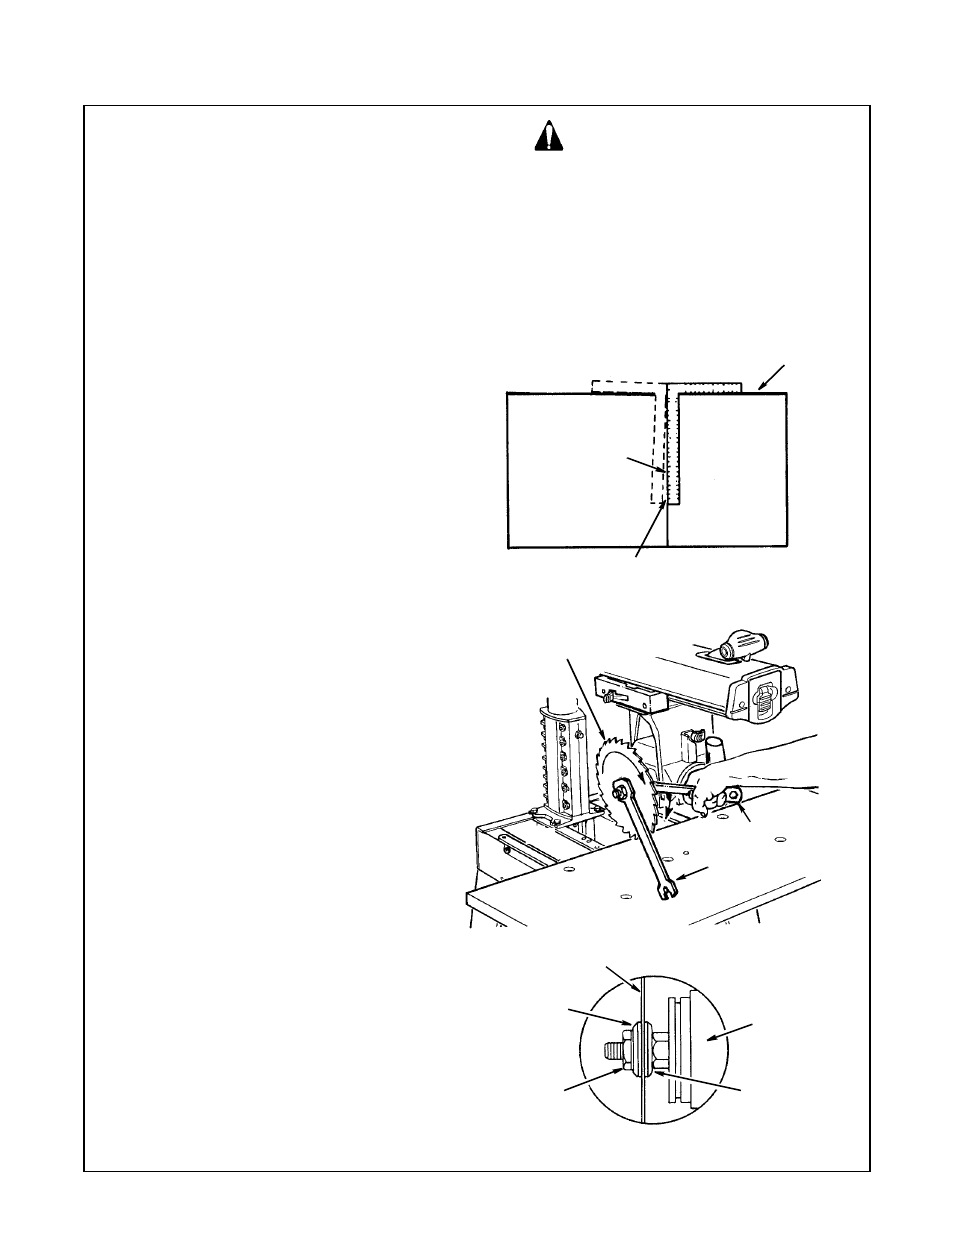
Squaring cross cut travel.
1. Index but do not lock arm at 0° miter.
2. Install saw blade as shown. Motor shaft
has left hand threads.
Note:
Do not overtighten arbor nut. Use the arbor
wrench to just "snug" it.
Check Framing Square
This edge must
be straight
Draw light
line on board
along this edge
Should be no gap or overlap here when
square is filipped over to dotted position.
Blade
Rotation
Shaft Wrench
End of arbor wrench
resting on table
Sawblade
Outer
Collar
Arbor
Nut
Inner
Motor
Collar
Alignment
WARNING
Plugging in saw
during alignment
could result in accidental start-up and
severe cuts from contact with spinning
blade.
Do not plug in saw at anytime during
alignment or adjustment.
Plug in saw only when it is to be used.