Adjustments – RIDGID SP6263 User Manual
Page 24
24
Adjusting Carriage Bearings
If the carriage bearings are loose it not only
allows the saw blade to move up, down, and
sideways but also results in inaccurate cuts.
Before following these steps make sure the
tracks (steel rods) and carriage bearings
have been cleaned by wiping them with a
clean cloth.
When properly adjusted, the top and bottom
face of all four bearing grooves should be in
contact with the arm tracks for their entire
length and carriage should roll smoothly with
some resistance.
To test for looseness between bearings and
tracks on radial arm, perform the following
steps.
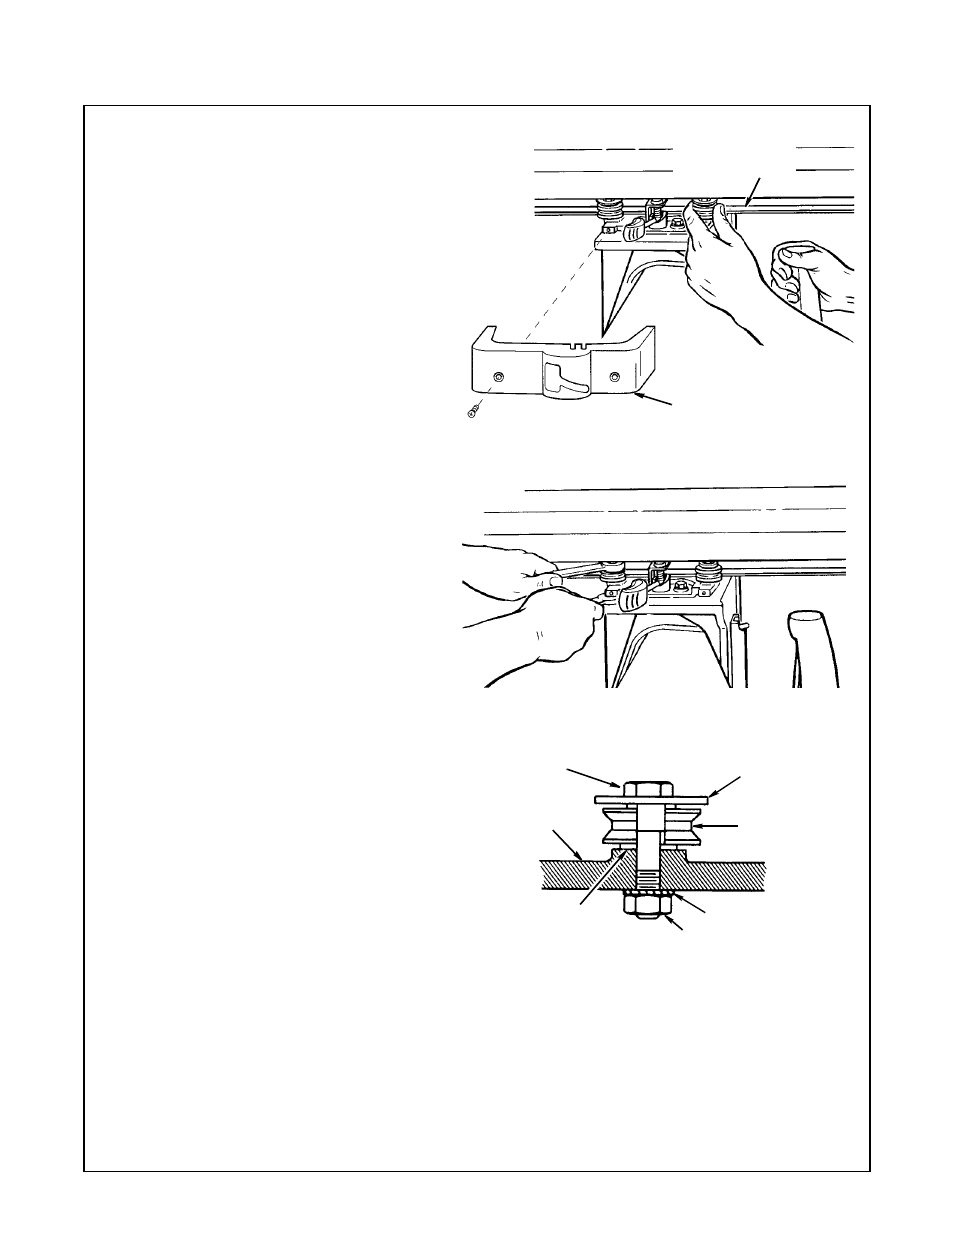
1. Remove left-hand carriage cover. (2 screws)
2. Push the carriage to its full rearward position.
3. Grasp front carriage bearing as shown
and hold as tight as possible. At the same
time pull carriage forward. If you can stop the
bearing from turning, it requires adjusting.
4. Check rear bearing in the same manner.
5. Adjust as follows:
a. Hold the eccentric screw in place with
a 9/16" wrench. Use a 1/2" wrench to
loosen the nut on the bottom just enough
to permit the eccentric screw to turn.
b. Rotate the eccentric screw a partial
turn (left or right) as required to take up
looseness.
c. Hold the head of eccentric screw in the
position established in the preceding step
and tighten nut on underside of carriage.
Correct adjustment exists when you can-
not keep the bearings from turning. How-
ever, excessive bearing pressure will
cause difficult operation and rapid wear.
d. Install carriage cover.
Wipe track on
each side with
a clean cloth
Remove Carriage
Cover
Eccentric
Screw
Carriage
Washer
Assembly
Carriage
Bearing
Lockwasher
Nut
Plain
Washer
Left Side Carriage Bearings
Adjustments