Assembly – RIDGID SP6263 User Manual
Page 17
17
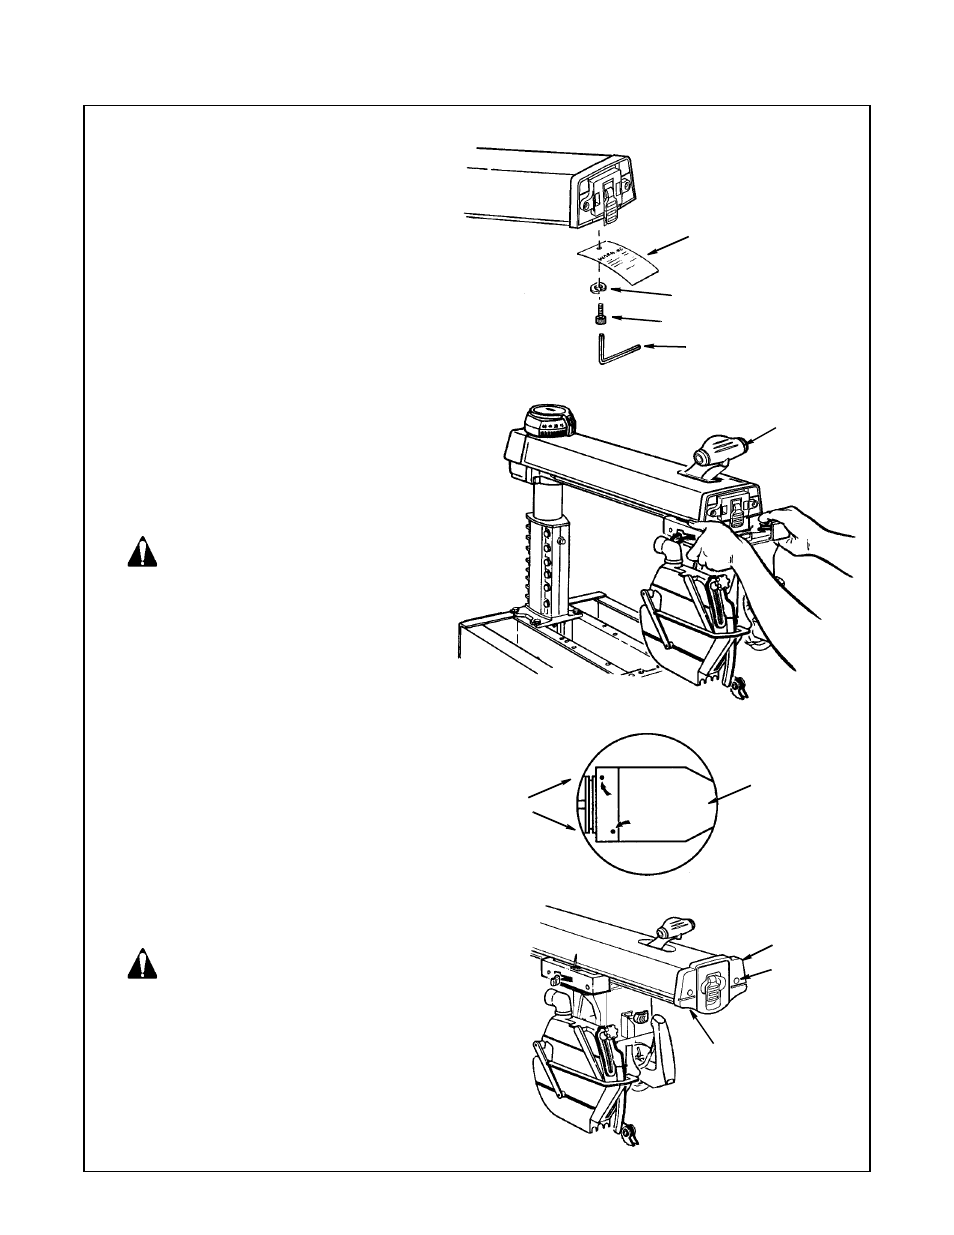
Attaching Carriage - Motor to Arm
Remove carriage stop screw, lockwasher
and tag. Read and understand warning tag
before discarding tag.
Lock miter/arm lock before proceeding.
Holding carriage assembly with both hands,
carefully start and slide the carriage onto the
tracks. The assembly must be held parallel
with the arm so that all four bearings slide
smoothly onto the arm, preventing any
excessive strain on bearings and track.
WARNING
Reinstall carriage stop screw and lock-
washer to prevent carriage from rolling
off arm. Tighten carriage stop screw
securely.
Note:
Remove two (2) motor packing studs that are
threaded into bottom of motor
.
Install arm cap.
WARNING
Make certain power cord is unplugged.
1. Insert finger under left end of switch lever
and pull out to the "ON" position.
2. Place arm cap in position and install with
(2) 10-32 x 7/8 self threading screws.
3. Push switch to "OFF" position.
Warning
Tab
Lockwasher
Stop Screw
Hex “L” Wrench 1/4 Inch
(Supplied)
Miter/Arm
Lock Lever
Push toward rear of
saw to lock
Bottom
of Motor
Packing
Studs
Screw
Arm Cap
Reinstall carriage
stop screw and
lockwasher
Assembly