Connecting the vh-11 and adjusting the td-12, Connecting the hi-hat, Making the hi-hat settings – Roland TD-12 User Manual
Page 47: Vh offset adjustment points
47
Chapter 5. Trigger Settings [TRIGGER]
Chapter 5
[TRIGGER]
Connecting the Hi-Hat
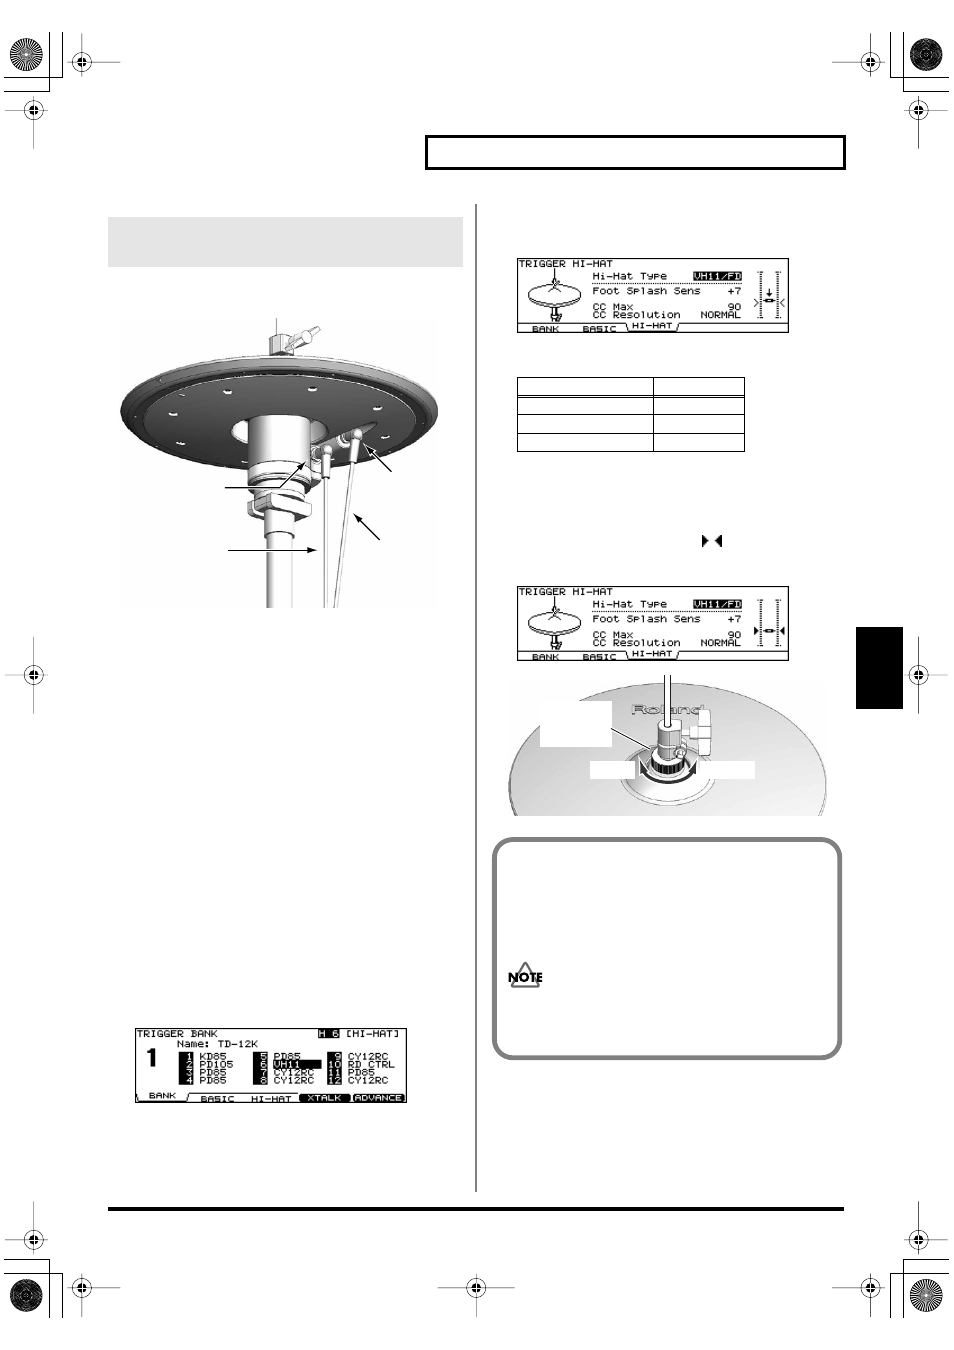
fig.VH-Connect.e
Making the Hi-Hat Settings
1.
Confirm that the VH-11 and TD-12 are
connected properly.
2.
After making sure that the hi-hat is not touching
the motion sensor unit at all, turn on the power
to the TD-12.
* The offset cannot be adjusted correctly if the hi-hat is making
contact with the motion sensor unit when the power is turned on.
3.
Loosen the clutch screw and let the hi-hat rest
naturally on the motion sensor unit.
4.
Press [TRIGGER] - [F1 (BANK)].
[TRIGGER] lights, and the “TRIGGER BANK” screen
appears.
5.
Press [CURSOR] to move the cursor to the
trigger type for TRIGGER INPUT 6.
6.
Use [+/-] or [VALUE] to select “VH11.”
fig.05-VH11-Offset1
7.
Press [F3 (HI-HAT)].
The “TRIGGER HI-HAT” screen appears.
fig.05-VH11-Offset2
8.
Confirm the TD-12’s settings.
9.
While reading the meter displayed on the right
side of the TD-12’s screen, adjust the offset
with the VH-11’s VH offset adjustment screw.
Adjust the offset so that a black
appears in the
meter.
fig.05-VH11-Offset3
fig.Offset.e
10.
If you need, make further adjustments to other
Connecting the VH-11 and Adjusting
the TD-12
TRIGGER
OUTPUT
jack
to the
TD-12’s
TRIGGER INPUT
HI-HAT jack
to the
TD-12’s
HH CTRL jack
CONTROL
OUTPUT
jack
Parameter
Value
Hi-Hat Type
VH11/FD
CC Max
90
CC Resolution
NORMAL
VH Offset
Adjustment
Screw
OPEN
CLOSE
VH Offset Adjustment Points
If the closed hi-hat sound is difficult to attain, rotate the
VH offset adjustment screw towards “CLOSE.”
If the open hi-hat sound is difficult to attain, rotate the
screw towards “OPEN.”
If the sound cuts off when you strike the hi-hat
forcefully, rotate the VH Offset adjustment screw
towards “OPEN.”
TD-12_e.book 47 ページ 2005年2月18日 金曜日 午後6時39分