16 hookups (cont’d), Mpeg2, or digital theater system), Helpful hints – Philips DVDR80/99 User Manual
Page 16
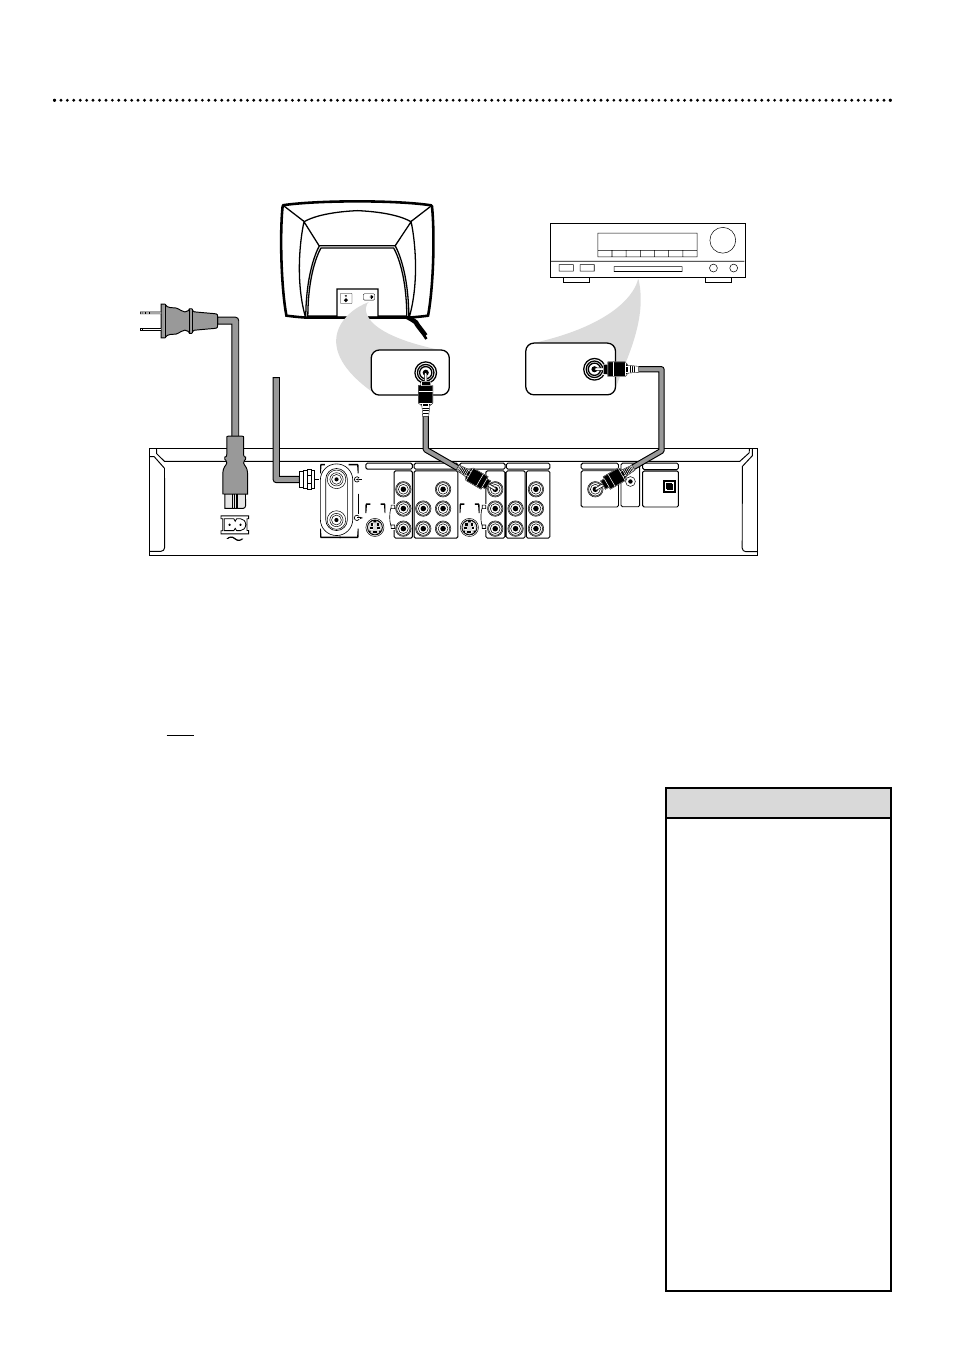
16 Hookups (cont’d)
Connecting to a TV and a Digital Stereo
(Stereo has Dolby Digital
TM
, MPEG2, or Digital Theater System)
S-VIDEO
(Y/C)
ANTENNA
TV
S-VIDEO
(Y/C)
VIDEO
(CVBS)
VIDEO
(CVBS)
COMPONENT
VIDEO
AUDIO
COMPONENT
VIDEO
AUDIO
Y
P
B
P
R
Y
P
B
P
R
IN - EXT 2
IN - EXT 1
OUT 2
OUT 1
480p/480i
COAX OUT
G-LINK
DIGITAL AUDIO OUT
OPTICAL OUT
MAINS
AUDIO
L
R
AUDIO
L
R
Back of TV
(example only)
COAXIAL DIGITAL
AUDIO IN
S-AUDIO IN
Stereo
(example only)
Antenna
or Cable TV
Signal
DIGITAL AUDIO OUT
VIDEO IN
1
Connect your Antenna or Cable TV signal to the ANTENNA jack on
the rear of the Recorder.
2
Connect one of the Recorder’s DIGITAL AUDIO OUT jacks -
COAX (coaxial) OUT or OPTICAL OUT - to a DIGITAL AUDIO
IN jack on your Stereo. You only need one connection, depending on what
your Stereo has. Use an appropriate digital audio cable (not supplied).
3
Connect the Recorder’s yellow OUT 2 VIDEO (CVBS) jack to the
VIDEO IN jack on your TV. The supplied video cable has yellow markings.
4
Connect the supplied power cord to the MAINS ~ (AC Power) jack
on the rear of the Recorder. Connect the power cords of the
Recorder, Stereo, and TV to a power outlet.
5
Turn on the Stereo and select its Digital Audio In channel or sound
source. Refer to the Stereo manual.
6
Press STANDBY-ON y
y
on the front of the Recorder to turn it on.
“IS TV ON? CH03” will appear on the Recorder’s display panel the first time
you turn on the Recorder.
7
Turn on the TV and choose its Video In channel.
It may be called AUX
or AUXILIARY IN,AUDIO/VIDEO or A/V IN, EXT1 or EXT2 or External
In, etc. Or, your TV remote may have a button or switch that selects the
Video In channel. This is not channel 3 or 4. See your TV manual for details.
Or, go to your lowest TV channel and change channels down until you see the
DVD background picture or Initial Setup.
Initial Setup will appear the first time you turn on the Recorder. Go to pages 18-20
to complete Initial Setup.
• Set Digital output. See page 59.
Otherwise the Stereo may pro-
duce a strong, distorted sound
or no sound at all.
• Your Stereo must support
MPEG2, Dolby Digital
TM
or
Digital Theater System (DTS).
Check your Stereo manual.
• You may use Component Video
or S-Video at step 3 instead for
higher picture quality. See pages
12-13.
• A small, square, black cap pro-
tects the OPTICAL OUT jack.
Remove the cap to use the
jack; replace it when the jack is
not in use.
• To watch TV with the Recorder
off, connect the RF coaxial cable
to the Recorder’s TV jack and to
the RF IN or ANTENNA IN
jack (75 ohm) on your TV. This
lets you watch channels at the
TV when the Recorder is off
and will improve TV reception.
See page 10 for this hookup.
Helpful Hints