Chapter 3 advanced photography – Konica Minolta Q-M200 User Manual
Page 23
Chapter 3 Advanced Photography
Using the Mode Setup Buttons
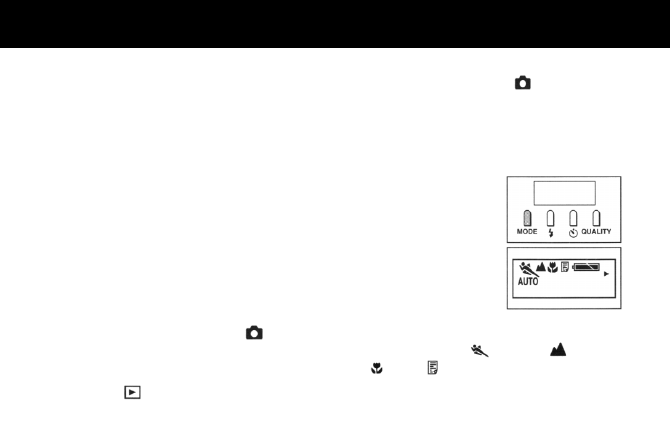
The 4 buttons (Photo mode, Flash mode, Selftimer
and Image quality mode) on the top of the camera
can be used to change the photographic settings.
These settings can be checked using the icons
displayed on the data display panel.
Photo Mode button (MODE)
Subjects are classified into four categories: sports
(rapidly moving subjects), infinity (distant subjects),
macro (close-up subjects) and text (text, black &
white) so that settings can be selected for the
appropriate mode beforehand. The initial setting is
“Standard”.
1. Set the mode select dial to Photo (
).
Note:
When the power is already turned on with
Playback (
) or set up (SET UP), set the
mode select dial to Photo (
) to cancel these
two modes and open the lens barrier automati-
cally.
2. Press the power button.
The lens cover will open automatically.
3. Press the Photo mode
button (MODE) on the
top of the camera and
set the desired imag-
ing mode. Each time
this button is pressed,
the icon on the data
display panel will
change accordingly in
the following sequence: Standard (initial setting,
no icon)→Sports [
]→Infinity [
] →Macro
[ ]→Text [ ] →Standard . . .