KORG EasyStart microX User Manual
Page 7
Installation
4
The applications you selected will be successively installed.
4
Follow the on-screen instructions to install each application.
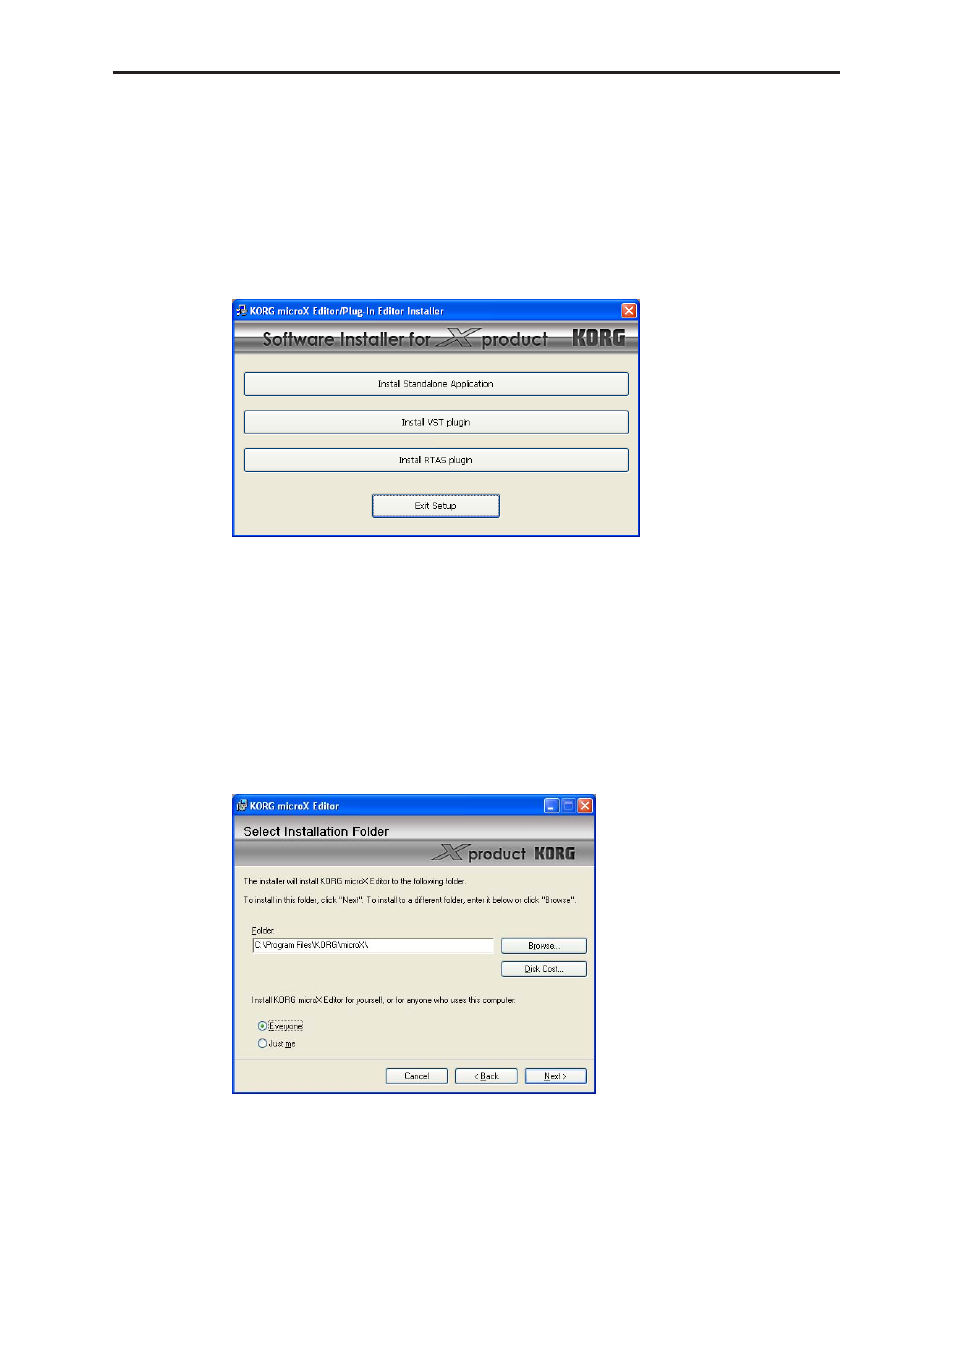
5
“microX Editor/Plug-In Editor Installer” will appear.
Successively select and install the Editor (Standalone), Plug-In Editor (VST), and/or
Plug-In Editor (RTAS) as desired.
For example if you want to install the stand-alone version, click [Install Standalone
Application].
6
The microX Editor screen will appear. Click [Next>].
7
The “Welcome to the microX Editor setup wizard” screen will appear. Click [Next>].
8
“microX Editor information” will appear. Read the displayed content, and click
[Next>].
9
The “License agreement” will appear. Carefully read the contents, and if you agree,
check “I accept the terms of the license agreement” and click [Next>].
10
The “Select installation folder” screen will appear. Choose the location and user(s) for
which you want to install the software, and click [Next>].
11
“Verify installation” will appear. To proceed with installation, click [Next>].
Installation will begin.
12
If installation is successful, click [Close].
“microX Editor/Plug-In Editor Installer” will appear.