Setting up the microx/x50 plug-in editor, Mac / pc, About the microx/x50 plug-in editor – KORG EasyStart microX User Manual
Page 12
Setup
9
Setting up the microX/X50 Plug-In Editor
If you want to use the microX/X50 Plug-In Editor with the microX/X50 connected to
your computer via USB, you must make sure that you have finished installing and
setting-up the KORG USB-MIDI Driver before you start up the microX/X50 Editor.
This section explains how to set up the microX/X50 Plug-In Editor in your host application
and make settings so that it will operate correctly. Make settings as appropriate for your sys-
tem and setup.
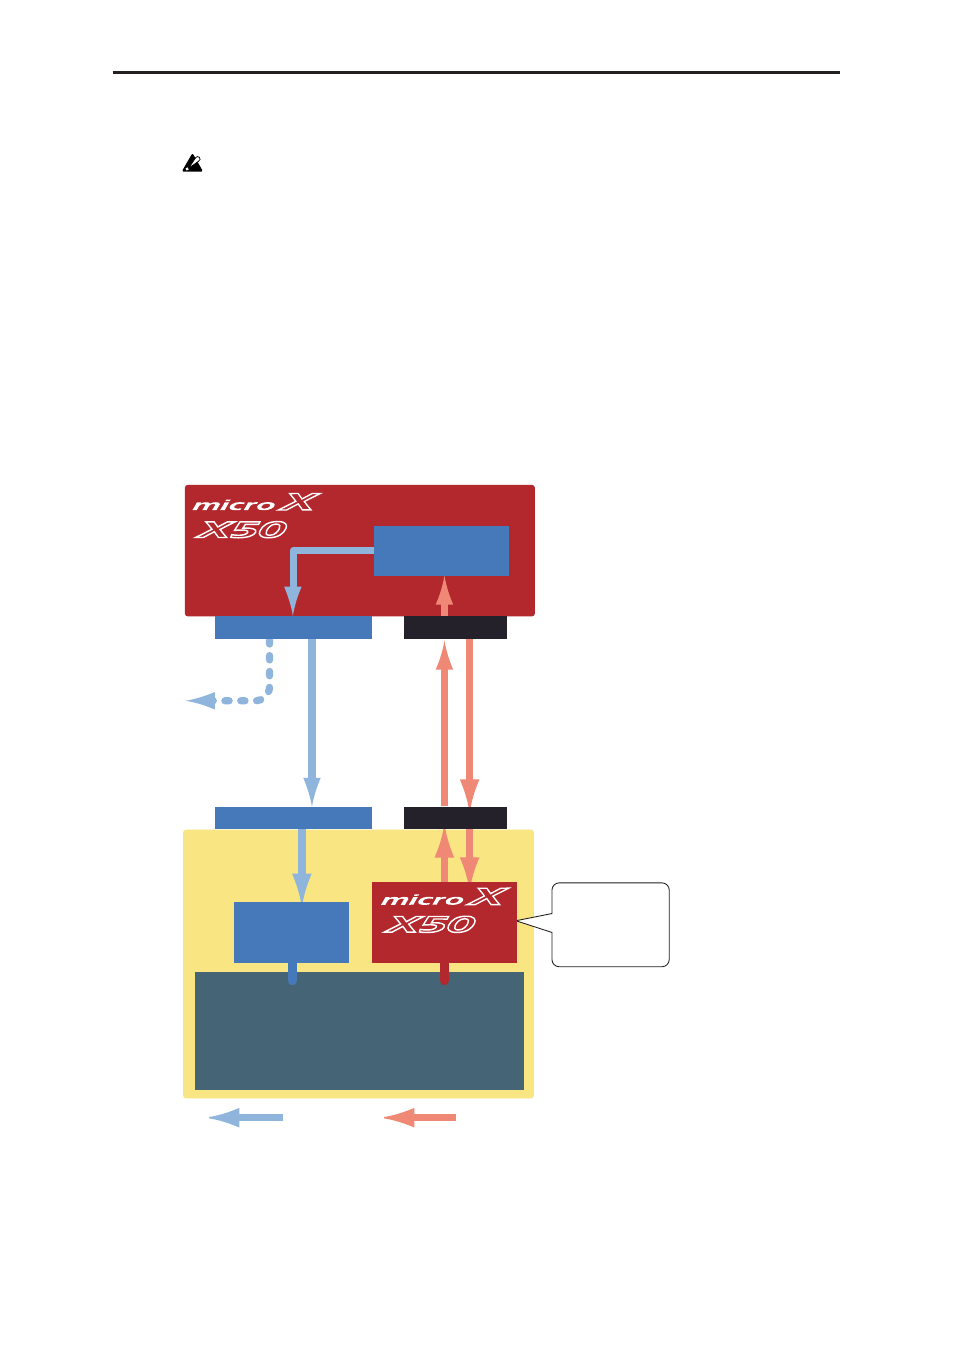
About the microX/X50 Plug-In Editor
The microX/X50 Plug-In Editor sends and receives only parameter data to and from the
microX/X50. Unlike typical plug-in instruments, the microX/X50 Plug-In Editor does not
produce an audio signal. Your microX/X50 will output audio signals when the microX/X50
Plug-In Editor sends it MIDI messages.
If you want to send the microX/X50’s audio signal to an audio track of your host application
and use it in conjunction with a plug-in effect etc., refer to “Using your host application to
control the microX/X50’s audio signal” (
Note: Because the microX/X50 Plug-In Editor does not handle audio signals, you can’t insert a
plug-in effect into the channel of the track in which the microX/X50 Plug-In Editor is
inserted, or send its audio signal via a send or bus.
to Mixer
to DAW's
Audio Track
or
Audio Track
(DAW's Audio In)
Instrument On Track
DAW
MIDI
AUDIO
Mac / PC
AUDIO OUTPUTS
Note:
Does not
produce an
audio signal.
TONE
GENERATOR
USB
USB
AUDIO INTERFACE
AUDIO I/O
INPUTS
Plug-In Editor