Woodstock SHOPFOX W1813 User Manual
Page 35
-33-
N(/(*(/Fg\e
J
M
@:<
KffcjE\\[\[
Hkp
Hex Wrench 6mm ...............................................1
Hex Wrench 8mm ...............................................1
KfX[aljkk_\jXe[`e^[ildXe[Zfem\pfigXiXcc\c`jd#
[fk_\j\jk\gj1
Efk\1Lj\k_\jXd\d\Xjli\d\ekjpfli\Zfi[\[
n_\eZ_\Zb`e^k_\gXiXcc\c`jd`ek_\gi\m`fljgifZ\$
[li\%
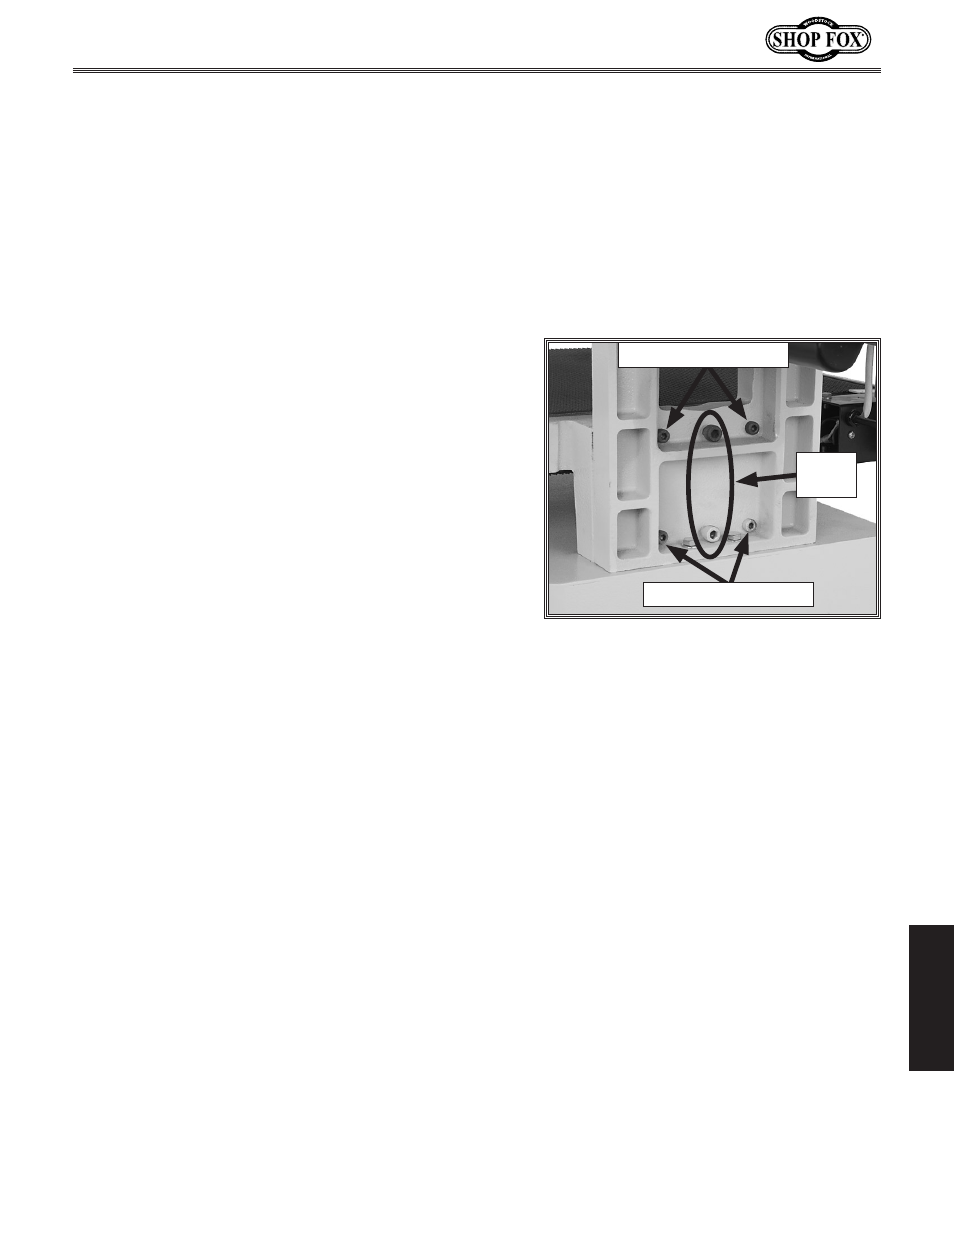
(% Loosen the four column mounting cap screws on the
right side of the column base shown in
=`^li\*(.
)% Adjust the jack screws evenly to bring the sanding
drum and conveyor parallel to each other within
0.005" from side-to-side.
— To raise the left side of the sanding drum, tighten
the upper jack screw.
— To lower the left side of the sanding drum, tighten
the lower jack screw.
*% Re-tighten the four mounting cap screws.
Note:
K`^_k\ek_\ZXgjZi\njaljklek`ck_\pXi\
jel^%Fm\i$k`^_k\e`e^k_\ddXpZ_Xe^\k_\j\kk`e^
XZZfdgc`j_\[n`k_k_\aXZbjZi\nj%
+% Surface plane an 18" wide piece of stock so that it
is the same height from side-to-side, then send it
through the sander until it is flat.
,% Use a caliper to measure this workpiece from side-
to-side.
— If these measurements differ more than 0.005",
repeat this procedure until you are satisfied with
the sanding drum and conveyor parallelism.
=`^li\*(% Column mounting cap and jack
screws.
Mounting Cap Screws
Mounting Cap Screws
Jack
Screws