Se tu p – Woodstock PORTABLECYCLONE W1823 User Manual
Page 17
-15-
Model W1823 (Mfg. Since 9/10)
SE
TU
P
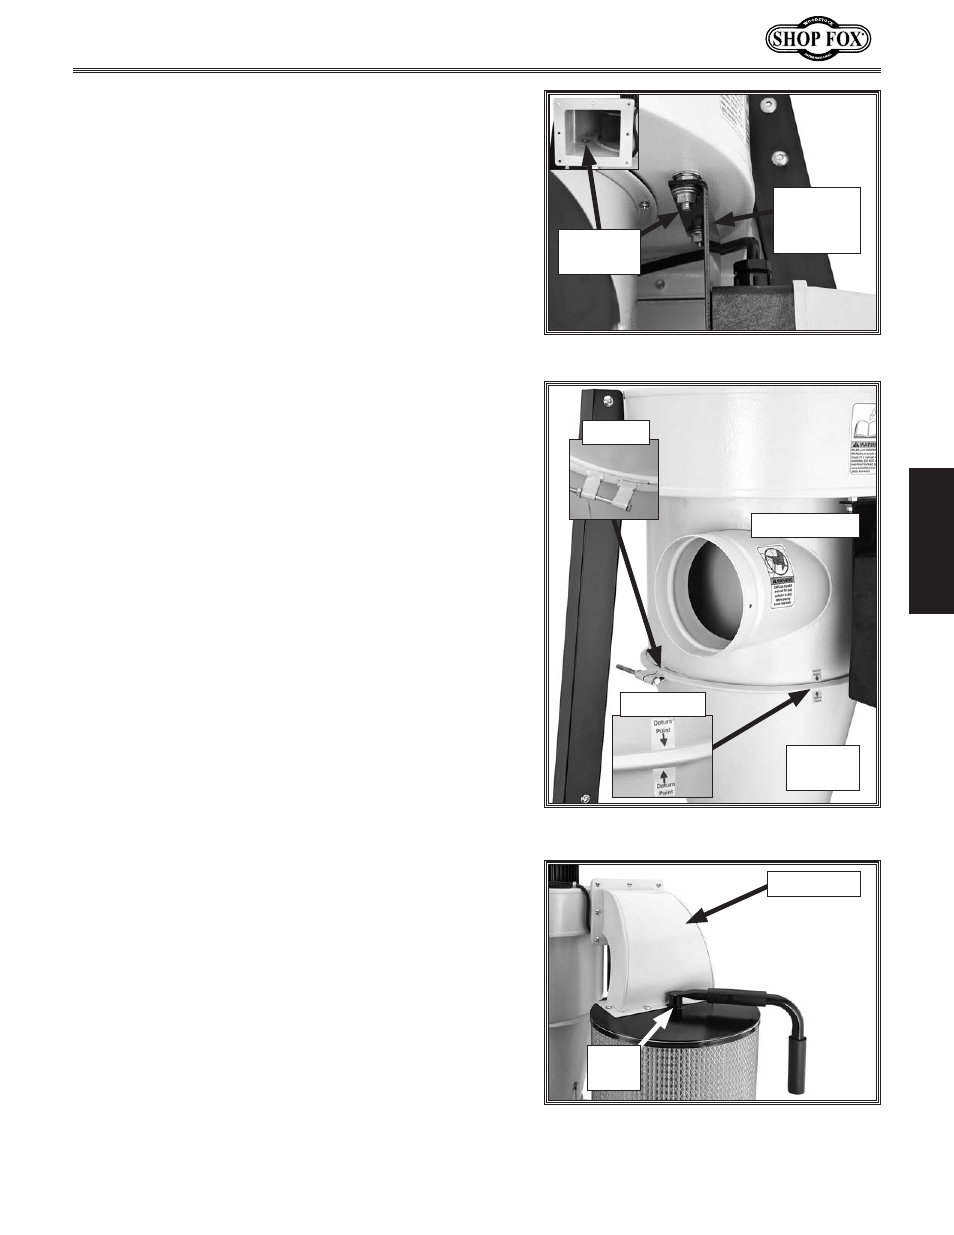
6. Using the square port in the blower housing (see
Figure 12) for access, fasten the magnetic switch
bracket on the studs with (2)
5
⁄
16
" flat washers and
(2)
5
⁄
16
"-18 hex nuts.
7. With the help of another person, lift and position the
dust collector upright, then lock the casters so the
unit will not move during the rest of the assembly
process.
Figure 12. Magnetic switch installation.
Magnetic
Switch
Bracket
9. Connect the outlet port and its larger gasket to the
filter canister with (6)
5
⁄
16
"-18 x
3
⁄
4
" button head cap
screws. Do not overtighten the screws, or the outlet
port flanges will bend and cause the gaskets to leak.
10. Have another person hold the canister filter in place
while you fasten the outlet port and its smaller
gasket to the blower housing with (8)
5
⁄
16
"-18 x
1
⁄
2
"
button head cap screws, as shown in
Figure 14.
11. Reach inside the canister filter and rotate the
cleaning flap so the flat on the filter cleaning rod
faces outward.
12. Place the cleaning handle onto the shaft, align the
flat and set screw, then tighten the set screw (see
Figure 14).
8. Have another person hold the cyclone funnel in-
place against the intake barrel, and align the datum
point labels, as shown in
Figure 13, then clamp the
cyclone funnel and the intake barrel together using
the barrel clamp. To ensure a tight seal, make sure
the clamp is tight when it overlaps, as shown in
Figure 13.
Figure 14. Filter canister installation.
Set
Screw
Outlet Port
Figure 13. Cyclone funnel installation.
Cyclone
Funnel
Intake Barrel
Overlap
Alignment
Mounting
Bolts