Assembly, Se tu p – Woodstock PORTABLECYCLONE W1823 User Manual
Page 16
-14-
Model W1823 (Mfg. Since 9/10)
SE
TU
P
Assembly
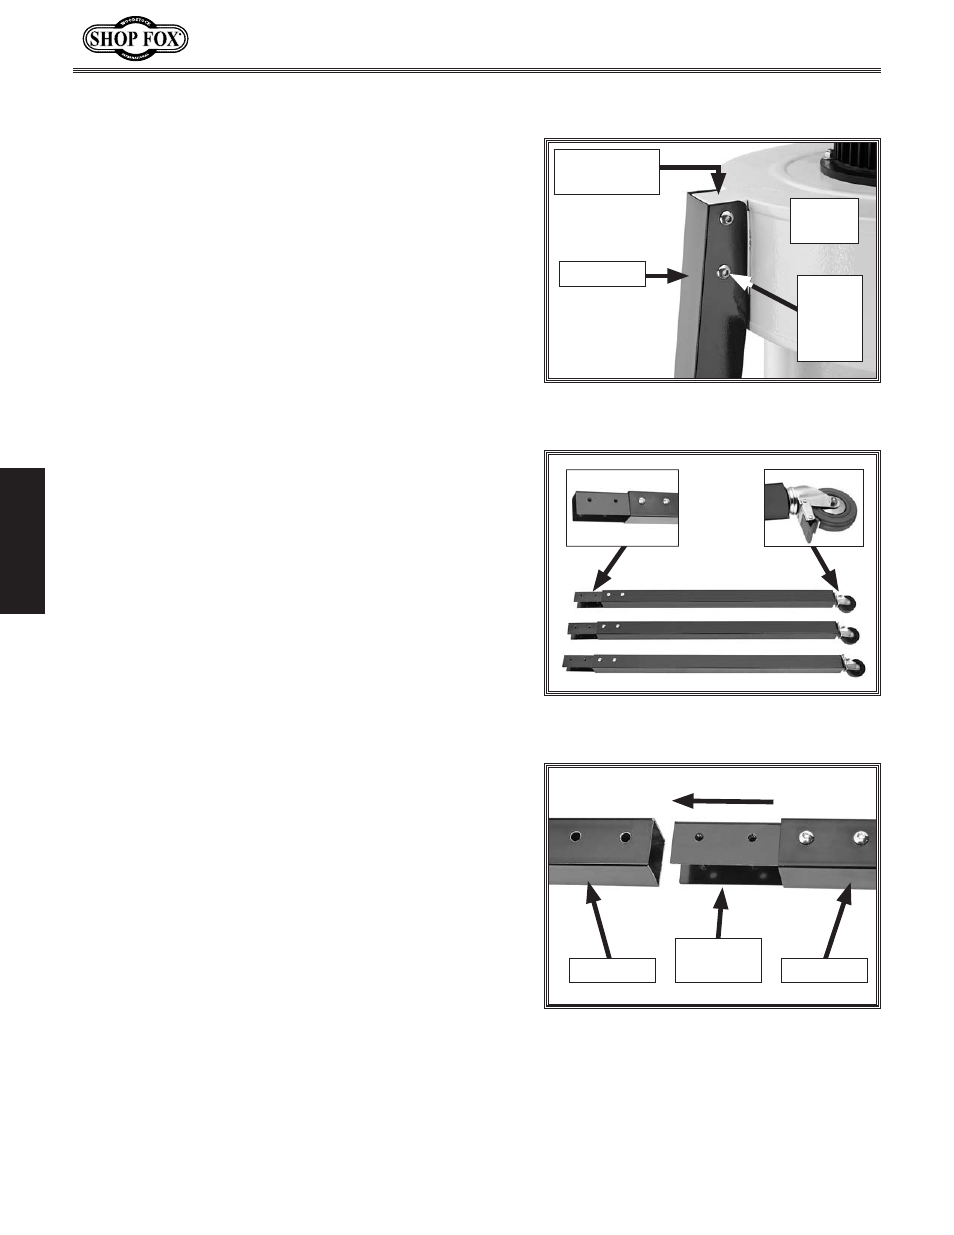
Figure 9. Upper leg installed on blower
housing leg support boss.
Before beginning assembly, refer to the inventory list and
group all fasteners with their intended components. Doing
this will make assembly easier.
When assembling this machine, tighten fasteners using
hand tools only. Avoid using air or electric impact tools
because fasteners can easily be over-tightened, causing
them to dig into the paint, strip threads, and over-
compress gaskets—causing flanges to deform and leak.
Using silicone sealant at connection points is optional.
To assemble the dust collector, do these steps:
1. With the help of another person, place the blower
housing on its side carefully as not to scratch the
paint.
2. Fasten the three upper legs to the leg support bosses
on the blower housing with (12)
5
⁄
16
"-18 x
1
⁄
2
" button
head cap screws, as shown in
Figure 9.
3. Thread the caster wheels into the lower legs and
tighten.
4. Insert and fasten the leg connectors in the lower
legs using (12)
5
⁄
16
"-18 x
1
⁄
2
" button head cap screws,
as shown in
Figure 10.
Figure 10. Lower leg connector and swivel
caster installation.
Figure 11. Inserting a lower leg into an
upper leg.
5. Insert the leg connectors into the upper legs, as
shown in
Figure 11, and secure together with (12)
5
⁄
16
"-18 x
1
⁄
2
" button head cap screws.
Note: You will notice that the bolt pattern in the
upper legs and the leg connectors (Figure 11) is
off–center to ensure that the lower legs can only be
installed in the correct direction.
Upper Leg
Blower
Housing
Leg Support
Boss
Leg
Connector
Lower Leg
Upper Leg
Button
Head
Cap
Screw