Star Trac E-TRi User Manual
Page 22
S
TEP
13
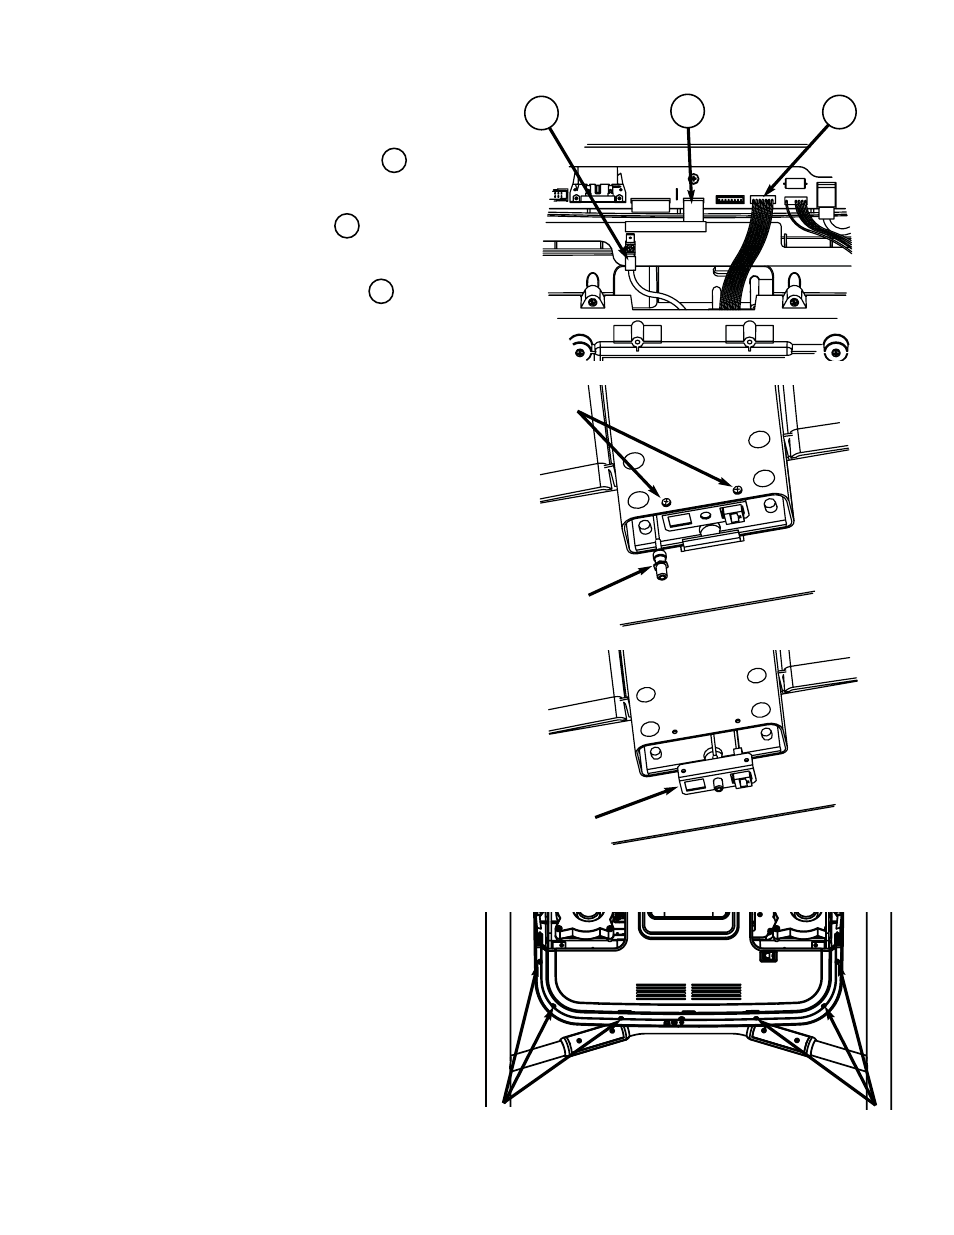
From below the display, connect the Center
Console Ground Cable to the
Quick
Disconnect Tab on the display mount.
Connect the Keypad Tail to the
Keypad con-
nector on the display PC board.
Connect the Interface Cable to the
Interface
connector on the display PC board.
S
TEP
14
Go to the base of the treadmill neck. Using a #2
Phillips screwdriver, remove the (2) screws that
hold in the RF cable Mounting Bracket. Retain the
screws for later use.
S
TEP
15
Remove the nut and washer from the F-Type con-
nector on the end of the coax cable you fed down
the treadmill neck, then put connector through the
Mounting Bracket. Replace the nut and washer,
and tighten the nut snugly.
Next replace Mounting Bracket into the neck, using
the screws retained from previous step. Tighten
with a #2 Phillips screwdriver.
S
TEP
16
Replace the bottom back plastic. Using a #2
Phillips screwdriver insert the (6) screws, retained
from earlier step, into the plastic and tighten snug.
Caution: Do Not over tighten screws.
7
4
5
22
STAR TRAC P
ERSONAL
V
IEWING
S
CREEN
O
WNER
’
S
G
UIDE
Screws
Screws
Mounting
Bracket
Screws
F-Type
Connector
5
4
7