Star Trac E-TRi User Manual
Page 15
S
TEP
16
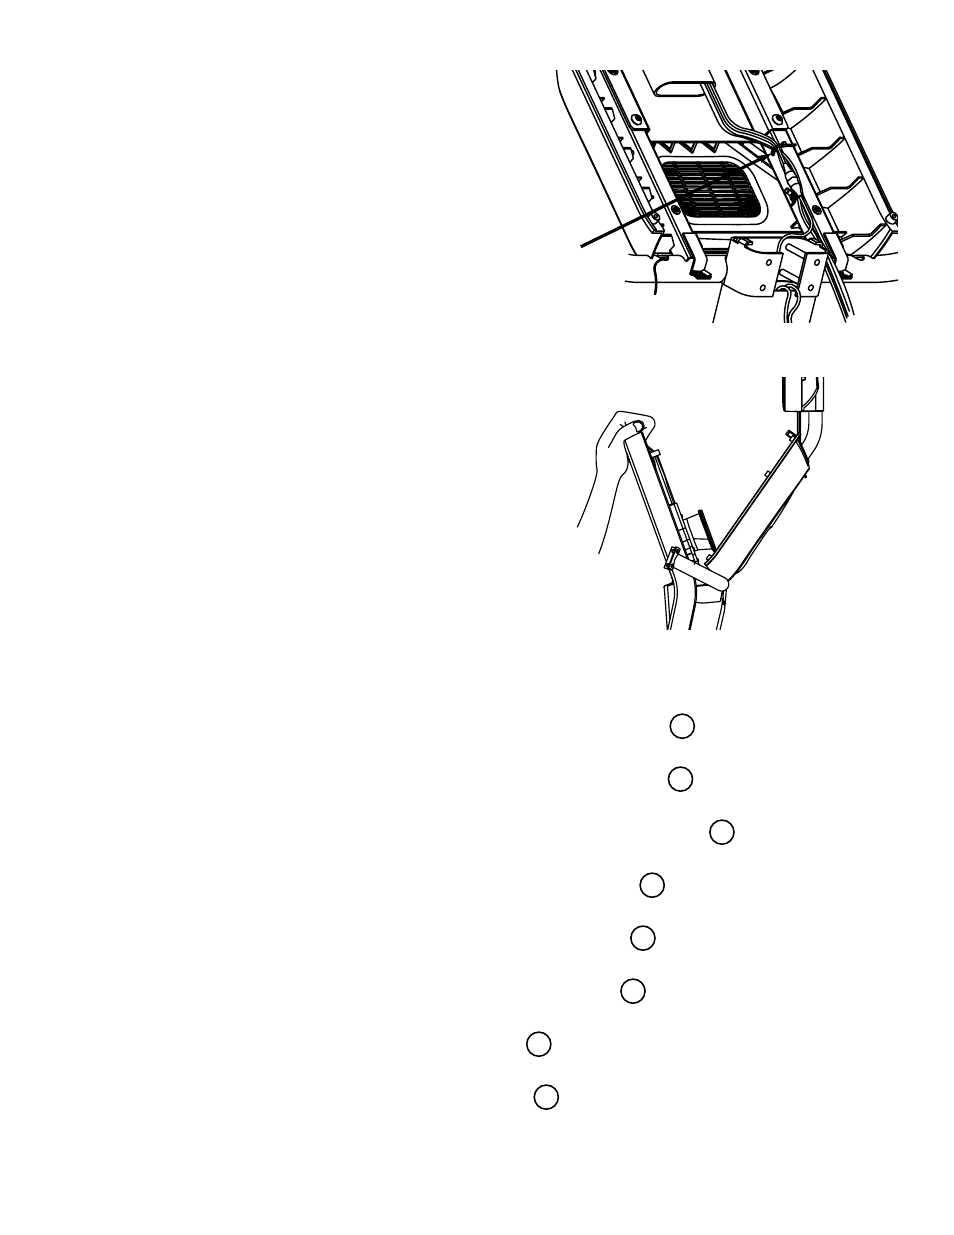
Using a tie wrap from the PVS kit, bind the cables
from the PVS neck to one side of the display
mount. Take the tie and put it through the hole on
one of the display mount tubes.
S
TEP
17
Now, take the front display plastics with the new
Center Console to the base unit. Hold the front
display plastics at the top with one hand while con-
necting the cables/harnesses with the other. There
is no particular order in connecting the
cables/harnessing. However, it may be best to start
off connecting the cables/harnessing coming from
the neck of the base unit.
S
TEP
18
CABLES to be connected. (Refer to drawing on previous page for connection points on the display
front.)
STAR TRAC P
ERSONAL
V
IEWING
S
CREEN
O
WNER
’
S
G
UIDE
15
• Connect the 12 pin serial cable from the base frame neck to the
12 pin socket on
the display.
• Connect the Heart Rate cable from the display support tube to the
Heart Rate board
on the display.
• Connect the DC power from the base frame neck to either one of the
DC connec-
tors on the front display center console board.
• Connect the DC power from the PVS display neck to the other
DC connector on the
front display center console board.
• Connect the Remote cable from the PVS display neck to the
Remote connector on
the front display center console board.
• Connect the RCA cable from the PVS display neck to the
RCA connector on the
front display center console board.
• Connect the Ground cable from the front display
Heart Rate board to one of the ter-
minals on the display mount.
• Connect the Ground cable from the front display
Center Console to one of the ter-
minals on the display mount.
5
2
4
7
6
6
3
1
Tie Wrap