Star Trac E-TRi User Manual
Page 21
S
TEP
10
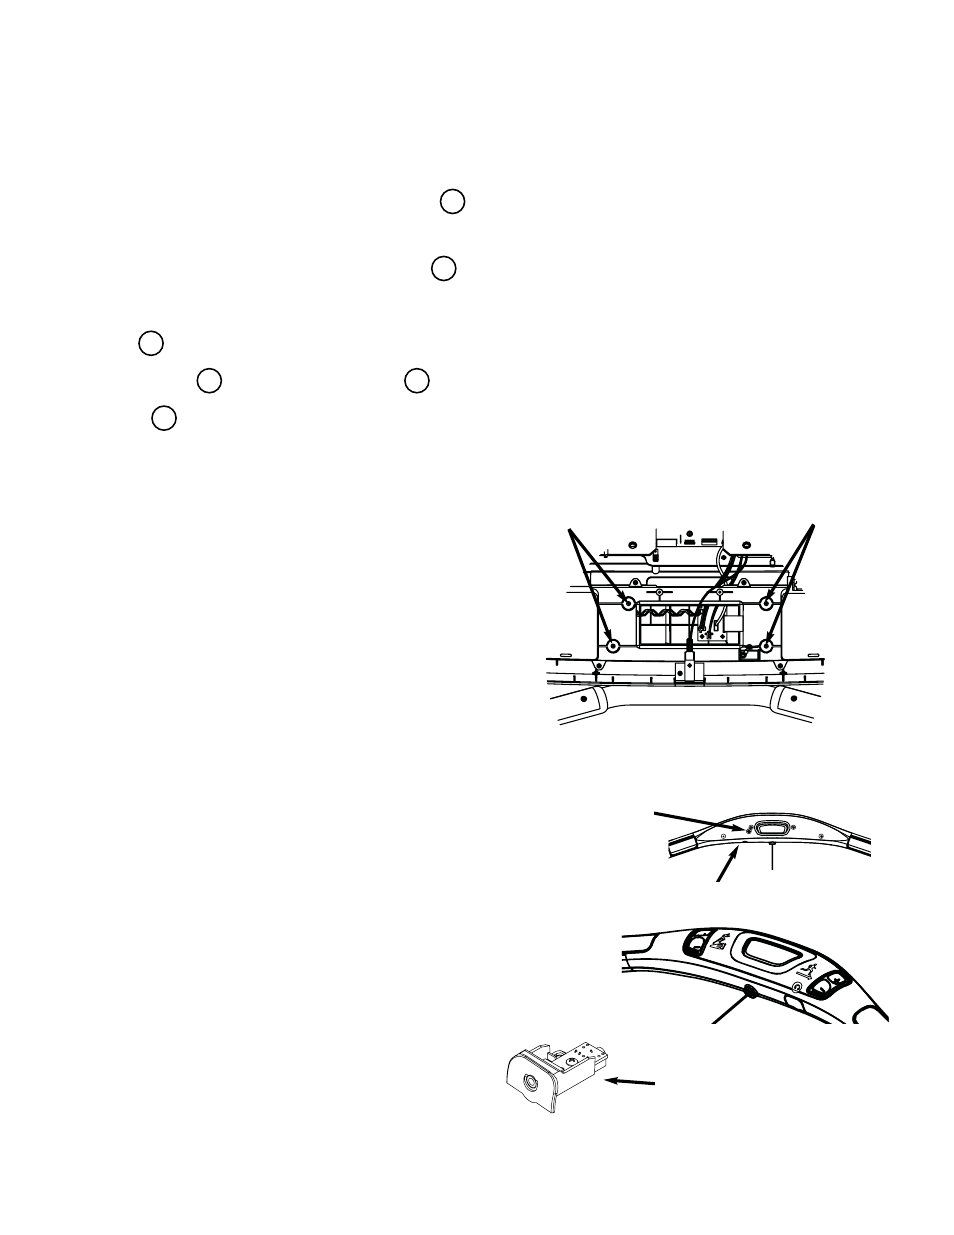
While holding the New Center Console near the opening of the display, connect the following cables
to there approprate connector.(There is no particular order)
S
TEP
11
Close the Center Console. Using a #2 Phillips
screwdriver, take the screws retained from earlier
and screw in the (4) screws from below that hold in
the center console. Tighten the screws snug.
S
TEP
12
Note: If you have an E-TR skip this step.
Using a #2 Phillips screwdriver, remove the screw
that holds in the Blank Head Phone Jack Cap at
the lower front of the Hot Bar. Retain the screw.
You will no longer need the cap and, if desired, you
can store it away for any possible future use. Now
take the Head Phone Jack from the PVS CC hard-
ware kit. Conect the Head Phone Jack to the cable
in the jack opening. Use the previously retained
screw to reinstall the Headphone Jack. Tighten
snugly.
STAR TRAC P
ERSONAL
V
IEWING
S
CREEN
O
WNER
’
S
G
UIDE
21
Plug in the (2) DC power cables to the
DC connectors, (they are the same so it
does not matter which goes to which).
Plug in the PVS Remote Cable to the
PVS Remote Connector.
Plug in the RCA Cable to the Video (6-pin) and the Audio (2-pin) connector, respective-
ly ,
RCA Connectors.
Take the
Keypad Tail, and the
Center Console Ground and feed them through
the
Cable Window.
1
7
5
6
3
2
Screws
Screws
Blank Cover
Screws
E-TRx Head
Phone Jack