Lens lock unlock – JVC DLA-M4000LU User Manual
Page 30
No.51666
DLA-M4000LU
DLA-M4000LE
58
Setting Up (or Changing) the Display Size (Cont.)
Operating the Main Menu (Cont.)
■
Remote control unit
■
Main menu
Note
• The selected item is shown in magenta color. Items shown
in gray color cannot be operated or set in the current mode.
MEN
U/E
N
T
E
R
QUICK
ALIGN.
AV HIDE
OPERATE
PRESET
AV
SHIFT
ZOOM
FOCUS
LENS
U
T
+
D
W
–
RGB/COMPUTER
LENS
LOCK
UNLOCK
PAGE BACK
PAGE BACK button
MENU/ENTER button
Submenu item [DISPLAY SIZE]
■
To return to the main menu, press PAGE BACK. To finish
the main menu, press PAGE BACK again.
Adjustment item
Contents of adjustment
H PIXEL
Adjusts the number of horizontal effective dots.
Adjustment value (640
Ô
1360)
V PIXEL
Adjusts the number of vertical effective dots.
Adjustment value (350
Ô
1024)
H CENTER
Adjusts the horizontal display position.
Adjustment value (0
Ô
639)
V CENTER
Adjusts the horizontal display position.
Adjustment value (1
Ô
511)
N T S C ( 4 8 0 i )
E N G L I S H
P I X E L C L O C K
P O S I T I O N
P I C T U R E
O P T I O N S
S O U R C E
C H A N N E L
U S E R S O U R C E S E T U P
D I S P L A Y S I Z E
D E C O D E R
L A N G U A G E
C O M P 1
A U T O
S X G A 1
59
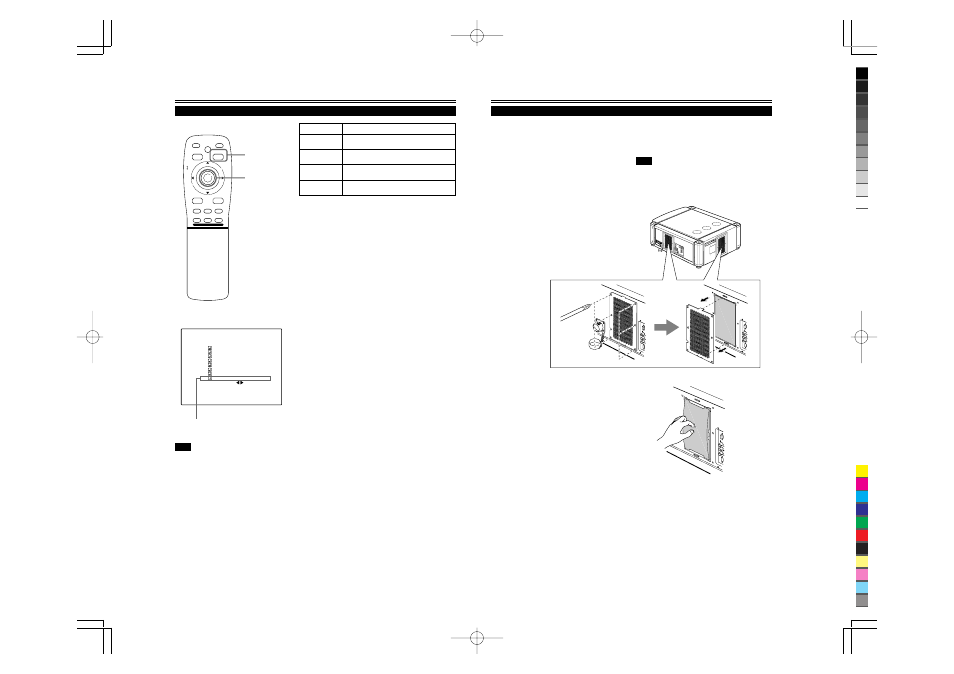
Filter Maintenance and Light-Source Lamp Replacement
Note
• If the filter is clogged with dirt, etc., the projector goes into an
emergency mode (the EMERGENCY indicator blinks).
So, clean the filter periodically. For the emergency mode, refer to
pages 8 and 24.
1
Bring the projector into stand-by
state, and turn off the MAIN POWER
switch.
Put the projector into stand-by, and make sure the STAND
BY indicator is lit, then tun off the MAIN POWER switch.
After that, disconnect the power cord from the wall outlet
and the projector. For detailed procedures, refer to
“Turning off the power” (page 25).
2
Remove the filter cover screws.
Using a Phillips screwdriver, remove the six screws fixing
each filter.
Two filters are used, one on the right side and the other
on the back of the projector.
3
Remove the filters.
To remove the filter, pinch the center portion of the filter
with your fingers and pull it toward you.
(The filter is held by four tabs.)
There are two filters used.
Cleaning and Replacing the Filter
The filters should be cleaned periodically. If they are heavily stained, do not become clean if cleaned, or are damaged, replace
them with new filters (Parts number: LC30505); otherwise, dirt and dust may get inside, possibly causing an adverse effect on
the screen and preventing you from enjoying clear pictures.
■
The projector has two filters installed, one on the right side and the other on the back.
(To be continued on the next page)