Getting started, Power, Supply power – JVC YU30052-513-2 User Manual
Page 6: Attach battery pack, Detach battery pack
6
GETTING STARTED
Power
This camcorder’s 3-way power supply system lets you
choose the most appropriate source of power.
NOTES:
● No function is available without power supply.
● Use only specified power supply.
● Do not use provided power supply units with other equipment.
CHARGING THE BATTERY PACK
SUPPLY POWER
1
Connect the charger’s AC power cord to a wall
outlet. The power indicator lights.
ATTACH BATTERY PACK
2
Align the marks and slide the battery pack in the
direction of the arrow until it locks in place.
The CHG. indicator lights.
DETACH BATTERY PACK
3
When charging is completed, the END indicator
lights. Slide the battery pack opposite the direction
of the arrow.
BATT. PACK
CHARGE
DISCHARGE
BN-V12U
approx. 1 hr. 10 min.
approx.
3 hrs. 30 min.
BN-V22U
approx. 2 hrs. 10 min.
approx. 7 hrs.
BN-V25U
approx. 2 hrs. 40 min.
approx. 10 hrs.
REFRESH indicator
REFRESH switch
CHG. (charge) indicator
To AC outlet
Marks
END
indicator
Hook on.
Push in.
BATT. RELEASE
POWER
indicator
**REFRESH
The AC power adapter features a REFRESH function that
allows you to fully discharge the battery pack before
recharging.
To discharge the battery . . .
.... attach the battery pack to the adapter as shown in the
illustration to the left. Then push REFRESH. The
REFRESH indicator lights when discharging starts,
and goes out when discharging is complete.
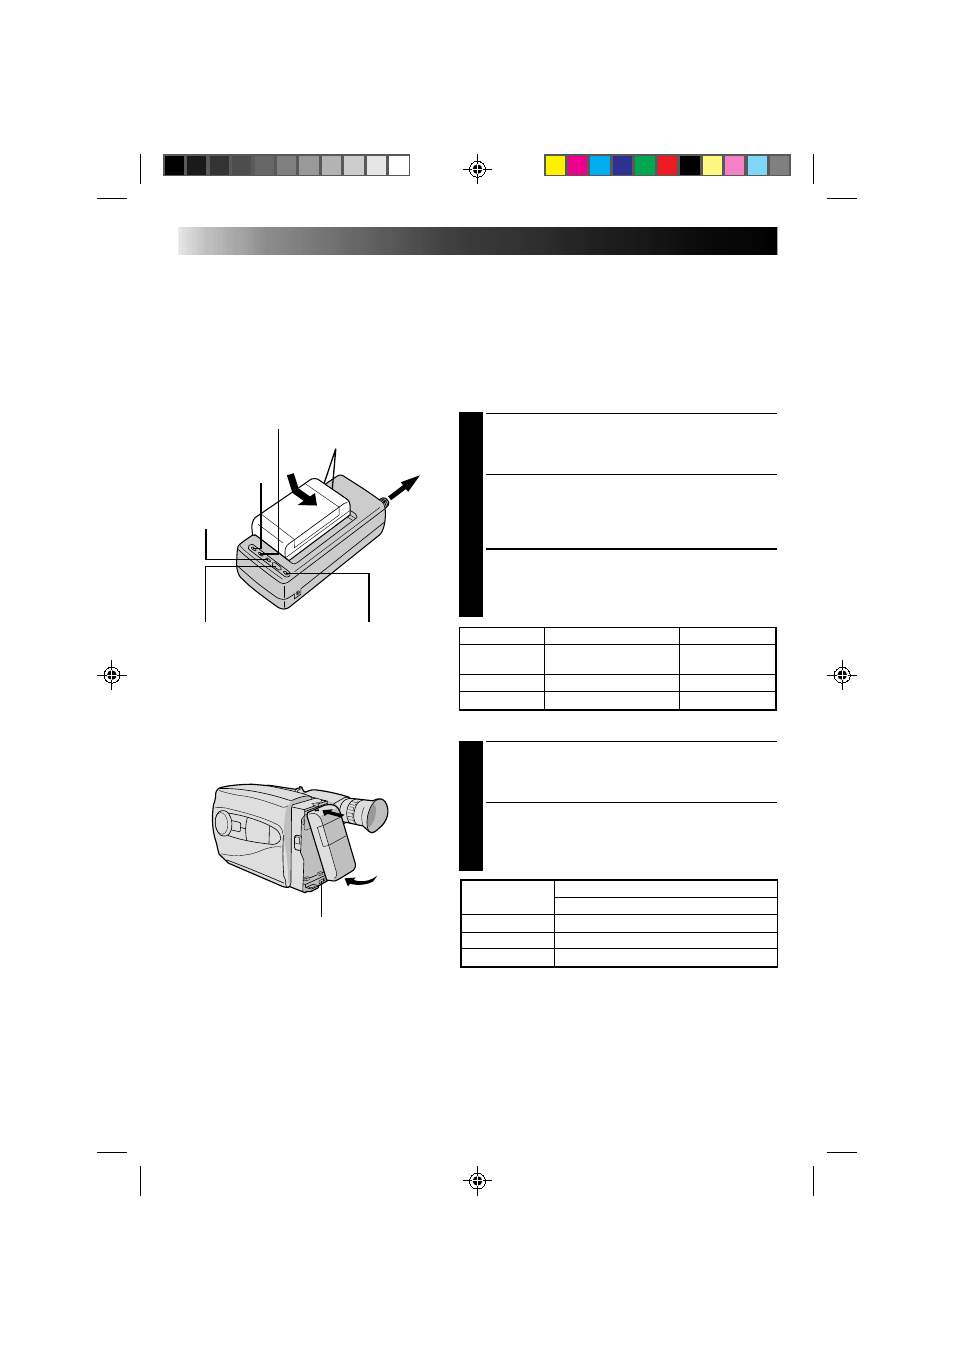
USING THE BATTERY PACK
ATTACH BATTERY PACK
1
Hook its top end to the camcorder and push the
battery pack in until it locks in place.
DETACH BATTERY PACK
2
Slide BATT. RELEASE and pull out the battery pack.
BATT. PACK
APPROXIMATE RECORDING TIME
GR-AX460/AX260
BN-V12U
1 hr. 5 min. (35 min.)
BN-V22U
2 hrs. 15 min. (1 hr. 25 min.)
BN-V25U
3 hrs. (1 hr. 50 min.)
( ) : when the video light is on (GR-AX460 only).