Juniper Networks EX8208 User Manual
Page 245
Ensure that you have the following parts and tools available to remove a line card from
an EX8200 switch chassis:
•
ESD grounding strap
•
Phillips (+) screwdriver, number 2
•
An antistatic bag or an antistatic mat
•
Replacement line card or a cover panel and its captive screws to cover the empty slot
To remove a line card from an EX8200 switch:
1.
Place the antistatic bag or antistatic mat on a flat, stable surface.
2.
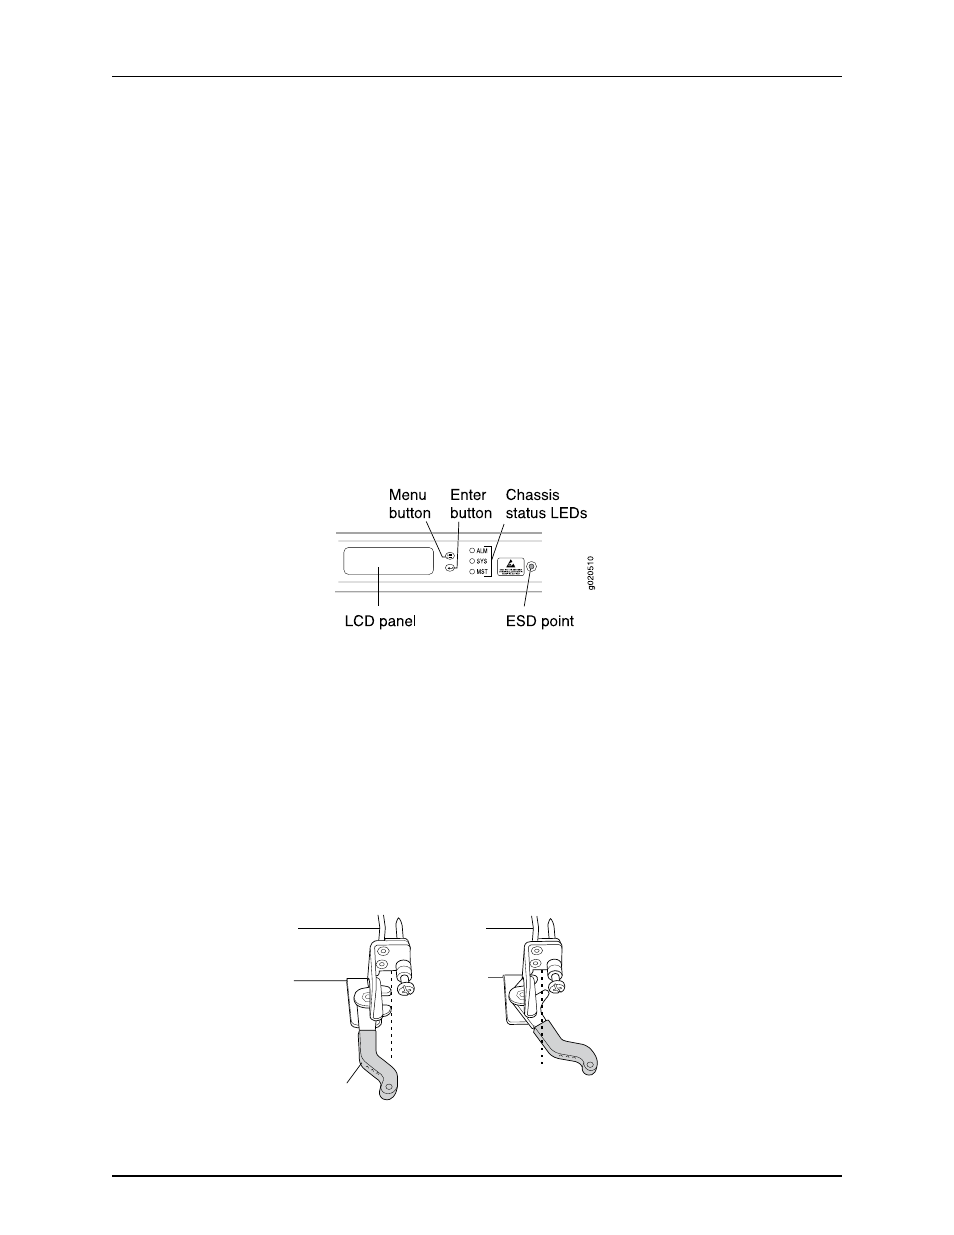
Attach the ESD grounding strap to your bare wrist and connect the strap to the ESD
point on the switch chassis (see Figure 87 on page 219). The ESD point is at the same
location on EX8208 and EX8216 switches.
Figure 87: Location of the ESD Point on an EX8200 Switch Chassis
3.
Label the cables connected to each port on the line card so you can reconnect the
cables to the correct ports.
4.
Take the line card offline by issuing the following CLI command:
user@switch> request chassis fpc slot slot-number offline
5.
Remove the captive screws on the faceplate of the line card by using the screwdriver.
6.
Grasp the ejector levers on the faceplate of the line card and pull them outward
simultaneously until they are in the open position and the line card is fully unseated.
The closed and the open positions of the shorter ejector levers are not as markedly
distinguishable as those of the longer ones (see Figure 88 on page 219).
Figure 88: Closed and Open Positions of the 2-in. Ejector Lever
Open
Ejector lever
Line card
Closed
g020907
219
Copyright © 2010, Juniper Networks, Inc.
Chapter 13: Removing Switch Components