Menu screens, Remote menu screens, Remote menu screens (continued) – JVC BR-DV6000U User Manual
Page 46
75
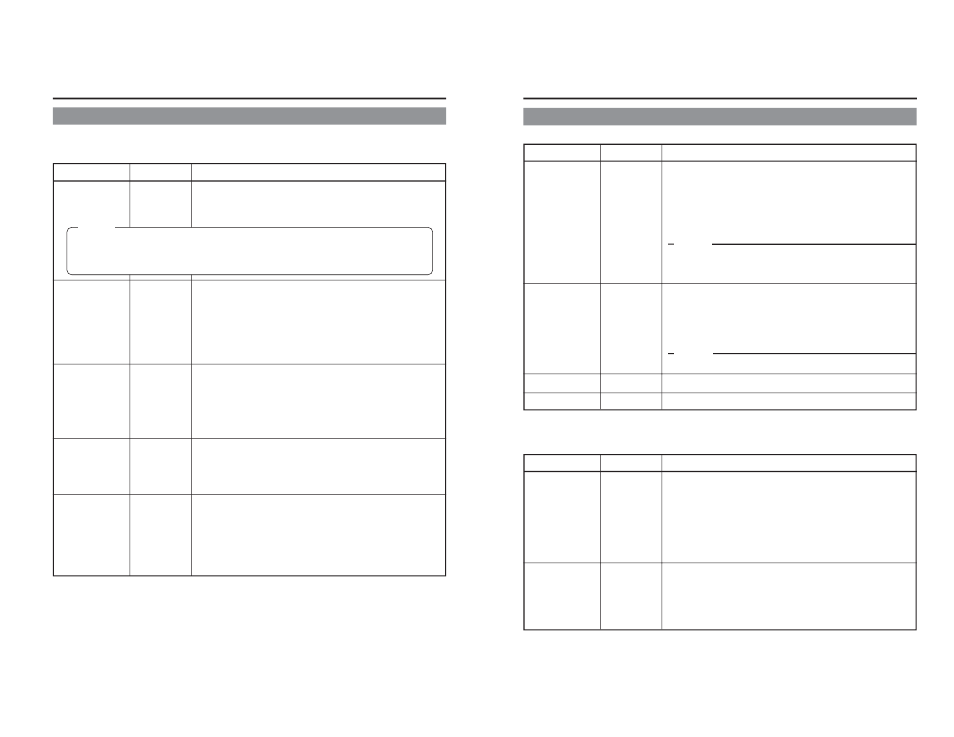
REMOTE Menu screens
The REMOTE Menu consists of the following two screens (1/2 and 2/2).
Item
Setting
Description
REMOTE SEL
9P
REMOTE SEL
SER
REMOTE SEL
DV
REMOTE SEL
JVC
REMOTE SEL
NET
OFF
ⅷ ON
OFF
ⅷ ON
LOC+REM
OFF
ⅷ ON
LOC+REM
OFF
ⅷ ON
OFF
ⅷ ON
LOC+REM
For enabling/disabling the REMOTE1 (9-PIN) terminal when the
REMOTE/LOCAL switch on the front panel is set to REMOTE.
OFF
: Control through RS-422A disabled
ON
: Control through RS-422A enabled
For enabling/disabling control via the SERIAL REMOTE IN ter-
minal.
OFF
: Control disabled regardless of the settings of the
REMOTE/LOCAL switch
ON
: Control enabled only when the REMOTE/
LOCAL switch is set to REMOTE.
LOC+REM
: Control enabled regardless of the settings of the
REMOTE/LOCAL switch.
For enabling/disabling control via the DV terminal.
OFF
: Control disabled regardless of the settings of the
REMOTE/LOCAL switch.
ON
: Control enabled only when the REMOTE/
LOCAL switch is set to REMOTE.
LOC+REM
: Control enabled regardless of the settings of the
REMOTE/LOCAL switch.
For enabling/disabling the REMOTE 2 (12-PIN) terminal when
the [REMOTE/LOCAL] switch on the front panel is set to RE-
MOTE.
OFF
: Control through the JVC bus disabled
ON
: Control through the JVC bus enabled
For enabling/disabling control via the network board SA-DV6000
(sold separately).
OFF
: Control disabled regardless of the settings of the
REMOTE/LOCAL switch.
ON
: Control enabled only when the REMOTE/
LOCAL switch is set to REMOTE.
LOC+REM
: Control enabled regardless of the settings of the
REMOTE/LOCAL switch.
Ⅵ REMOTE (1/2) Menu screen
Memo
When the RS-232C board SA-K46U (sold separately) is installed, the name of this item changes
to REMOTE SEL 232.
Use this setting to enable/disable the control via RS-232C when the REMOTE/LOCAL switch
on the front panel is set to REMOTE.
76
REMOTE Menu screens (continued)
Ⅵ REMOTE (1/2) Menu screen (continued)
Item
Setting
Description
LOCAL
FUNCTION
PREROLL
NEXT PAGE
PAGE BACK
NO KEY
EJECT
ⅷ STP + EJT
ALL KEYS
3SEC
5SEC
ⅷ 7SEC
10SEC
For selecting the buttons of BR-DV6000 to be enabled in remote-
controlling it with the REMOTE (1/2) terminals or the SERIAL
REMOTE terminal:
NO KEY
: No button enabled.
EJECT
: Only the EJECT button enabled.
STP + EJT
: Only the STOP button and the EJECT button are
enabled.
ALL KEYS
: All operation buttons are enabled.
Memo
If OPERATION LOCK in the SYSTEM (2/2) Menu screen is set
to ON, the buttons on BR-DV6000 will be disabled regardless of
the setting here.
For setting the preroll time of BR-DV6000 in remote-controlling it
with the REMOTE 1 terminal. Setting done with the editing re-
mote controller prevails over other settings:
3SEC
: 3 seconds
5SEC
: 5 seconds
7SEC
: 7 seconds
10SEC : 10 seconds
Memo
To enhance editing precision, please set it to at least 7 seconds.
For displaying the REMOTE (2/2) Menu screen.
For returning to the TOP MENU screen.
Item
Setting
Description
REM FF/REW
MODE
REM STOP SEL
ⅷ FF/REW
SEARCH
ⅷ EE
PB
For setting the action to be performed when the 9-PIN REMOTE
terminal, 12-PIN REMOTE terminal, RS-232C terminal or DV
terminal received an FF/REW command:
FF/REW
: Sets BR-DV6000 to perform FF/REW when an
FF/REW command is received. Normal setting.
SEARCH
: Sets BR-DV6000 to perform searching when an
FF/REW command is received. Use this setting
if the search (cue up) function does not work prop-
erly.
For setting the action to be performed when the 9 PIN REMOTE
terminal or DV terminal received a STANDBY ON command:
EE
: Sets BR-DV6000 to the EE mode.
(It goes into the STOP mode.)
PB
: Sets BR-DV6000t to the PLAY mode.
(It goes into the STILL mode.)
Ⅵ REMOTE (2/2) Menu screen
MENU SCREENS
– Description of the Menu screens – (continued)