3 radio re-assembly - detailed, Figure 7-10, 2 microphone and speaker re-assembly – Motorola PR400 User Manual
Page 77
6881096C24-A
July, 2004
Limited Keypad Model Disassembly and Re-assembly: Disassembling and Re-assembling the Radio — General 7-9
7.4.3
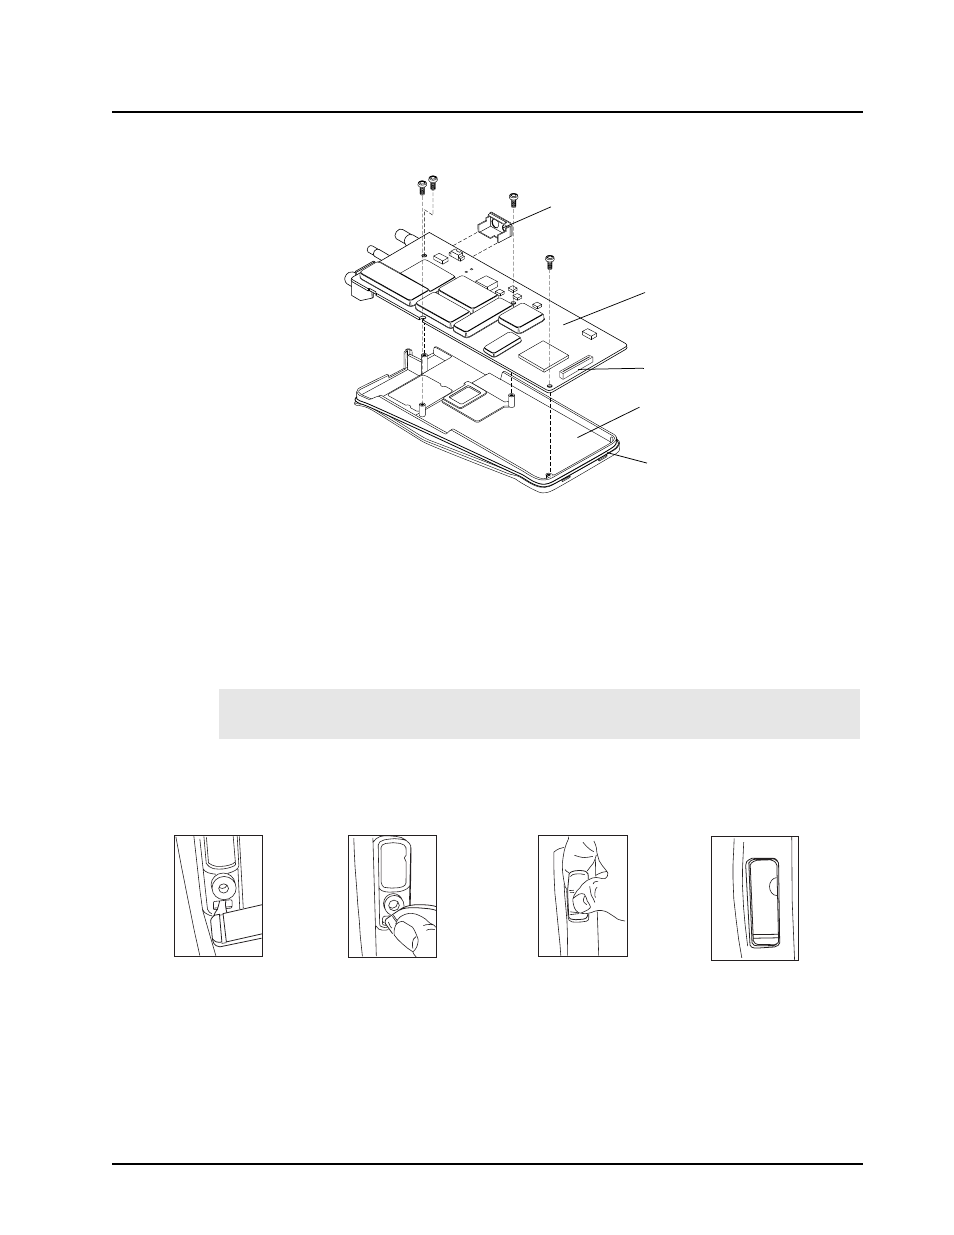
Radio Re-assembly - Detailed
7.4.3.1 Dust Cover Re-assembly
1.
Insert the tail of the dust cap into the bottom hole of the audio jacks housing opening (
2.
Press the dust cap until the tail is fully into the hole.
3.
Twist the dust cap counter-clockwise until the cap is seated properly onto the recess.
4.
Press the cap again to ensure it fully covers the opening for the audio jack.
7.4.3.2 Microphone and Speaker Re-assembly
1.
Check that the mic and speaker felts are in position and not damaged. If damaged replace felts.
2.
Insert the microphone sub-assembly into the microphone boot.
Figure 7-10. Removal of Main Board from Chassis
Note:
Make sure the dust cap is placed between the keypad retainer mounting post and the side
wall of the radio.
Figure 7-11. Dust Cap Re-assembly
Main Board
Radio Chassis
Audio Jack Shroud
Flex Cable Connector
O-Ring
1
2
3
4