Service, Power cartridge replacement – Graco Inc. 218-745 User Manual
Page 22
22
307-712
SERVICE
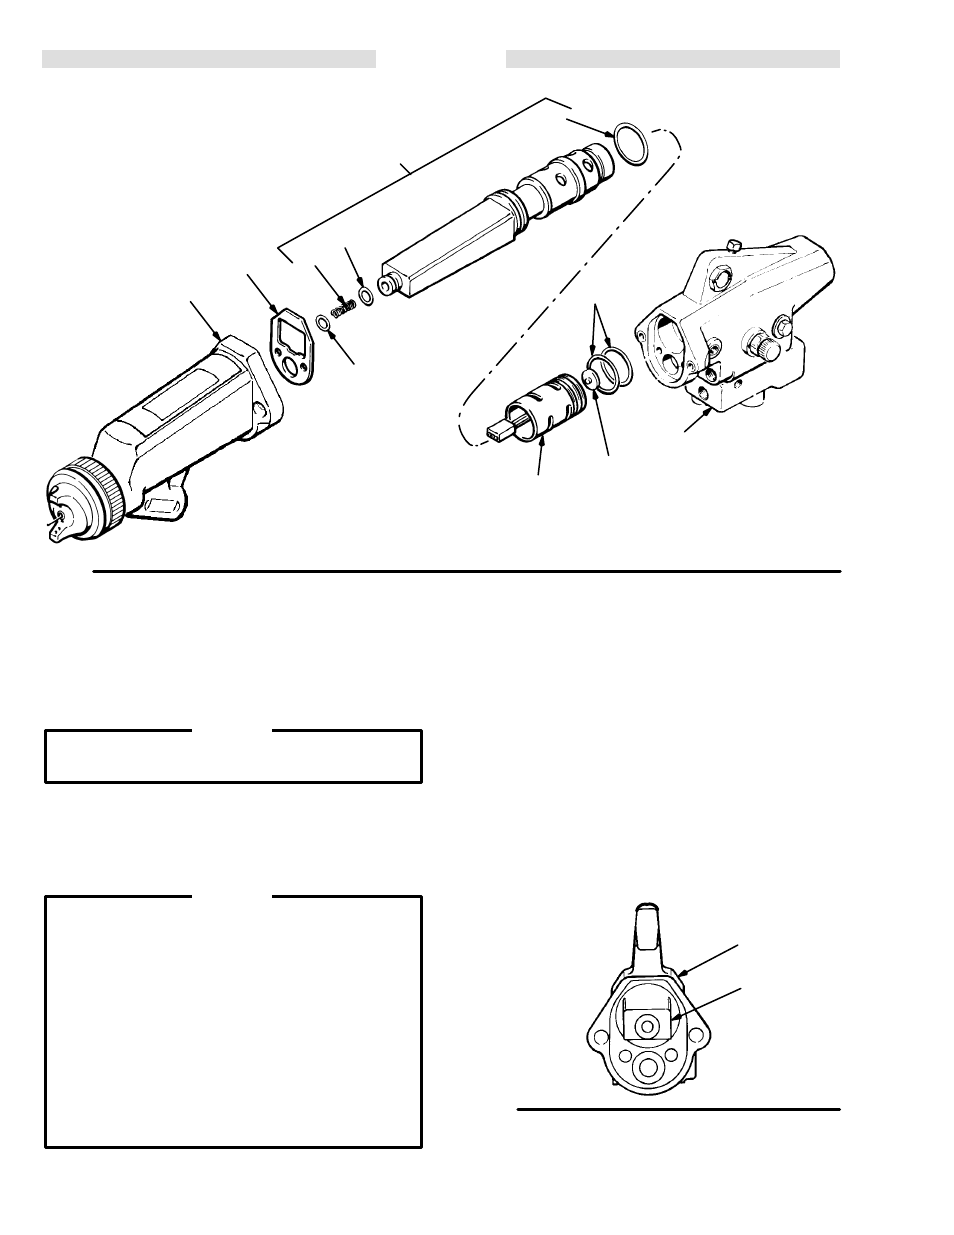
Fig 17
KEY
1
Gun Body
2a
Alternator
2b
O-Ring
2c
Plug
5
Power Supply
5a
O-Ring
5b
O-Ring
5c
Spring
6
Gasket
20
Barrel
20
6
1
NOTE: The power cartridge (2)
includes items 2a, 2b,
2c, and 5.
5c
5b
5a
2a
2c
2b
5
20b
See NOTE after
step 3, below.
Power Cartridge Replacement
1. Remove the barrel as described under Barrel
Removal.
2. Remove the gasket (6) from the gun body (1). See
Fig 17.
CAUTION
The power cartridge is fragile. Be careful when
handling it to avoid damage.
3. Grasp the power cartridge with your hand. With a
gentle side to side motion, pull it free from the gun
body (1). Then pull the power cartridge straight out
of the body.
CAUTION
DO NOT use solvents to clean the power carĆ
tridge cavity in the gun body (1). Solvent will damĆ
age electrical components contained in the
power cartridge.
Inspect the power cartridge cavity in the gun
body for dirt or moisture. Clean out the cavity with
a clean, dry rag if necessary.
Lightly lubricate the o-rings (2b, 5a, 5b) on the
new power cartridge with petroleum jelly. All the
o-rings and the compression spring (5c) must
be in place or the gun will malfunction.
NOTE: The cushion (20b) is part of the gun barrel and
should never need to be removed. If it is
removed, push the cushion in, adhesive side toĆ
ward the barrel, with a rod until it is securely adĆ
hered in the barrel. DO NOT use the power supĆ
ply (5) to press the cushion into the barrel as it
will not adhere properly.
4. Insert the new power cartridge in the gun body (1).
NOTE: See Fig 18 for proper alignment of the power
cartridge (2) in the gun body (1).
5. Install the gasket (6) in the gun body (1).
6. Install the barrel on the gun body as described
under Barrel Removal.
Fig 18
KEY
1
Gun Body
2
Power Cartridge
1
2