Grizzly H8192 User Manual
Page 18
-16-
Model h8192 (Mfg. Since 8/07)
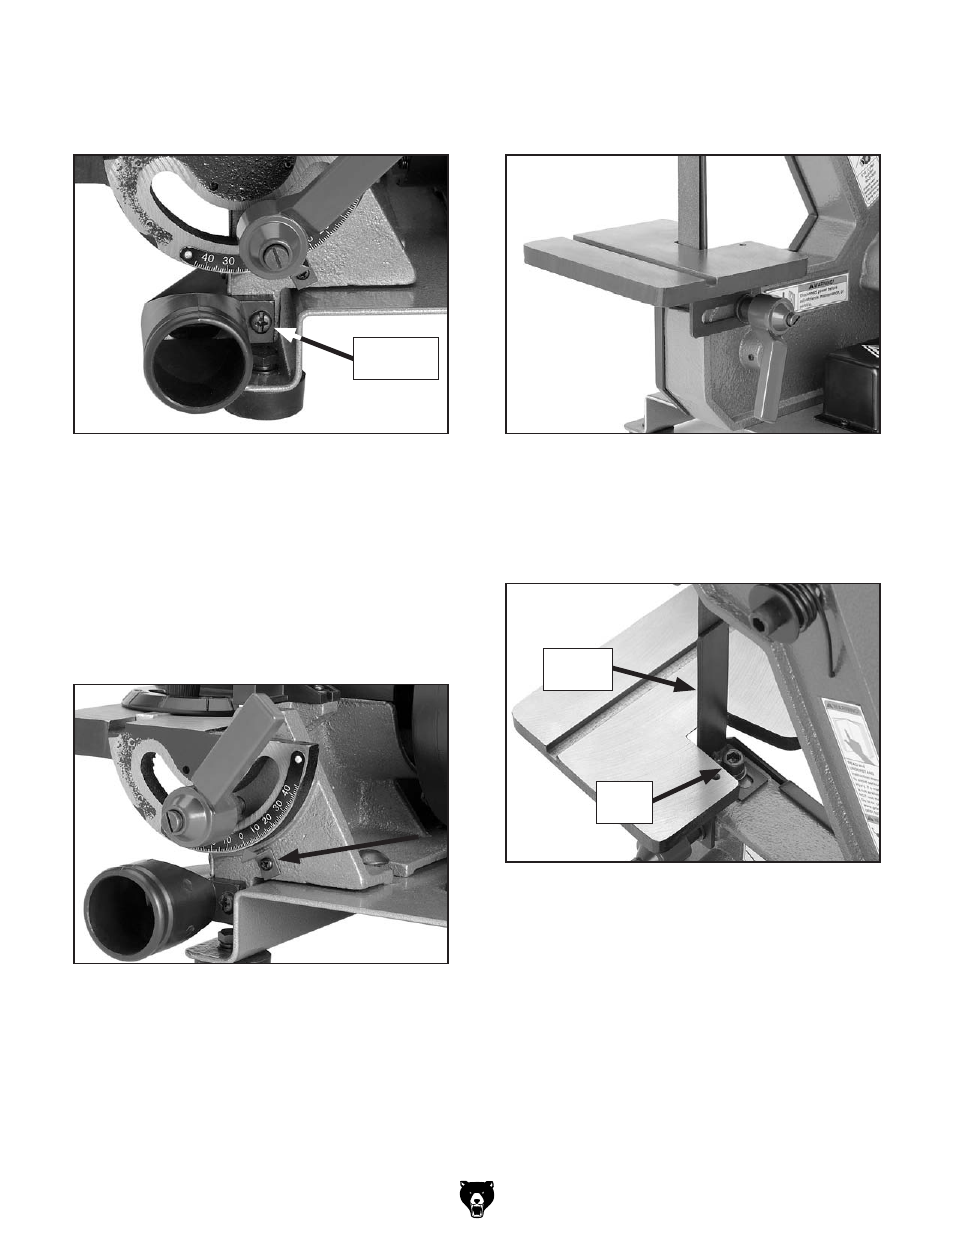
16. Secure the dust port, as shown in figure 17,
with the M6-1 x 15 phillips head screw and
flatwasher.
Note: Make sure the dust port covers the
entire opening in the dust cover.
17. Square the disc table to the sanding disc
(refer to
Squaring Disc Table on page 25).
18. Using the M4-.7 x 10 phillips head screw,
align the red scale pointer with the "0" mark
on the table angle scale (see
figure 18).
19. install the belt table with a
1
⁄
16
" clearance from
the sanding belt, and secure it in place with
the table lock handle (see
figure 19).
20. loosen the cap screw shown in figure 20,
adjust the belt support approximately
1
⁄
16
"
away from the sanding belt, then re-tighten
the cap screw.
figure 18. Sanding disc table angle scale
pointer installed.
figure 19. Sanding belt table installed.
figure 20. Sanding belt support.
Cap
Screw
Belt
Support
figure 17. disc dust port installed.
Mounting
Screw
- G0574 (32 pages)
- H7760 (32 pages)
- H2881 (1 page)
- 9962ZX (80 pages)
- G0565 (32 pages)
- G0473 (24 pages)
- 6" random orbital sander H8120 (4 pages)
- G1276 (34 pages)
- G1071 (40 pages)
- Pneumatic Sanding Drum G1970 (1 page)
- G9983 (60 pages)
- Air Belt H0596 (4 pages)
- G1079 (54 pages)
- G1066 (54 pages)
- G9907 (10 pages)
- G0512 (44 pages)
- G1014Z (27 pages)
- G1600 (1 page)
- H7672 (20 pages)
- 7" Angle Sander H0592 (2 pages)
- G0547 (35 pages)
- G0489 (28 pages)
- G0459P (56 pages)
- G0563 (52 pages)
- 12" Drum Sander G0459 (56 pages)
- G1971 (1 page)
- G0486/G0487 (76 pages)
- Drum H2882 (1 page)
- 7" Angle Polisher H0593 (2 pages)
- G0679 (11 pages)
- H3140 (32 pages)
- G3105 (26 pages)
- G0458 (48 pages)
- H8215 (8 pages)
- G9984 (44 pages)
- G0445 (80 pages)
- G1066Z (54 pages)
- G5049Z (26 pages)
- G9910 (10 pages)
- G8749 (24 pages)
- G1870 (2 pages)
- G0571 (3 pages)
- G0475 (20 pages)
- Oscilatign Spindle GO739 (32 pages)