Installation instructions, Installation, Stud work installation – Stovax PR0919 User Manual
Page 15
15
INSTALLATION INSTRUCTIONS
INSTALLATION
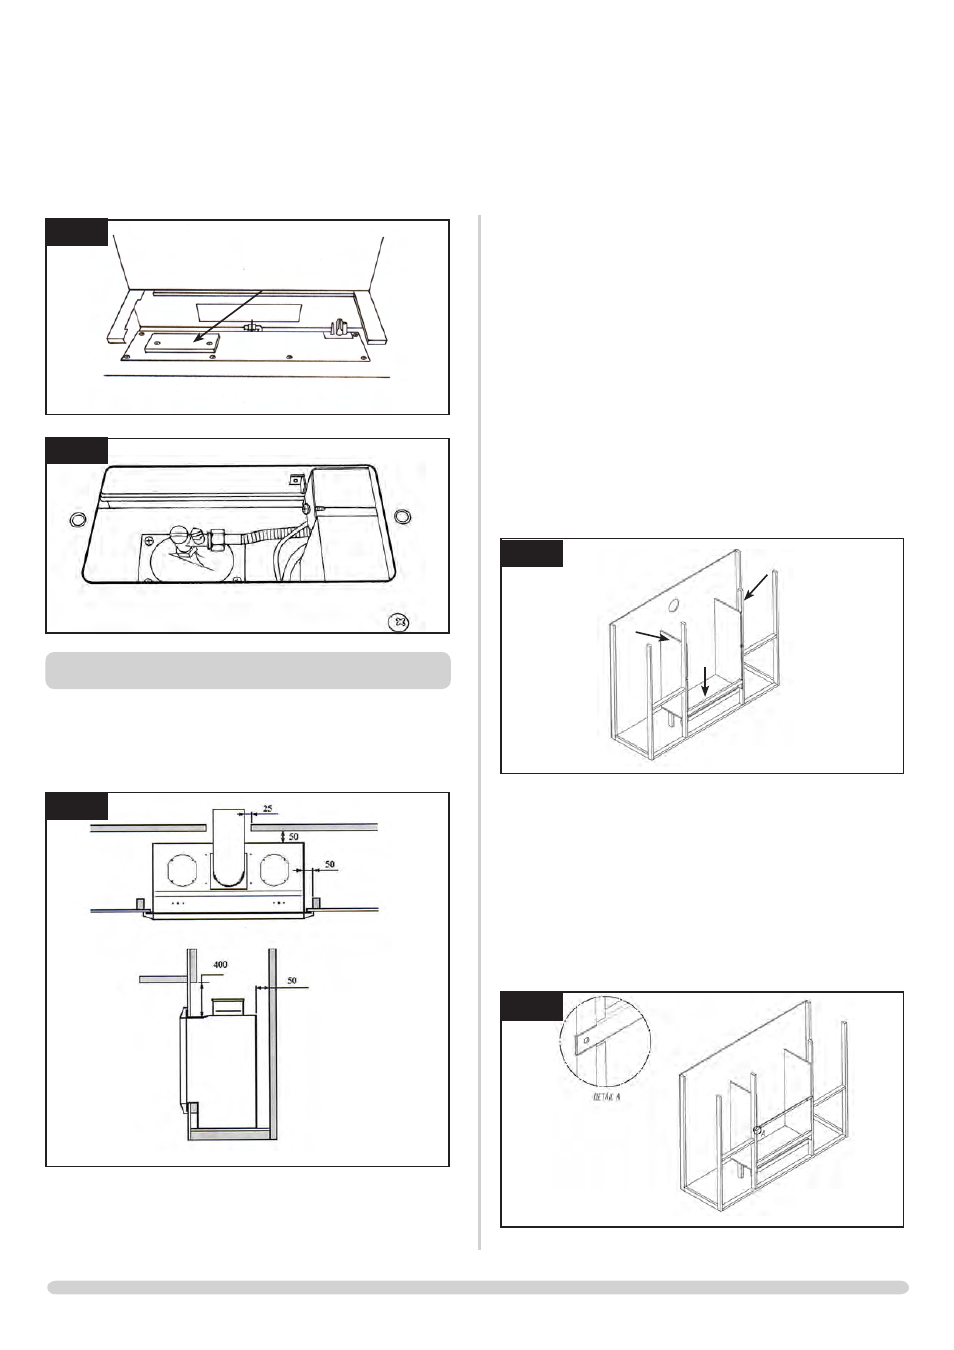
2
AR1869
access panel
2
AR1888
3. STUD WORk INSTALLATION
3.1 Combustible parts of the stud work must be kept beyond
the minimum dimensions shown in Diagram 4. Even if the
framework is protected by non-combustible material, you
must maintain these dimensions, Diagram 4
4
AR1884
3.1.1 Do not pack the void around or above the appliance with
insulation materials such as mineral wool.
3.1.2 T
hE
vOid
builT
fOr
ThE
cassETTE
musT
bE
vENTilaTEd
TO
prEvENT
a
build
-
up
Of
hEaT
. i
f
ThE
vOid
is
sEalEd
,
ThEN
yOu
musT
fiT
vENTs
aT
bOTh
lOW
aNd
high
lEvEls
Of
apprOximaTEly
50
cm
2
Each
. T
hEsE
vENTs
musT
TakE
cOld
air
frOm
ThE
rOOm
aNd
rETurN
Warm
air
back
iNTO
ThE
rOOm
.
3.1.3 a
N
accEss
haTch
musT
bE
lEfT
iN
ThE
sidE
Of
ThE
chimNEy
brEasT
fOr
fuTurE
sErviciNg
aNd
iNspEcTiON
Of
ThE
fluE
aNd
appliaNcE
.
3.2 STUD WORk INSTALLATION METHOD 1 (FRAME)
Build the stud work chimney breast and enclosures to the
desired size to include the protected platform at the
required height.
• Line the aperture for the appliance with 12mm thick
non-combustible material as shown, Diagram 5
5
AR1902
• Ensure the clearances are maintained, see Diagram 4
• Site the appliance and decide on flue requirements
• Cut a hole for the flue exit - see Installation Instructions,
Section 4
• Provide gas and electric services into the cassette void on
the left-hand side
• Mark out the position to fit the supplied top support bar
into the stud work at the correct height. This bar needs to
be recessed into the stud work, Diagram 6
6
AR1903