Resawing, Notice, Cutting curves – Grizzly G0636X User Manual
Page 35
G0636X 17" Ultimate Bandsaw
-33-
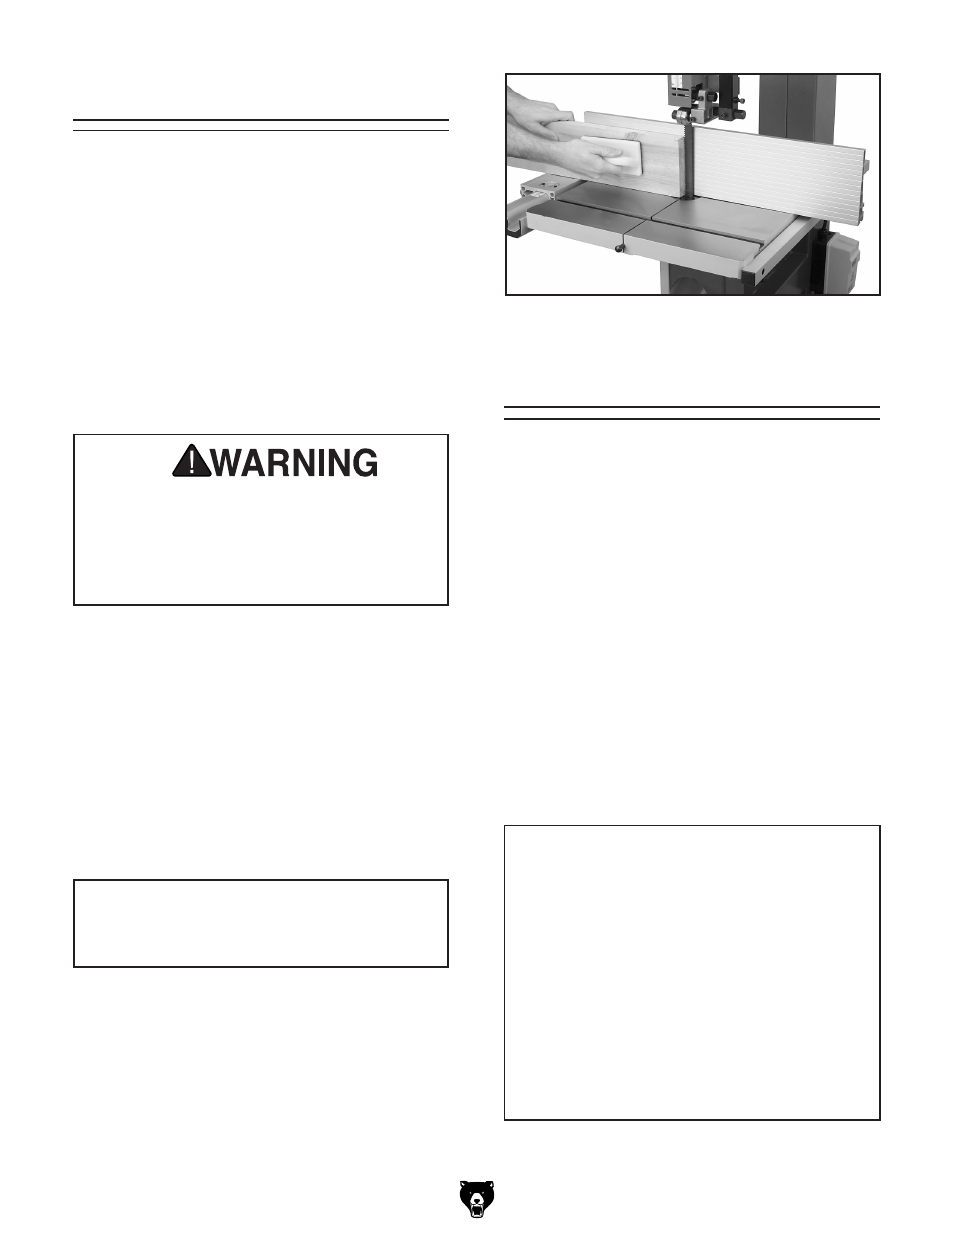
Resawing (
Figure 45) is the process of cutting a
board into two or more thinner boards. The maxi-
mum board width that can be resawn is limited by
the maximum cutting height of the bandsaw.
One of the most important considerations when
resawing is blade selection. Generally, wider
blades are better. In most applications, a hook or
a skip tooth style will be desirable. Choose blades
with fewer teeth-per-inch (from 3 to 6), because
they offer larger gullet capacities for clearing saw-
dust, reducing heat buildup and reducing strain
on the motor.
Resawing
When resawing thin pieces, a wandering
blade (blade lead) can tear through the sur-
face of the workpiece, exposing your hands
to the blade teeth. Always use push blocks
when resawing and keep your hands clear
of the blade.
To resaw a workpiece:
1. Verify that the bandsaw is setup properly and
that the fence is parallel to the blade.
2. Adjust the upper blade guide so it is about 1"
above the workpiece with a minimum amount
of blade exposed.
3. Install the resaw fence, set it to the desired
width of cut, and lock it in place.
4. Support the ends of the board if necessary.
5. Turn the bandsaw ON.
6. Using push paddles and a push stick, keep
pressure against the fence and table, and
slowly feed the workpiece into the moving
blade until the blade is completely through
the workpiece (see
Figure 45).
NOTICE
The scale on the front rail will NOT be accu-
rate when using the resaw fence.
Figure 45. Example of resawing lumber.
Cutting Curves
When cutting curves, simultaneously feed and
turn the stock carefully so that the blade follows
the layout line without twisting. If a curve is so
abrupt that it is necessary to repeatedly back up
and cut a new kerf, use either a narrower blade
or a blade with more TPI (teeth per inch), or make
more relief cuts.
Always make short cuts first, then proceed to
the longer cuts. Relief cuts will also reduce the
chance that the blade will be pinched or twisted.
Relief cuts are cuts made through the waste
portion of the workpiece and are stopped at the
layout line. As you cut along the layout line, waste
wood is released from the workpiece, alleviating
any pressure on the back of the blade. Relief cuts
also make backing the workpiece out easier, if
needed.
NOTICE
The list below displays blade widths and
the corresponding minimum radii for those
blade widths.
Width
Radius
1
⁄
8
" ....................................
1
⁄
8
"
3
⁄
16
" ...................................
3
⁄
8
"
1
⁄
4
'' ....................................
5
⁄
8
''
3
⁄
8
'' .................................... 1
1
⁄
4
''
1
⁄
2
'' .................................... 2
1
⁄
2
''
5
⁄
8
'' .................................... 3
3
⁄
4
''
3
⁄
4
'' .................................... 5
1
⁄
2
''